Spiderfoot est un outil de test de vulnérabilité gratuit et open source qui vous aide à réduire les attaques des pirates. Il est utilisé pour analyser les vulnérabilités et les fonctions malveillantes sur les serveurs Linux. Il s'agit d'un outil logiciel multiplateforme qui prend en charge les machines Linux et Windows et peut être collaboré avec GitHub. Il est écrit en Python et utilise SQLite comme backend de base de données. Il fournit une interface Web pour effectuer des tests d'intrusion pour plusieurs cibles simultanément via un navigateur Web.
Dans ce tutoriel, nous allons vous montrer comment installer Spiderfoot sur le serveur Ubuntu 20.04.
Prérequis
- Un serveur exécutant Ubuntu 20.04.
- Un mot de passe root est configuré sur le serveur.
Mise en route
Avant de commencer, il est recommandé de mettre à jour votre cache de packages avec la dernière version. Vous pouvez le mettre à jour avec la commande suivante :
apt-get update -y
Une fois que tout le package est à jour, installez les autres packages requis avec la commande suivante :
apt-get install python3 python3-pip -y
Une fois tous les packages installés, vous pouvez passer à l'étape suivante.
Installer Spiderfoot
Tout d'abord, vous devrez télécharger la dernière version de Spiderfoot à partir du référentiel Git. Vous pouvez le télécharger avec la commande suivante :
wget https://github.com/smicallef/spiderfoot/archive/v3.3.tar.gz
Une fois le téléchargement terminé, extrayez le fichier téléchargé avec la commande suivante :
tar -xvzf v3.3.tar.gz
Ensuite, remplacez le répertoire par le répertoire extrait et installez toutes les dépendances Python à l'aide de la commande suivante :
cd spiderfoot-3.3
pip3 install -r requirements.txt
Une fois installé, vous pouvez lister toutes les options disponibles avec SpiderFoot en utilisant la commande suivante :
python3 sf.py --help
Vous devriez obtenir le résultat suivant :
usage: sf.py [-h] [-d] [-l IP:port] [-m mod1,mod2,...] [-M] [-s TARGET] [-t type1,type2,...] [-T] [-o tab|csv|json] [-H] [-n] [-r]
             [-S LENGTH] [-D DELIMITER] [-f] [-F type1,type2,...] [-x] [-q]

SpiderFoot 3.3: Open Source Intelligence Automation.

optional arguments:
  -h, --help          show this help message and exit
  -d, --debug         Enable debug output.
  -l IP:port          IP and port to listen on.
  -m mod1,mod2,...    Modules to enable.
  -M, --modules       List available modules.
  -s TARGET           Target for the scan.
  -t type1,type2,...  Event types to collect (modules selected automatically).
  -T, --types         List available event types.
  -o tab|csv|json     Output format. Tab is default. If using json, -q is enforced.
  -H                  Don't print field headers, just data.
  -n                  Strip newlines from data.
  -r                  Include the source data field in tab/csv output.
  -S LENGTH           Maximum data length to display. By default, all data is shown.
  -D DELIMITER        Delimiter to use for CSV output. Default is ,.
  -f                  Filter out other event types that weren't requested with -t.
  -F type1,type2,...  Show only a set of event types, comma-separated.
  -x                  STRICT MODE. Will only enable modules that can directly consume your target, and if -t was specified only those events
                      will be consumed by modules. This overrides -t and -m options.
  -q                  Disable logging. This will also hide errors!
Exécuter SpiderFoot en mode interface Web
À ce stade, SpiderFoot est installé sur votre serveur. Maintenant, vous devrez démarrer SpiderFoot en mode interface utilisateur Web pour y accéder via un navigateur Web.
Vous pouvez l'exécuter avec la commande suivante :
python3 sf.py -l your-server-ip:5001
Vous devriez obtenir le résultat suivant :
2021-03-01 11:16:53,927 [INFO] Starting web server at 45.58.43.9:5001 ...
2021-03-01 11:16:53,937 [WARNING]
********************************************************************
Warning: passwd file contains no passwords. Authentication disabled.
Please consider adding authentication to protect this instance!
Refer to https://www.spiderfoot.net/documentation/#security.
********************************************************************


*************************************************************
 Use SpiderFoot by starting your web browser of choice and
 browse to http://45.58.43.9:5001/
*************************************************************

2021-03-01 11:16:53,996 [INFO] [01/Mar/2021:11:16:53] ENGINE Listening for SIGTERM.
2021-03-01 11:16:53,996 [INFO] [01/Mar/2021:11:16:53] ENGINE Listening for SIGHUP.
2021-03-01 11:16:53,996 [INFO] [01/Mar/2021:11:16:53] ENGINE Listening for SIGUSR1.
2021-03-01 11:16:53,996 [INFO] [01/Mar/2021:11:16:53] ENGINE Bus STARTING
2021-03-01 11:16:54,099 [INFO] [01/Mar/2021:11:16:54] ENGINE Serving on http://45.58.43.9:5001
2021-03-01 11:16:54,100 [INFO] [01/Mar/2021:11:16:54] ENGINE Bus STARTED
Comme vous pouvez le voir, SpiderFoot est démarré et écoute sur le port 5001. Appuyez sur CTRL+C pour arrêter le SpiderFoot.
Configurer l'authentification SpiderFoot
Par défaut, SpiderFoot est accessible sans aucune authentification. Il est donc recommandé d'activer l'authentification de base.
Pour ce faire, changez le répertoire en SpiderFoot avec la commande suivante :
cd spiderfoot-3.3
Ensuite, ajoutez votre nom d'utilisateur et votre mot de passe dans le fichier passwd avec la commande suivante :
echo "admin:yourpassword" > passwd
Maintenant, redémarrez le SpiderFoot en mode Web UI avec la commande suivante :
python3 sf.py -l your-server-ip:5001
Vous devriez obtenir le résultat suivant :
2021-03-01 11:17:56,108 [INFO] Starting web server at 45.58.43.9:5001 ...
2021-03-01 11:17:56,118 [INFO] Enabling authentication based on supplied passwd file.

*************************************************************
 Use SpiderFoot by starting your web browser of choice and
 browse to http://45.58.43.9:5001/
*************************************************************

2021-03-01 11:17:56,138 [INFO] [01/Mar/2021:11:17:56] ENGINE Listening for SIGTERM.
2021-03-01 11:17:56,138 [INFO] [01/Mar/2021:11:17:56] ENGINE Listening for SIGHUP.
2021-03-01 11:17:56,138 [INFO] [01/Mar/2021:11:17:56] ENGINE Listening for SIGUSR1.
2021-03-01 11:17:56,138 [INFO] [01/Mar/2021:11:17:56] ENGINE Bus STARTING
2021-03-01 11:17:56,240 [INFO] [01/Mar/2021:11:17:56] ENGINE Serving on http://45.58.43.9:5001
2021-03-01 11:17:56,241 [INFO] [01/Mar/2021:11:17:56] ENGINE Bus STARTED
Accéder à SpiderFoot
Maintenant, ouvrez votre navigateur Web et accédez à l'interface Web de SpiderFoot en utilisant l'URL http://your-server-ip:5001 . Vous allez être redirigé vers la page de connexion de SpiderFoot :

Indiquez votre nom d'utilisateur et votre mot de passe d'administrateur, puis cliquez sur Connexion bouton. Une fois connecté, vous devriez voir le tableau de bord SpiderFoot sur la page suivante :

Maintenant, cliquez sur Nouvelle analyse bouton pour créer une nouvelle numérisation. Vous devriez voir la page suivante :
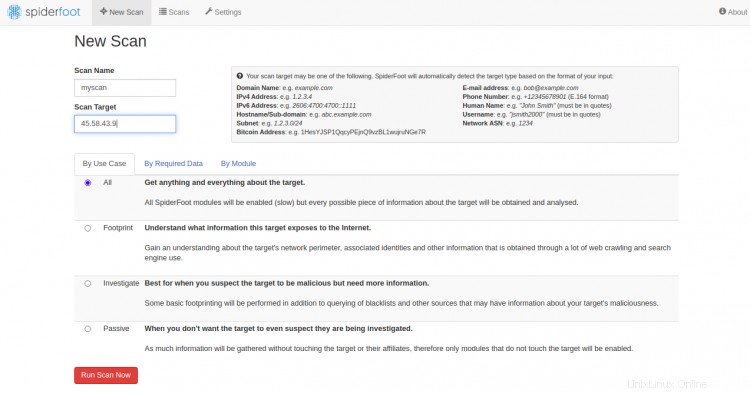
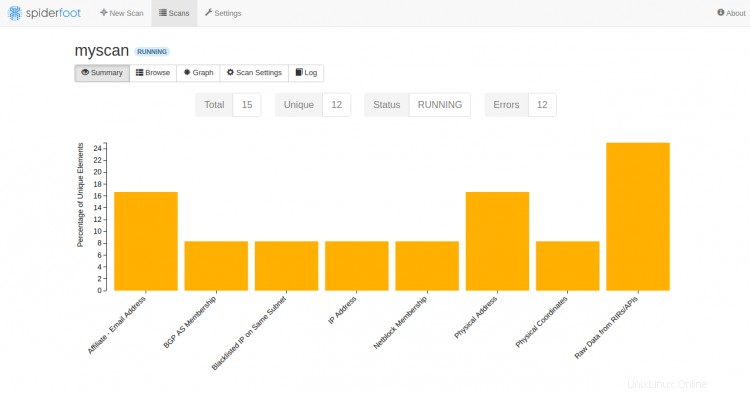
Indiquez l'adresse IP de votre serveur cible et cliquez sur Exécuter l'analyse maintenant . Vous devriez voir la page suivante :
Conclusion
Vous avez installé avec succès SpiderFoot sur le serveur Ubuntu 20.04. Vous pouvez désormais analyser l'ordinateur distant à la recherche de toute vulnérabilité via le tableau de bord SpiderFoot. N'hésitez pas à me demander si vous avez des questions.