Plex est un serveur de streaming multimédia puissant et riche en fonctionnalités qui peut être utilisé pour organiser vos vidéos, musiques et photos, et les diffuser sur des appareils distants depuis n'importe où. Il prend en charge de nombreux systèmes d'exploitation, notamment Linux, Windows, FreeBSD, macOS et bien d'autres. Vous pouvez accéder aux médias stockés sur le serveur Plex à partir d'une smart TV, d'un smartphone et d'un boîtier de streaming à l'aide du client multimédia Plex.
Plex possède de nombreuses fonctionnalités, dont certaines sont répertoriées ci-dessous :
- Télévision en direct et DVR.
- Synchronisation mobile.
- Synchronisation Cloud.
- Fonctionnalités musicales Premium.
- Bibliothèques de photos Premium.
- Diffusion accélérée par le matériel.
- Contrôle parental.
- Téléchargement de la caméra.
- Limites de bande passante et de transcodage
Dans ce tutoriel, nous expliquerons comment installer le serveur multimédia Plex avec Nginx en tant que proxy inverse sur le serveur Ubuntu 20.04.
Prérequis
- Un serveur exécutant Ubuntu 20.04.
- Un mot de passe racine est configuré.
Mise en route
Tout d'abord, vous devrez mettre à jour vos packages système vers la dernière version. Vous pouvez les mettre à jour avec la commande suivante :
apt-get update -y
Une fois vos packages mis à jour, vous pouvez passer à l'étape suivante.
Installer Plex Media Server
Tout d'abord, vous devrez télécharger la dernière version du serveur multimédia Plex à partir du site Web officiel de Plex. Vous pouvez le télécharger avec la commande suivante :
wget https://downloads.plex.tv/plex-media-server-new/1.20.1.3252-a78fef9a9/debian/plexmediaserver_1.20.1.3252-a78fef9a9_amd64.deb
Une fois le package du serveur multimédia Plex téléchargé, vous pouvez l'installer à l'aide de la commande suivante :
dpkg -i plexmediaserver_1.20.1.3252-a78fef9a9_amd64.deb
Une fois le serveur multimédia Plex installé, démarrez le service Plex et autorisez-le à démarrer au redémarrage du système avec la commande suivante :
systemctl start plexmediaserver
systemctl enable plexmediaserver
Ensuite, vous pouvez vérifier l'état du service Plex avec la commande suivante :
systemctl status plexmediaserver
Vous devriez voir le résultat suivant :
? plexmediaserver.service - Plex Media Server
     Loaded: loaded (/lib/systemd/system/plexmediaserver.service; enabled; vendor preset: enabled)
     Active: active (running) since Sat 2020-09-05 06:48:06 UTC; 17s ago
    Process: 38369 ExecStartPre=/bin/sh -c /usr/bin/test -d "${PLEX_MEDIA_SERVER_APPLICATION_SUPPORT_DIR}" || /bin/mkdir -p "${PLEX_MEDIA_SERV>
   Main PID: 38371 (Plex Media Serv)
      Tasks: 120 (limit: 2353)
     Memory: 215.0M
     CGroup: /system.slice/plexmediaserver.service
             ??38371 /usr/lib/plexmediaserver/Plex Media Server
             ??38405 Plex Plug-in [com.plexapp.system] /usr/lib/plexmediaserver/Resources/Plug-ins-a78fef9a9/Framework.bundle/Contents/Resourc>
             ??38451 /usr/lib/plexmediaserver/Plex Tuner Service /usr/lib/plexmediaserver/Resources/Tuner/Private /usr/lib/plexmediaserver/Res>
             ??38474 Plex Plug-in [com.plexapp.agents.plexthememusic] /usr/lib/plexmediaserver/Resources/Plug-ins-a78fef9a9/Framework.bundle/C>
             ??38477 Plex Plug-in [com.plexapp.agents.themoviedb] /usr/lib/plexmediaserver/Resources/Plug-ins-a78fef9a9/Framework.bundle/Conte>
             ??38533 Plex Plug-in [org.musicbrainz.agents.music] /usr/lib/plexmediaserver/Resources/Plug-ins-a78fef9a9/Framework.bundle/Conten>
             ??38544 Plex Plug-in [com.plexapp.agents.thetvdb] /usr/lib/plexmediaserver/Resources/Plug-ins-a78fef9a9/Framework.bundle/Contents>
             ??38638 Plex Plug-in [com.plexapp.agents.opensubtitles] /usr/lib/plexmediaserver/Resources/Plug-ins-a78fef9a9/Framework.bundle/Co>
             ??38710 Plex Plug-in [com.plexapp.agents.fanarttv] /usr/lib/plexmediaserver/Resources/Plug-ins-a78fef9a9/Framework.bundle/Content>

Sep 05 06:48:06 ubuntu2004 systemd[1]: Starting Plex Media Server...
Sep 05 06:48:06 ubuntu2004 systemd[1]: Started Plex Media Server.
À ce stade, le serveur multimédia Plex est démarré et écoute sur le port 32400. Vous pouvez le vérifier avec la commande suivante :
ss -lnpt | grep Plex
Vous devriez voir le résultat suivant :
LISTEN    0         128              127.0.0.1:39851            0.0.0.0:*        users:(("Plex Script Hos",pid=38739,fd=4))
LISTEN    0         128              127.0.0.1:46031            0.0.0.0:*        users:(("Plex Script Hos",pid=38779,fd=4))
LISTEN    0         1024             127.0.0.1:32401            0.0.0.0:*        users:(("Plex Media Serv",pid=38371,fd=61))
LISTEN    0         128              127.0.0.1:44661            0.0.0.0:*        users:(("Plex Script Hos",pid=38533,fd=4))
LISTEN    0         128              127.0.0.1:32600            0.0.0.0:*        users:(("Plex Tuner Serv",pid=38451,fd=13))
LISTEN    0         128              127.0.0.1:36637            0.0.0.0:*        users:(("Plex Script Hos",pid=38544,fd=4))
LISTEN    0         128              127.0.0.1:42973            0.0.0.0:*        users:(("Plex Script Hos",pid=38405,fd=10))
LISTEN    0         128              127.0.0.1:38467            0.0.0.0:*        users:(("Plex Script Hos",pid=38824,fd=4))
LISTEN    0         128              127.0.0.1:40035            0.0.0.0:*        users:(("Plex Script Hos",pid=38477,fd=4))
LISTEN    0         1024                     *:32400                  *:*        users:(("Plex Media Serv",pid=38371,fd=60))
Une fois que vous avez terminé, vous pouvez passer à l'étape suivante.
Activer le référentiel Plex Media Server
Par défaut, le référentiel du serveur multimédia Plex est désactivé dans l'APT. Il est donc recommandé de l'activer afin de pouvoir mettre à jour le serveur multimédia Plex à l'aide de la commande APT. Vous pouvez l'activer en éditant le fichier suivant :
nano /etc/apt/sources.list.d/plexmediaserver.list
Décommentez la ligne suivante :
deb https://downloads.plex.tv/repo/deb/ public main
Enregistrez et fermez le fichier puis ajoutez la clé Plex GPG avec la commande suivante :
wget -q https://downloads.plex.tv/plex-keys/PlexSign.key -O - | apt-key add -
Maintenant, mettez à jour le référentiel avec la commande suivante pour appliquer les modifications :
apt-get update -y
Une fois le référentiel mis à jour, vous pouvez passer à l'étape suivante.
Configurer Nginx pour Plex
Ensuite, il est recommandé d'installer et de configurer Nginx en tant que proxy inverse pour Plex. Vous pouvez donc accéder au serveur multimédia Plex en utilisant le port 80.
Tout d'abord, installez le serveur Web Nginx avec la commande suivante :
apt-get install nginx -y
Une fois le serveur Web Nginx installé, créez un nouveau fichier de configuration d'hôte virtuel Nginx avec la commande suivante :
nano /etc/nginx/sites-available/plex.conf
Ajoutez les lignes suivantes :
upstream plex_backend {
        server 127.0.0.1:32400;
        keepalive 32;
}

server {
        listen 80;
        server_name plex.example.com;

        send_timeout 100m; #Some players don't reopen a socket and playback stops totally instead of resuming after an extended pause (e.g. Ch$

       	#Plex has A LOT of javascript, xml and html. This helps a lot, but if it causes playback issues with devices turn it off. (Haven't enc$
        gzip on;
        gzip_vary on;
        gzip_min_length 1000;
        gzip_proxied any;
        gzip_types text/plain text/css text/xml application/xml text/javascript application/x-javascript image/svg+xml;
        gzip_disable "MSIE [1-6]\.";

       	#Nginx default client_max_body_size is 1MB, which breaks Camera Upload feature from the phones.
       	#Increasing the limit fixes the issue. Anyhow, if 4K videos are expected to be uploaded, the size might need to be increased even more
        client_max_body_size 100M;

       	#Forward real ip and host to Plex
        proxy_set_header Host $host;
        proxy_set_header X-Real-IP $remote_addr;
        proxy_set_header X-Forwarded-For $proxy_add_x_forwarded_for;
        proxy_set_header X-Forwarded-Proto $scheme;
        proxy_set_header Sec-WebSocket-Extensions $http_sec_websocket_extensions;
        proxy_set_header Sec-WebSocket-Key $http_sec_websocket_key;
        proxy_set_header Sec-WebSocket-Version $http_sec_websocket_version;
       	#Websockets
        proxy_http_version 1.1;
        proxy_set_header Upgrade $http_upgrade;
        proxy_set_header Connection "Upgrade";

       	#Buffering off send to the client as soon as the data is received from Plex.
        proxy_redirect off;
        proxy_buffering off;

        location / {
                proxy_pass http://plex_backend;
        }
}
Enregistrez et fermez le fichier puis vérifiez le Nginx pour toute erreur de syntaxe avec la commande suivante :
nginx -t
Vous devriez obtenir le résultat suivant :
nginx: the configuration file /etc/nginx/nginx.conf syntax is ok
nginx: configuration file /etc/nginx/nginx.conf test is successful
Ensuite, activez le fichier de configuration de l'hôte virtuel Nginx avec la commande suivante :
ln -s nano /etc/nginx/sites-available/plex.conf /etc/nginx/sites-enabled/
Enfin, redémarrez le service Nginx pour appliquer les modifications de configuration :
systemctl restart nginx
Vous pouvez maintenant vérifier l'état de Nginx avec la commande suivante :
systemctl status nginx
Vous devriez obtenir le résultat suivant :
? nginx.service - A high performance web server and a reverse proxy server
     Loaded: loaded (/lib/systemd/system/nginx.service; enabled; vendor preset: enabled)
     Active: active (running) since Sat 2020-09-05 06:57:20 UTC; 1min 47s ago
       Docs: man:nginx(8)
    Process: 40059 ExecStartPre=/usr/sbin/nginx -t -q -g daemon on; master_process on; (code=exited, status=0/SUCCESS)
    Process: 40070 ExecStart=/usr/sbin/nginx -g daemon on; master_process on; (code=exited, status=0/SUCCESS)
   Main PID: 40072 (nginx)
      Tasks: 3 (limit: 2353)
     Memory: 3.6M
     CGroup: /system.slice/nginx.service
             ??40072 nginx: master process /usr/sbin/nginx -g daemon on; master_process on;
             ??40073 nginx: worker process
             ??40074 nginx: worker process

Sep 05 06:57:20 ubuntu2004 systemd[1]: Starting A high performance web server and a reverse proxy server...
Sep 05 06:57:20 ubuntu2004 systemd[1]: Started A high performance web server and a reverse proxy server.
Une fois que vous avez terminé, vous pouvez passer à l'étape suivante.
Accéder au serveur multimédia Plex
À ce stade, le service multimédia Plex est installé et configuré avec Nginx. Maintenant, ouvrez votre navigateur Web et accédez au serveur multimédia Plex en utilisant l'URL http://plex.example.com. Vous devriez voir la page suivante :
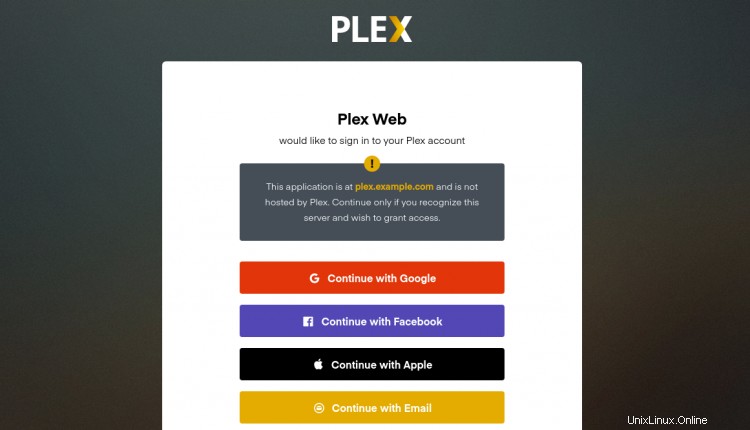
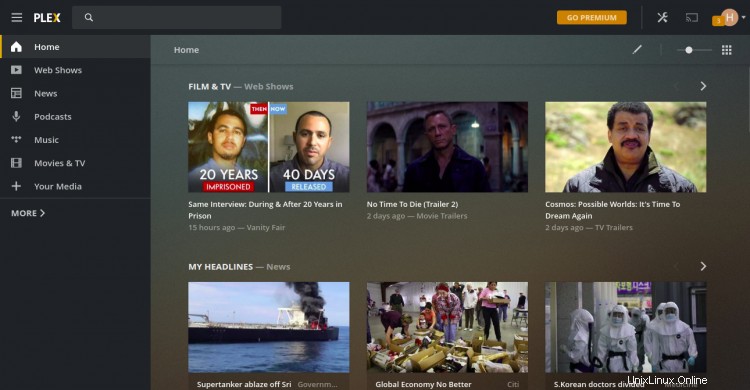
Maintenant, connectez-vous avec votre Google ou Facebook Compte. Vous devriez voir le tableau de bord du serveur multimédia Plex sur la page suivante :
Sécuriser Plex avec Let's Encrypt SSL
Ensuite, il est recommandé de sécuriser Plex avec Let's Encrypt SSL. Tout d'abord, vous devrez installer le client Certbot Let's Encrypt sur votre serveur pour installer et gérer le SSL. Vous pouvez l'installer avec la commande suivante :
apt-get install python3-certbot-nginx -y
Après avoir installé Certbot, exécutez la commande suivante pour installer Let's Encrypt SSL sur votre domaine :
certbot --nginx -d plex.example.com
Il vous sera demandé de fournir une adresse e-mail valide et d'accepter les conditions d'utilisation comme indiqué ci-dessous :
Saving debug log to /var/log/letsencrypt/letsencrypt.log
Plugins selected: Authenticator nginx, Installer nginx
Enter email address (used for urgent renewal and security notices) (Enter 'c' to
cancel): [email protected]

- - - - - - - - - - - - - - - - - - - - - - - - - - - - - - - - - - - - - - - -
Please read the Terms of Service at
https://letsencrypt.org/documents/LE-SA-v1.2-November-15-2017.pdf. You must
agree in order to register with the ACME server at
https://acme-v02.api.letsencrypt.org/directory
- - - - - - - - - - - - - - - - - - - - - - - - - - - - - - - - - - - - - - - -
(A)gree/(C)ancel: A

- - - - - - - - - - - - - - - - - - - - - - - - - - - - - - - - - - - - - - - -
Would you be willing to share your email address with the Electronic Frontier
Foundation, a founding partner of the Let's Encrypt project and the non-profit
organization that develops Certbot? We'd like to send you email about our work
encrypting the web, EFF news, campaigns, and ways to support digital freedom.
- - - - - - - - - - - - - - - - - - - - - - - - - - - - - - - - - - - - - - - -
(Y)es/(N)o: Y
Obtaining a new certificate
Performing the following challenges:
http-01 challenge for plex.example.com
Waiting for verification...
Cleaning up challenges
Deploying Certificate to VirtualHost /etc/nginx/sites-enabled/plex.conf
Ensuite, choisissez de rediriger ou non le trafic HTTP vers HTTPS comme indiqué ci-dessous :
- - - - - - - - - - - - - - - - - - - - - - - - - - - - - - - - - - - - - - - -
1: No redirect - Make no further changes to the webserver configuration.
2: Redirect - Make all requests redirect to secure HTTPS access. Choose this for
new sites, or if you're confident your site works on HTTPS. You can undo this
change by editing your web server's configuration.
- - - - - - - - - - - - - - - - - - - - - - - - - - - - - - - - - - - - - - - -
Select the appropriate number [1-2] then [enter] (press 'c' to cancel): 2
Tapez 2 et appuyez sur Entrée pour terminer l'installation. Vous devriez voir le résultat suivant :
Redirecting all traffic on port 80 to ssl in /etc/nginx/sites-enabled/plex.conf

- - - - - - - - - - - - - - - - - - - - - - - - - - - - - - - - - - - - - - - -
Congratulations! You have successfully enabled https://plex.example.com

You should test your configuration at:
https://www.ssllabs.com/ssltest/analyze.html?d=plex.example.com
- - - - - - - - - - - - - - - - - - - - - - - - - - - - - - - - - - - - - - - -

IMPORTANT NOTES:
 - Congratulations! Your certificate and chain have been saved at:
   /etc/letsencrypt/live/plex.example.com/fullchain.pem
   Your key file has been saved at:
   /etc/letsencrypt/live/plex.example.com/privkey.pem
   Your cert will expire on 2020-10-30. To obtain a new or tweaked
   version of this certificate in the future, simply run certbot again
   with the "certonly" option. To non-interactively renew *all* of
   your certificates, run "certbot renew"
 - Your account credentials have been saved in your Certbot
   configuration directory at /etc/letsencrypt. You should make a
   secure backup of this folder now. This configuration directory will
   also contain certificates and private keys obtained by Certbot so
   making regular backups of this folder is ideal.
 - If you like Certbot, please consider supporting our work by:

   Donating to ISRG / Let's Encrypt:   https://letsencrypt.org/donate
   Donating to EFF:                    https://eff.org/donate-le

 - We were unable to subscribe you the EFF mailing list because your
   e-mail address appears to be invalid. You can try again later by
   visiting https://act.eff.org.
Vous pouvez désormais accéder à votre serveur multimédia Plex en toute sécurité à l'aide de l'URL https://plex.example.com.
Conclusion
Toutes nos félicitations! vous avez installé avec succès le serveur multimédia Plex avec Nginx en tant que proxy inverse sur le serveur Ubuntu 20.04. Vous pouvez maintenant télécharger vos médias, votre musique et vos photos et y accéder depuis le smartphone, la télévision ou d'autres boîtiers de streaming. N'hésitez pas à me demander si vous avez des questions.