Nginx (prononcez "engine x") est un serveur HTTP gratuit, open-source et hautes performances. Nginx est connu pour sa stabilité, son riche ensemble de fonctionnalités, sa configuration simple et sa faible consommation de ressources. Ce didacticiel explique comment installer Nginx sur un serveur CentOS 7 avec prise en charge de PHP (via PHP-FPM) et MySQL (Mariadb).
1 Remarque préliminaire
Dans ce tutoriel, j'utilise le nom d'hôte server1.example.com avec l'adresse IP 192.168.1.105. Ces paramètres peuvent différer pour vous, vous devez donc les remplacer le cas échéant.
2 Activer des dépôts supplémentaires
Nginx n'est pas disponible à partir des référentiels CentOS officiels, nous incluons donc le référentiel du projet Nginx pour l'installer :
vi /etc/yum.repos.d/nginx.repo
 [nginx]
     name=nginx repo
     baseurl=http://nginx.org/packages/centos/$releasever/$basearch/
     gpgcheck=0
     enabled=1
3 Installer MySQL
Nous installons d'abord Mariadb. Mariadb est un fork gratuit de MySQL. Exécutez cette commande sur le shell :
yum install mariadb mariadb-server net-tools
Ensuite, nous créons les liens de démarrage du système pour MySQL (afin que MySQL démarre automatiquement à chaque démarrage du système) et démarrons le serveur MySQL :
systemctl enable mariadb.service
systemctl start mariadb.service
Vérifiez maintenant que la mise en réseau est activée. Exécuter
netstat -tap | grep mysql
Il devrait afficher quelque chose comme ceci :
[[email protected] ~]# netstat -tap | grep mysql
tcp 0 0 0.0.0.0:mysql 0.0.0.0:* LISTEN 10623/mysqld
Exécuter
mysql_secure_installation
pour définir un mot de passe pour l'utilisateur root (sinon n'importe qui peut accéder à votre base de données MySQL !) :
[[email protected] ~]# mysql_secure_installation
/usr/bin/mysql_secure_installation: line 379: find_mysql_client: command not found
NOTE: RUNNING ALL PARTS OF THIS SCRIPT IS RECOMMENDED FOR ALL MariaDB
SERVERS IN PRODUCTION USE! PLEASE READ EACH STEP CAREFULLY!
In order to log into MariaDB to secure it, we'll need the current
password for the root user. If you've just installed MariaDB, and
you haven't set the root password yet, the password will be blank,
so you should just press enter here.
Enter current password for root (enter for none):
OK, successfully used password, moving on...
Setting the root password ensures that nobody can log into the MariaDB
root user without the proper authorisation.
Set root password? [Y/n] <-- ENTER
New password: <-- yourrootsqlpassword
Re-enter new password: <-- yourrootsqlpassword
Password updated successfully!
Reloading privilege tables..
... Success!
By default, a MariaDB installation has an anonymous user, allowing anyone
to log into MariaDB without having to have a user account created for
them. This is intended only for testing, and to make the installation
go a bit smoother. You should remove them before moving into a
production environment.
Remove anonymous users? [Y/n] <-- ENTER
... Success!
Normally, root should only be allowed to connect from 'localhost'. This
ensures that someone cannot guess at the root password from the network.
Disallow root login remotely? [Y/n] <-- ENTER
... Success!
By default, MariaDB comes with a database named 'test' that anyone can
access. This is also intended only for testing, and should be removed
before moving into a production environment.
Remove test database and access to it? [Y/n] <-- ENTER
- Dropping test database...
... Success!
- Removing privileges on test database...
... Success!
Reloading the privilege tables will ensure that all changes made so far
will take effect immediately.
Reload privilege tables now? [Y/n] <-- ENTER
... Success!
Cleaning up...
All done! If you've completed all of the above steps, your MariaDB
installation should now be secure.
Thanks for using MariaDB!
[[email protected] ~]#
[[email protected] ~]# mysql_secure_installation
4 Installer Nginx
Nginx est disponible sous forme de package sur nginx.org que nous pouvons installer comme suit :
yum install nginx
Ensuite, nous créons les liens de démarrage du système pour nginx et le démarrons :
systemctl enable nginx.service
systemctl start nginx.service
Il y a des chances que vous obteniez une erreur comme le port 80 déjà utilisé, le message d'erreur ressemblera à ceci
[[email protected] ~]# service nginx start
Starting nginx: nginx: [emerg] bind() to 0.0.0.0:80 failed (98: Address already in use)
nginx: [emerg] bind() to 0.0.0.0:80 failed (98: Address already in use)
nginx: [emerg] bind() to 0.0.0.0:80 failed (98: Address already in use)
nginx: [emerg] bind() to 0.0.0.0:80 failed (98: Address already in use)
nginx: [emerg] bind() to 0.0.0.0:80 failed (98: Address already in use)
nginx: [emerg] still could not bind()
                                                           [FAILED]
[[email protected] ~]#
Ensuite, cela signifie qu'il y a des chances que le service apache s'y exécute. Arrêtez le service et démarrez le service pour NGINX comme suit
systemctl stop httpd.service
yum remove httpd
systemctl disable httpd.service
systemctl enable nginx.service
systemctl start nginx.service
Et ouvrez les ports http et https dans le pare-feu
firewall-cmd --permanent --zone=public --add-service=http
firewall-cmd --permanent --zone=public --add-service=https
firewall-cmd --reload
La sortie résultante sur le shell ressemblera à ceci :
[[email protected] ~]# firewall-cmd --permanent --zone=public --add-service=http
success
[[email protected] ~]# firewall-cmd --permanent --zone=public --add-service=https
success
[[email protected] ~]# firewall-cmd --reload
success
[[email protected] ~]#
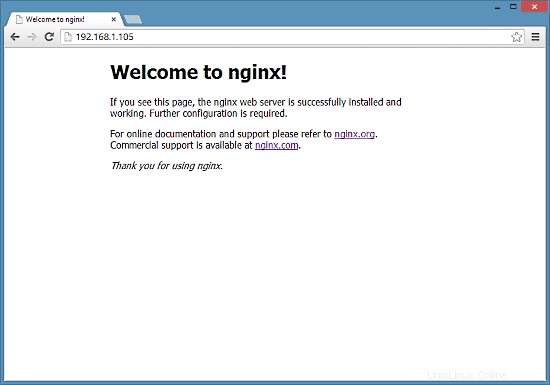
Tapez l'adresse IP ou le nom d'hôte de votre serveur Web dans un navigateur (par exemple, http://192.168.1.105), et vous devriez voir la page d'accueil de nginx :