Grav est un CMS gratuit, open source et à fichier plat qui ne nécessite aucune base de données. Il est basé sur PHP et offre plusieurs fonctionnalités qui peuvent ne pas être disponibles sur d'autres CMS tels que WordPress, Joomla, etc. Il est simple, facile à utiliser et est livré avec certaines des technologies clés, notamment Twig Templating, Markdown, YAML, Parsedown, Doctrine Cache, bibliothèque d'images Gregwar et console Symfony.
Dans ce tutoriel, je vais vous montrer comment installer Grav CMS avec Nginx et Let's Encrypt SSL sur le serveur Ubuntu 20.04.
Prérequis
- Un serveur exécutant Ubuntu 20.04.
- Un nom de domaine valide pointé vers l'adresse IP de votre serveur.
- Un mot de passe root est configuré sur le serveur.
Mise en route
Tout d'abord, mettez à jour les packages système vers la version mise à jour en exécutant la commande suivante :
apt-get update -y
Une fois tous les packages mis à jour, vous pouvez passer à l'étape suivante.
Installer Nginx et PHP
Tout d'abord, vous devrez installer le serveur Web Nginx, PHP et d'autres extensions PHP sur votre système. Vous pouvez tous les installer avec la commande suivante :
apt-get install nginx php php-cli php-fpm php-common php-curl php-gd php-json php-mbstring php-xml php-zip php-opcache php-apcu unzip -y
Une fois tous les packages installés, vérifiez la version de PHP à l'aide de la commande suivante :
php --version
Vous devriez obtenir le résultat suivant :
PHP 7.4.3 (cli) (built: Jul  5 2021 15:13:35) ( NTS )
Copyright (c) The PHP Group
Zend Engine v3.4.0, Copyright (c) Zend Technologies
    with Zend OPcache v7.4.3, Copyright (c), by Zend Technologies
Ensuite, éditez le fichier php.ini et apportez quelques modifications :
nano /etc/php/7.4/fpm/php.ini
Modifiez les lignes suivantes :
memory_limit = 256M
upload_max_filesize = 100M
max_execution_time = 360
max_input_vars = 1500
date.timezone = America/Chicago
Enregistrez et fermez le fichier puis redémarrez le service PHP-FPM pour appliquer les modifications :
systemctl restart php7.4-fpm
Une fois que vous avez terminé, vous pouvez passer à l'étape suivante.
Installer Grav CMS
Ensuite, vous devrez télécharger le CMS Grav dans le répertoire racine Web de Nginx. Vous pouvez le télécharger depuis la page de téléchargement de Grav en utilisant la commande suivante :
cd /var/www/html
wget https://getgrav.org/download/core/grav-admin/1.7.17
Une fois le téléchargement terminé, décompressez le fichier téléchargé avec la commande suivante :
unzip 1.7.17
Ensuite, renommez le répertoire extrait en grav avec la commande suivante :
mv grav-admin grav
Ensuite, définissez la propriété appropriée sur le répertoire grav :
chown -R www-data:www-data /var/www/html/grav
Une fois que vous avez terminé, vous pouvez passer à l'étape suivante.
Configurer Nginx pour Grav CMS
Ensuite, vous devrez créer un fichier de configuration d'hôte virtuel Nginx pour héberger Grav CMS. Vous pouvez le créer avec la commande suivante :
nano /etc/nginx/conf.d/grav.conf
Ajoutez les lignes suivantes :
server {

listen 80;

server_name grav.example.com;
root /var/www/html/grav;

index index.html index.php;

location / {
   try_files $uri $uri/ /index.php?$query_string;
 }

   location ~* /(\.git|cache|bin|logs|backup|tests)/.*$ { return 403; }
   location ~* /(system|vendor)/.*\.(txt|xml|md|html|yaml|yml|php|pl|py|cgi|twig|sh|bat)$ { return 403; }
   location ~* /user/.*\.(txt|md|yaml|yml|php|pl|py|cgi|twig|sh|bat)$ { return 403; }
   location ~ /(LICENSE\.txt|composer\.lock|composer\.json|nginx\.conf|web\.config|htaccess\.txt|\.htaccess) { return 403; }

location ~ \.php$ {
   fastcgi_pass unix:/var/run/php/php7.4-fpm.sock;
   fastcgi_split_path_info ^(.+\.php)(/.+)$;
   fastcgi_index index.php;
   include fastcgi_params;
   fastcgi_param SCRIPT_FILENAME $document_root/$fastcgi_script_name;
 }

}
Enregistrez et fermez le fichier lorsque vous avez terminé, puis vérifiez le Nginx pour toute erreur de syntaxe :
nginx -t
Vous devriez obtenir le résultat suivant :
nginx: the configuration file /etc/nginx/nginx.conf syntax is ok
nginx: configuration file /etc/nginx/nginx.conf test is successful
Enfin, redémarrez le service Nginx pour appliquer les modifications :
systemctl restart nginx
Vous pouvez également vérifier l'état du Nginx avec la commande suivante :
systemctl status nginx
Vous devriez voir le résultat suivant :
? nginx.service - A high performance web server and a reverse proxy server
     Loaded: loaded (/lib/systemd/system/nginx.service; enabled; vendor preset: enabled)
     Active: active (running) since Fri 2021-07-09 06:45:28 UTC; 3s ago
       Docs: man:nginx(8)
    Process: 33099 ExecStartPre=/usr/sbin/nginx -t -q -g daemon on; master_process on; (code=exited, status=0/SUCCESS)
    Process: 33110 ExecStart=/usr/sbin/nginx -g daemon on; master_process on; (code=exited, status=0/SUCCESS)
   Main PID: 33111 (nginx)
      Tasks: 2 (limit: 2353)
     Memory: 2.6M
     CGroup: /system.slice/nginx.service
             ??33111 nginx: master process /usr/sbin/nginx -g daemon on; master_process on;
             ??33112 nginx: worker process

Jul 09 06:45:28 node1 systemd[1]: Starting A high performance web server and a reverse proxy server...
Jul 09 06:45:28 node1 systemd[1]: Started A high performance web server and a reverse proxy server.
Une fois que tout va bien, vous pouvez passer à l'étape suivante.
Accéder au CMS Grav
Vous pouvez maintenant accéder à l'interface utilisateur Web Grav CMS en utilisant l'URL http://grav.example.com . Vous devriez voir l'écran suivant :
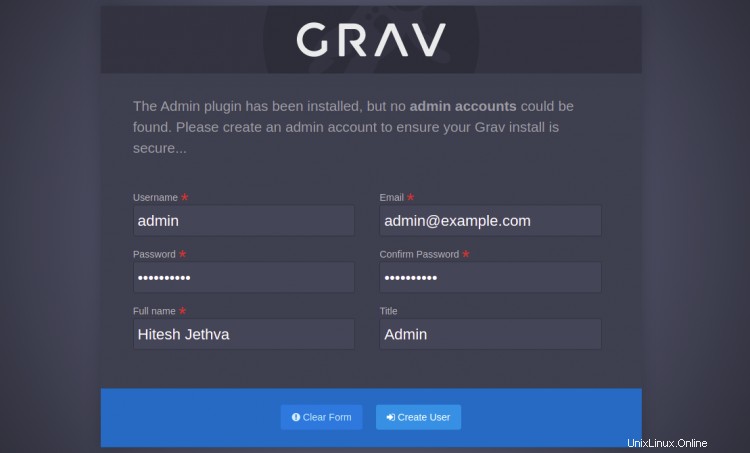
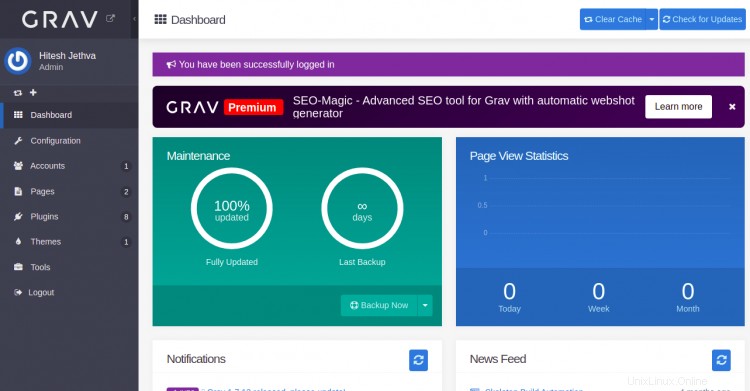
Définissez votre nom d'utilisateur et votre mot de passe d'administrateur et cliquez sur Créer un utilisateur bouton. Vous allez être redirigé vers le tableau de bord Grav CMS :
Page de configuration

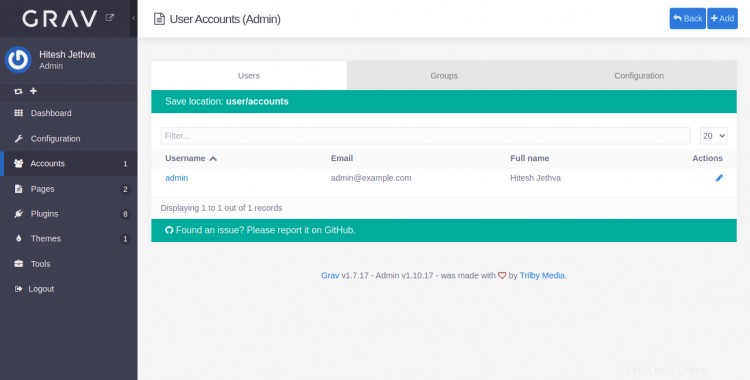
Page des comptes
Page Plug-ins

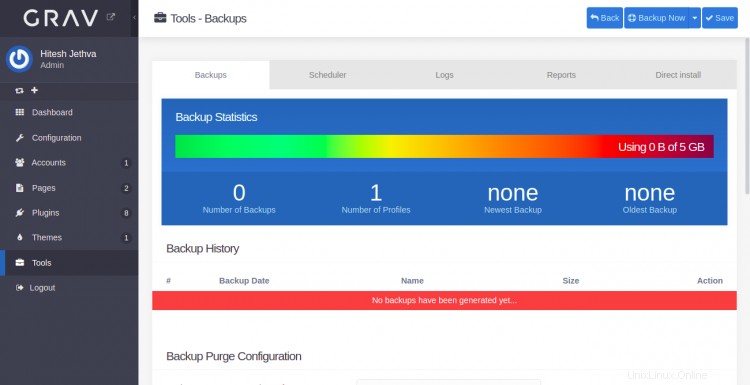
Page Outils
Sécuriser Grav CMS avec Let's Encrypt SSL
Ensuite, vous devrez installer le package client Certbot pour installer et gérer le SSL Let's Encrypt.
Tout d'abord, installez le Certbot avec la commande suivante :
apt-get install python3-certbot-nginx -y
Une fois l'installation terminée, exécutez la commande suivante pour installer Let's Encrypt SSL sur votre site Web :
certbot --nginx -d grav.example.com
Il vous sera demandé de fournir une adresse e-mail valide et d'accepter les conditions d'utilisation comme indiqué ci-dessous :
Saving debug log to /var/log/letsencrypt/letsencrypt.log
Plugins selected: Authenticator nginx, Installer nginx
Enter email address (used for urgent renewal and security notices) (Enter 'c' to
cancel): [email protected]

- - - - - - - - - - - - - - - - - - - - - - - - - - - - - - - - - - - - - - - -
Please read the Terms of Service at
https://letsencrypt.org/documents/LE-SA-v1.2-November-15-2017.pdf. You must
agree in order to register with the ACME server at
https://acme-v02.api.letsencrypt.org/directory
- - - - - - - - - - - - - - - - - - - - - - - - - - - - - - - - - - - - - - - -
(A)gree/(C)ancel: A

- - - - - - - - - - - - - - - - - - - - - - - - - - - - - - - - - - - - - - - -
Would you be willing to share your email address with the Electronic Frontier
Foundation, a founding partner of the Let's Encrypt project and the non-profit
organization that develops Certbot? We'd like to send you email about our work
encrypting the web, EFF news, campaigns, and ways to support digital freedom.
- - - - - - - - - - - - - - - - - - - - - - - - - - - - - - - - - - - - - - - -
(Y)es/(N)o: Y
Obtaining a new certificate
Performing the following challenges:
http-01 challenge for grav.example.com
Waiting for verification...
Cleaning up challenges
Deploying Certificate to VirtualHost /etc/nginx/conf.d/grav.conf
Ensuite, choisissez de rediriger ou non le trafic HTTP vers HTTPS comme indiqué ci-dessous :
- - - - - - - - - - - - - - - - - - - - - - - - - - - - - - - - - - - - - - - -
1: No redirect - Make no further changes to the webserver configuration.
2: Redirect - Make all requests redirect to secure HTTPS access. Choose this for
new sites, or if you're confident your site works on HTTPS. You can undo this
change by editing your web server's configuration.
- - - - - - - - - - - - - - - - - - - - - - - - - - - - - - - - - - - - - - - -
Select the appropriate number [1-2] then [enter] (press 'c' to cancel): 2
Tapez 2 et appuyez sur Entrée pour terminer l'installation. Vous devriez voir le résultat suivant :
Redirecting all traffic on port 80 to ssl in /etc/nginx/conf.d/grav.conf

- - - - - - - - - - - - - - - - - - - - - - - - - - - - - - - - - - - - - - - -
Congratulations! You have successfully enabled https://grav.example.com

You should test your configuration at:
https://www.ssllabs.com/ssltest/analyze.html?d=grav.example.com
- - - - - - - - - - - - - - - - - - - - - - - - - - - - - - - - - - - - - - - -

IMPORTANT NOTES:
 - Congratulations! Your certificate and chain have been saved at:
   /etc/letsencrypt/live/grav.example.com/fullchain.pem
   Your key file has been saved at:
   /etc/letsencrypt/live/grav.example.com/privkey.pem
   Your cert will expire on 2021-12-30. To obtain a new or tweaked
   version of this certificate in the future, simply run certbot again
   with the "certonly" option. To non-interactively renew *all* of
   your certificates, run "certbot renew"
 - Your account credentials have been saved in your Certbot
   configuration directory at /etc/letsencrypt. You should make a
   secure backup of this folder now. This configuration directory will
   also contain certificates and private keys obtained by Certbot so
   making regular backups of this folder is ideal.
 - If you like Certbot, please consider supporting our work by:

   Donating to ISRG / Let's Encrypt:   https://letsencrypt.org/donate
   Donating to EFF:                    https://eff.org/donate-le

 - We were unable to subscribe you the EFF mailing list because your
   e-mail address appears to be invalid. You can try again later by
   visiting https://act.eff.org.
Vous pouvez désormais accéder au CMS Grav en toute sécurité grâce au protocole HTTPS.
Conclusion
Toutes nos félicitations! vous avez installé avec succès Grav CMS avec Nginx et Let's Encrypt SSL sur le serveur Ubuntu 20.04. Vous pouvez maintenant créer votre site Web facilement en utilisant le CMS Grav.