Le serveur parfait - Ubuntu 13.04 (Apache2, BIND, Dovecot, ISPConfig 3)
Ce tutoriel montre comment préparer un serveur Ubuntu 13.04 (Raring Ringtail) (avec Apache2, BIND, Dovecot) pour l'installation d'ISPConfig 3, et comment installer ISPConfig 3. ISPConfig 3 est un panneau de contrôle d'hébergement Web qui vous permet de configurer les éléments suivants services via un navigateur Web :serveur Web Apache ou nginx, serveur de messagerie Postfix, serveur Courier ou Dovecot IMAP/POP3, serveur de noms MySQL, BIND ou MyDNS, PureFTPd, SpamAssassin, ClamAV, et bien d'autres. Cette configuration couvre Apache (au lieu de nginx), BIND (au lieu de MyDNS) et Dovecot (au lieu de Courier).
Veuillez noter que cette configuration ne fonctionne pas pour ISPConfig 2 ! Il n'est valable que pour ISPConfig 3 !
Je n'émets aucune garantie que cela fonctionnera pour vous !
Manuel ISPConfig 3
Afin d'apprendre à utiliser ISPConfig 3, je vous recommande fortement de télécharger le manuel ISPConfig 3.
Sur plus de 300 pages, il couvre le concept derrière ISPConfig (administrateur, revendeurs, clients), explique comment installer et mettre à jour ISPConfig 3, inclut une référence pour tous les formulaires et champs de formulaire dans ISPConfig ainsi que des exemples d'entrées valides, et fournit des tutoriels pour les tâches les plus courantes dans ISPConfig 3. Il explique également comment rendre votre serveur plus sécurisé et est accompagné d'une section de dépannage à la fin.
Application de surveillance ISPConfig pour Android
Avec l'application ISPConfig Monitor, vous pouvez vérifier l'état de votre serveur et savoir si tous les services fonctionnent comme prévu. Vous pouvez vérifier les ports TCP et UDP et envoyer un ping à vos serveurs. En plus de cela, vous pouvez utiliser cette application pour demander des détails aux serveurs sur lesquels ISPConfig est installé (veuillez noter que la version minimale installée d'ISPConfig 3 avec prise en charge de l'application ISPConfig Monitor est 3.0.3.3 ! ); ces détails incluent tout ce que vous savez du module Monitor dans le panneau de configuration ISPConfig (par exemple, les services, les journaux de messagerie et système, la file d'attente de messagerie, les informations sur le processeur et la mémoire, l'utilisation du disque, les quotas, les détails du système d'exploitation, le journal RKHunter, etc.), et bien sûr , comme ISPConfig est compatible avec plusieurs serveurs, vous pouvez vérifier tous les serveurs contrôlés à partir de votre serveur maître ISPConfig.
Pour obtenir des instructions de téléchargement et d'utilisation, veuillez visiter http://www.ispconfig.org/ispconfig-3/ispconfig-monitor-app-for-android/.
1 Exigences
Pour installer un tel système, vous aurez besoin des éléments suivants :
- le CD du serveur Ubuntu 13.04, disponible ici :http://releases.ubuntu.com/releases/13.04/ubuntu-13.04-server-i386.iso (i386) ou http://releases.ubuntu.com/releases /13.04/ubuntu-13.04-server-amd64.iso (x86_64)
- une connexion Internet rapide.
2 Remarque préliminaire
Dans ce tutoriel, j'utilise le nom d'hôte server1.example.com avec l'adresse IP 192.168.0.100 et la passerelle 192.168.0.1. Ces paramètres peuvent différer pour vous, vous devez donc les remplacer le cas échéant.
3 Le système de base
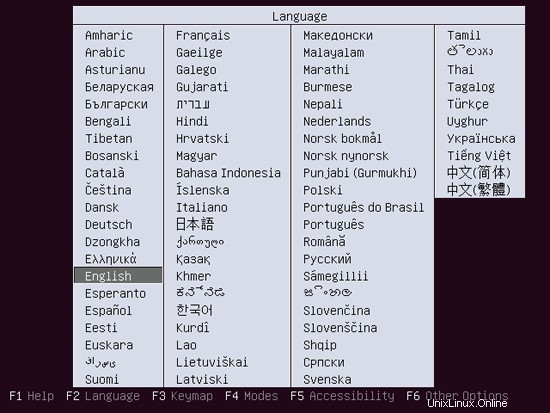
Insérez votre CD d'installation Ubuntu dans votre système et démarrez à partir de celui-ci. Sélectionnez votre langue :
Sélectionnez ensuite Installer le serveur Ubuntu :

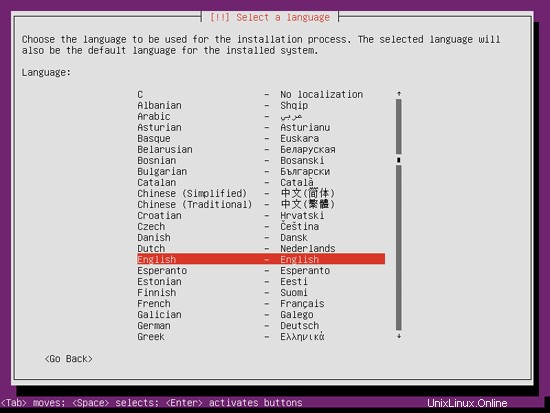
Choisissez à nouveau votre langue (?) :
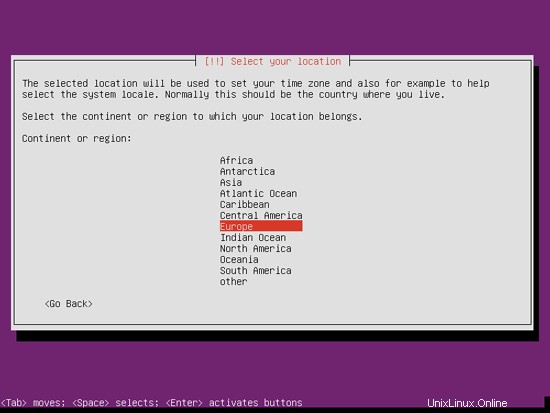
Sélectionnez ensuite votre emplacement :

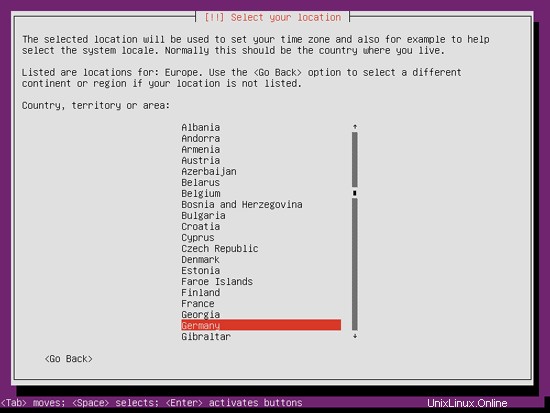
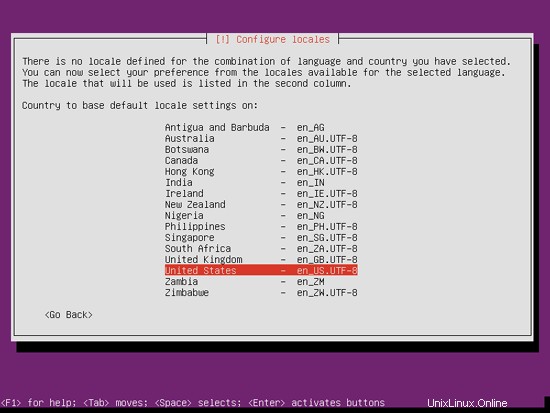
Si vous avez sélectionné une combinaison inhabituelle de langue et de lieu (comme l'anglais comme langue et l'Allemagne comme lieu, comme dans mon cas), le programme d'installation peut vous dire qu'il n'y a pas de paramètres régionaux définis pour cette combinaison ; dans ce cas, vous devez sélectionner les paramètres régionaux manuellement. Je sélectionne en_US.UTF-8 ici :
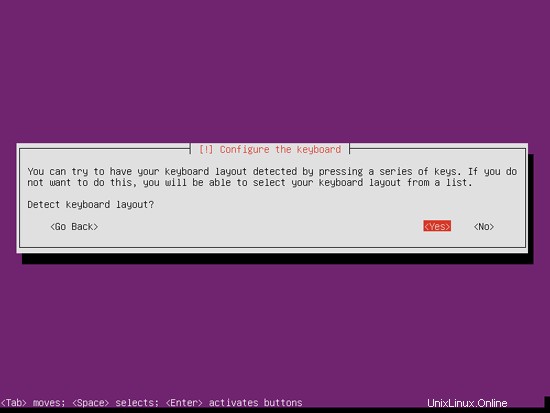
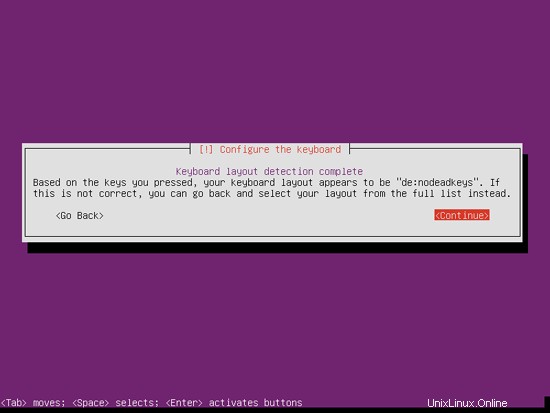
Choisissez une disposition de clavier (il vous sera demandé d'appuyer sur quelques touches et l'installateur essaiera de détecter la disposition de votre clavier en fonction des touches sur lesquelles vous avez appuyé) :
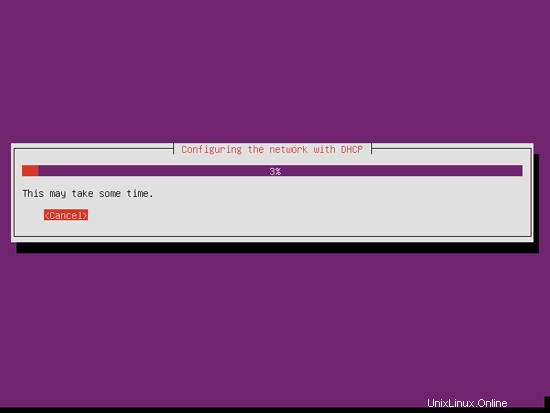
Le programme d'installation vérifie le CD d'installation, votre matériel et configure le réseau avec DHCP s'il y a un serveur DHCP sur le réseau :
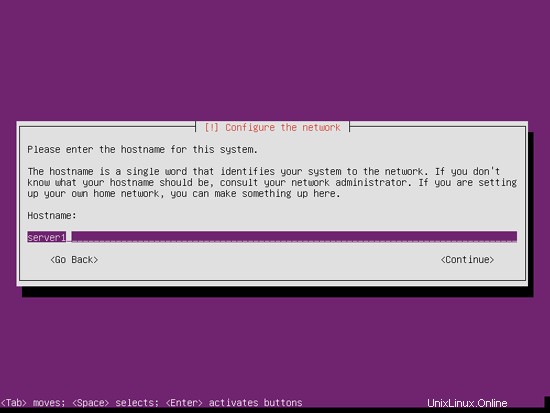
Entrez le nom d'hôte. Dans cet exemple, mon système s'appelle server1.example.com , donc j'entre server1 :
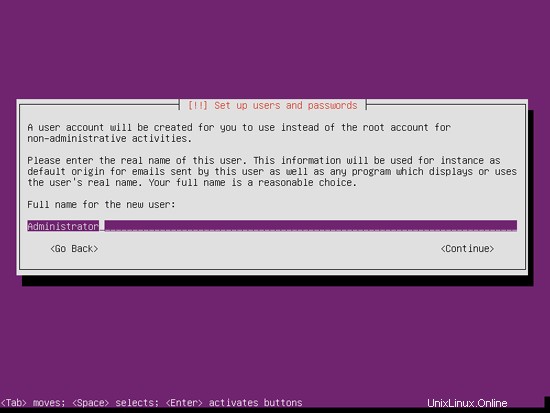
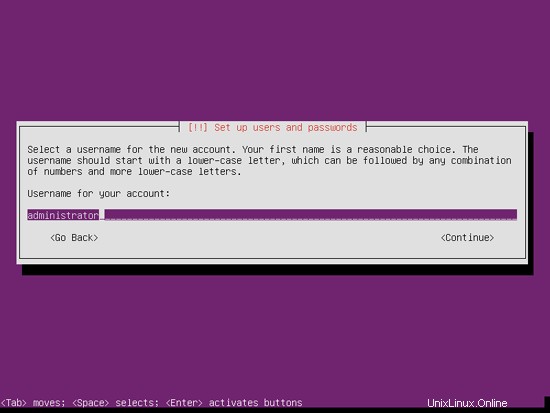
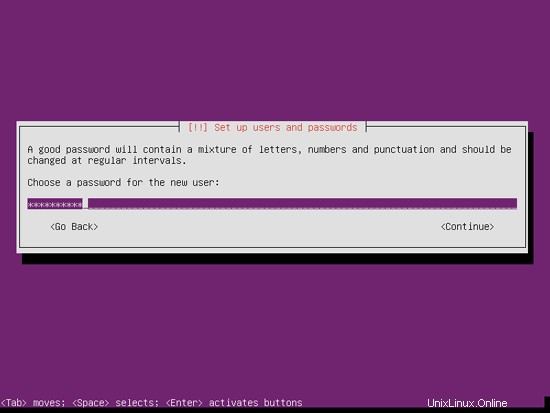
Créez un utilisateur, par exemple l'utilisateur Administrator avec le nom d'utilisateur administrator (n'utilisez pas le nom d'utilisateur admin car il s'agit d'un nom réservé sur Ubuntu 13.04) :
Le serveur parfait - Ubuntu 13.04 (Apache2, BIND, Dovecot, ISPConfig 3) - Page 2
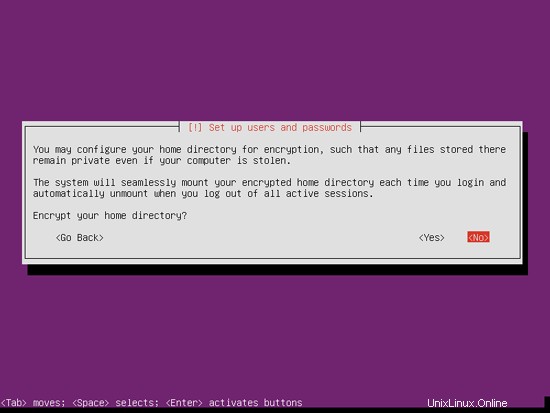
Je n'ai pas besoin d'un répertoire privé chiffré, donc je choisis Non ici :
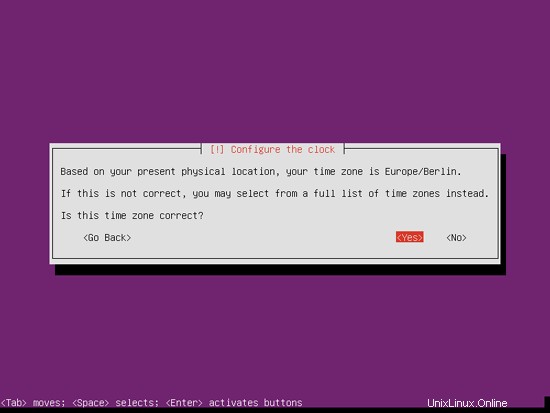
Veuillez vérifier si le programme d'installation a correctement détecté votre fuseau horaire. Si oui, sélectionnez Oui, sinon Non :
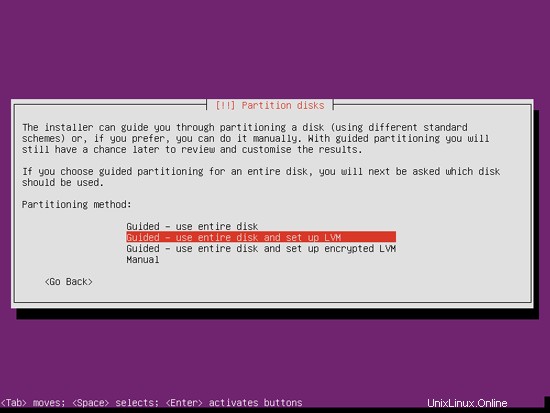
Vous devez maintenant partitionner votre disque dur. Par souci de simplicité, je sélectionne Guidé - utiliser le disque entier et configurer LVM - cela créera un groupe de volumes avec deux volumes logiques, un pour le système de fichiers / et un autre pour le swap (bien sûr, le partitionnement dépend entièrement de vous - si vous savez ce que vous faites, vous pouvez également configurer vos partitions manuellement).
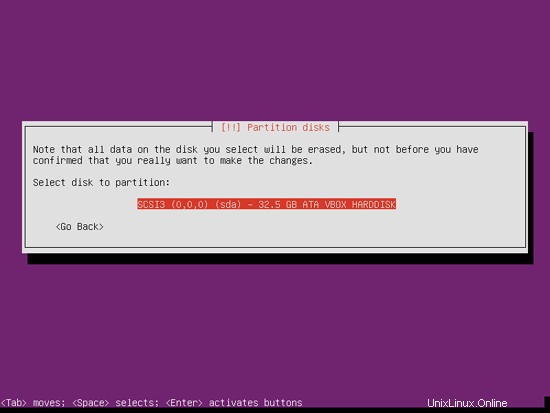
Sélectionnez le disque que vous souhaitez partitionner :
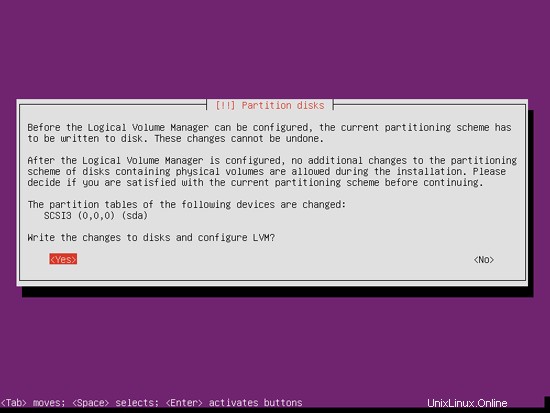
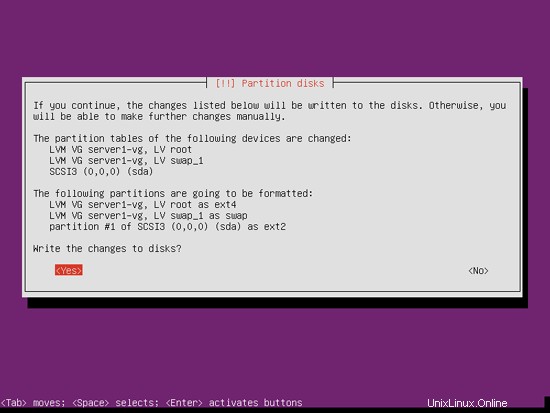
Lorsque vous êtes invité à écrire les modifications sur les disques et à configurer LVM ?, sélectionnez Oui :
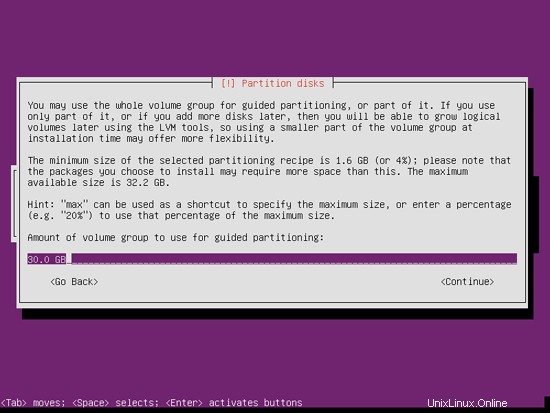
Si vous avez sélectionné Guidé - utiliser le disque entier et configurer LVM, le partitionneur créera un grand groupe de volumes qui utilise tout l'espace disque. Vous pouvez maintenant spécifier la quantité d'espace disque qui doit être utilisée par les volumes logiques pour / et swap. Il est logique de laisser de l'espace inutilisé afin de pouvoir étendre ultérieurement vos volumes logiques existants ou en créer de nouveaux - cela vous donne plus de flexibilité.
Lorsque vous avez terminé, cliquez sur Oui lorsque vous êtes invité à écrire les modifications sur les disques ? :
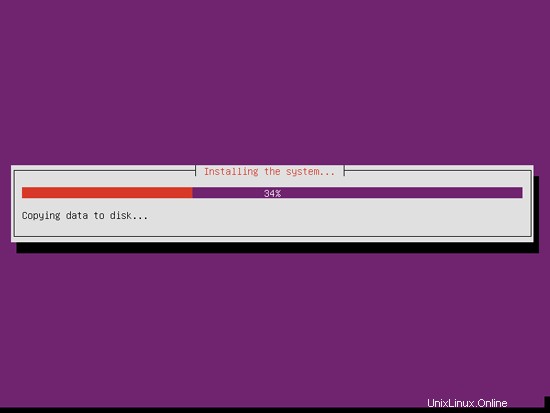
Ensuite, vos nouvelles partitions sont créées et formatées.
Le système de base est maintenant en cours d'installation :
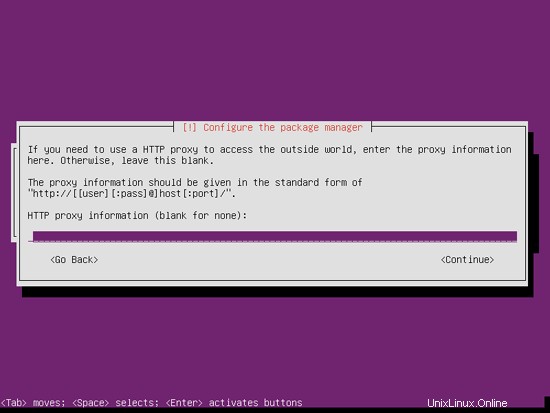
Ensuite, le gestionnaire de packages apt est configuré. Laissez la ligne proxy HTTP vide, sauf si vous utilisez un serveur proxy pour vous connecter à Internet :
Je suis un peu démodé et j'aime mettre à jour mes serveurs manuellement pour avoir plus de contrôle, donc je sélectionne Pas de mises à jour automatiques. Bien sûr, c'est à vous de choisir ici :

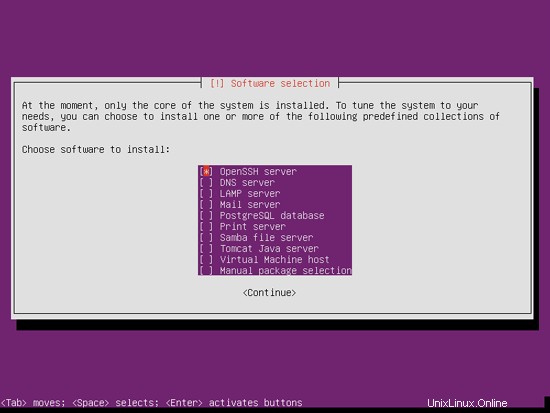
Nous avons besoin d'un serveur DNS, mail et LAMP, mais néanmoins je n'en sélectionne aucun pour le moment car j'aime avoir un contrôle total sur ce qui est installé sur mon système. Nous installerons les packages nécessaires manuellement plus tard. Le seul élément que je sélectionne ici est le serveur OpenSSH afin que je puisse me connecter immédiatement au système avec un client SSH tel que PuTTY une fois l'installation terminée :
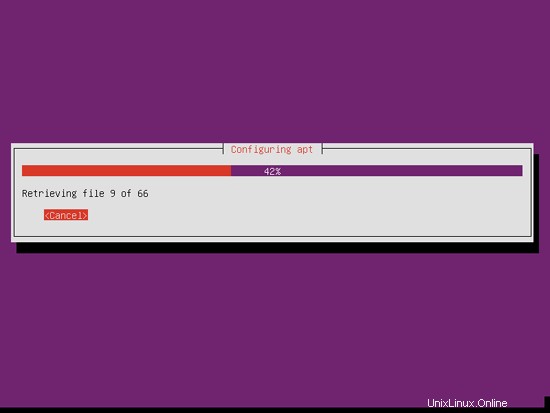
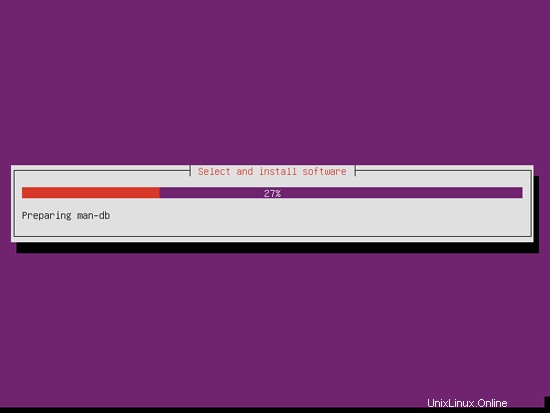
L'installation continue :
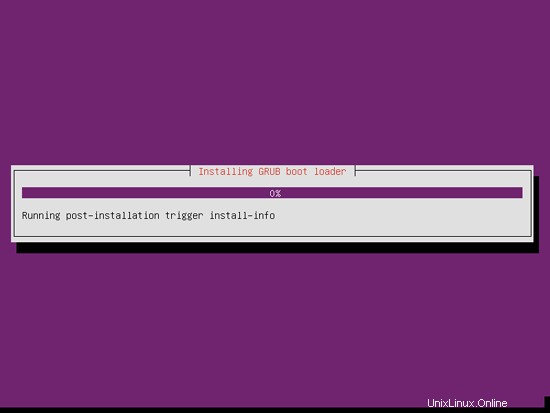
Le chargeur de démarrage GRUB est installé :
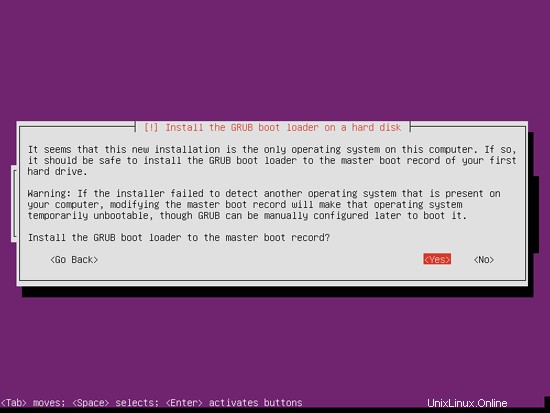
Sélectionnez Oui lorsque vous êtes invité à installer le chargeur de démarrage GRUB sur le secteur de démarrage principal ? :
L'installation du système de base est maintenant terminée. Retirez le CD d'installation du lecteur de CD et appuyez sur Continuer pour redémarrer le système :

Passons à l'étape suivante...
Le serveur parfait - Ubuntu 13.04 (Apache2, BIND, Dovecot, ISPConfig 3) - Page 3
4 Obtenir les privilèges root
Après le redémarrage, vous pouvez vous connecter avec votre nom d'utilisateur créé précédemment (par exemple, administrateur). Étant donné que nous devons exécuter toutes les étapes de ce didacticiel avec les privilèges root, nous pouvons soit ajouter la chaîne sudo à toutes les commandes de ce didacticiel, soit nous devenons root dès maintenant en tapant
sudo su
(Vous pouvez également activer la connexion root en exécutant
sudo passwd root
et donner un mot de passe à root. Vous pouvez ensuite vous connecter directement en tant que root, mais cela est mal vu par les développeurs et la communauté Ubuntu pour diverses raisons. Voir http://ubuntuforums.org/showthread.php?t=765414.)
5 Installer le serveur SSH (facultatif)
Si vous n'avez pas installé le serveur OpenSSH lors de l'installation du système, vous pouvez le faire maintenant :
apt-get install ssh openssh-server
À partir de maintenant, vous pouvez utiliser un client SSH tel que PuTTY et vous connecter depuis votre poste de travail à votre serveur Ubuntu 13.04 et suivre les étapes restantes de ce didacticiel.
6 Installer vim-nox (facultatif)
J'utiliserai vi comme éditeur de texte dans ce tutoriel. Le programme vi par défaut a un comportement étrange sur Ubuntu et Debian; pour résoudre ce problème, nous installons vim-nox :
apt-get install vim-nox
(Vous n'avez pas à le faire si vous utilisez un autre éditeur de texte tel que joe ou nano.)
7 Configurer le réseau
Parce que le programme d'installation d'Ubuntu a configuré notre système pour obtenir ses paramètres réseau via DHCP, nous devons changer cela maintenant car un serveur doit avoir une adresse IP statique. Modifier /etc/network/interfaces et ajustez-le à vos besoins (dans cet exemple de configuration, j'utiliserai l'adresse IP 192.168.0.100 et les serveurs DNS 8.8.8.8 et 8.8.4.4 - à partir d'Ubuntu 12.04, vous ne pouvez plus éditer /etc/resolv.conf directement, mais devez spécifier vos serveurs de noms dans votre configuration réseau - voir
man resolvconf
pour plus de détails):
vi /etc/network/interfaces
# This file describes the network interfaces available on your system
# and how to activate them. For more information, see interfaces(5).

# The loopback network interface
auto lo
iface lo inet loopback

# The primary network interface
auto eth0
iface eth0 inet static
        address 192.168.0.100
        netmask 255.255.255.0
        network 192.168.0.0
        broadcast 192.168.0.255
        gateway 192.168.0.1
dns-nameservers 8.8.8.8 8.8.4.4 |
Redémarrez ensuite votre réseau :
/etc/init.d/networking restart
Modifiez ensuite /etc/hosts. Faites en sorte qu'il ressemble à ceci :
vi /etc/hosts
127.0.0.1 localhost.localdomain localhost 192.168.0.100 server1.example.com server1 # The following lines are desirable for IPv6 capable hosts ::1 ip6-localhost ip6-loopback fe00::0 ip6-localnet ff00::0 ip6-mcastprefix ff02::1 ip6-allnodes ff02::2 ip6-allrouters |
Maintenant lancez
echo server1.example.com > /etc/hostname
 /etc/init.d/hostname restart
Ensuite, lancez
hostname
 hostname -f
Les deux devraient maintenant afficher server1.example.com.
8 Modifier /etc/apt/sources.list et mettre à jour votre installation Linux
Modifiez /etc/apt/sources.list. Commentez ou supprimez le CD d'installation du fichier et assurez-vous que les référentiels univers et multivers sont activés. Cela devrait ressembler à ceci :
vi /etc/apt/sources.list
# # deb cdrom:[Ubuntu-Server 13.04 _Raring Ringtail_ - Release amd64 (20130423.1)]/ raring main restricted #deb cdrom:[Ubuntu-Server 13.04 _Raring Ringtail_ - Release amd64 (20130423.1)]/ raring main restricted # See http://help.ubuntu.com/community/UpgradeNotes for how to upgrade to # newer versions of the distribution. deb http://de.archive.ubuntu.com/ubuntu/ raring main restricted deb-src http://de.archive.ubuntu.com/ubuntu/ raring main restricted ## Major bug fix updates produced after the final release of the ## distribution. deb http://de.archive.ubuntu.com/ubuntu/ raring-updates main restricted deb-src http://de.archive.ubuntu.com/ubuntu/ raring-updates main restricted ## N.B. software from this repository is ENTIRELY UNSUPPORTED by the Ubuntu ## team. Also, please note that software in universe WILL NOT receive any ## review or updates from the Ubuntu security team. deb http://de.archive.ubuntu.com/ubuntu/ raring universe deb-src http://de.archive.ubuntu.com/ubuntu/ raring universe deb http://de.archive.ubuntu.com/ubuntu/ raring-updates universe deb-src http://de.archive.ubuntu.com/ubuntu/ raring-updates universe ## N.B. software from this repository is ENTIRELY UNSUPPORTED by the Ubuntu ## team, and may not be under a free licence. Please satisfy yourself as to ## your rights to use the software. Also, please note that software in ## multiverse WILL NOT receive any review or updates from the Ubuntu ## security team. deb http://de.archive.ubuntu.com/ubuntu/ raring multiverse deb-src http://de.archive.ubuntu.com/ubuntu/ raring multiverse deb http://de.archive.ubuntu.com/ubuntu/ raring-updates multiverse deb-src http://de.archive.ubuntu.com/ubuntu/ raring-updates multiverse ## N.B. software from this repository may not have been tested as ## extensively as that contained in the main release, although it includes ## newer versions of some applications which may provide useful features. ## Also, please note that software in backports WILL NOT receive any review ## or updates from the Ubuntu security team. deb http://de.archive.ubuntu.com/ubuntu/ raring-backports main restricted universe multiverse deb-src http://de.archive.ubuntu.com/ubuntu/ raring-backports main restricted universe multiverse deb http://security.ubuntu.com/ubuntu raring-security main restricted deb-src http://security.ubuntu.com/ubuntu raring-security main restricted deb http://security.ubuntu.com/ubuntu raring-security universe deb-src http://security.ubuntu.com/ubuntu raring-security universe deb http://security.ubuntu.com/ubuntu raring-security multiverse deb-src http://security.ubuntu.com/ubuntu raring-security multiverse ## Uncomment the following two lines to add software from Canonical's ## 'partner' repository. ## This software is not part of Ubuntu, but is offered by Canonical and the ## respective vendors as a service to Ubuntu users. # deb http://archive.canonical.com/ubuntu raring partner # deb-src http://archive.canonical.com/ubuntu raring partner ## Uncomment the following two lines to add software from Ubuntu's ## 'extras' repository. ## This software is not part of Ubuntu, but is offered by third-party ## developers who want to ship their latest software. # deb http://extras.ubuntu.com/ubuntu raring main # deb-src http://extras.ubuntu.com/ubuntu raring main |
Puis lancez
apt-get update
pour mettre à jour la base de données des packages apt et
apt-get upgrade
pour installer les dernières mises à jour (s'il y en a). Si vous constatez qu'un nouveau noyau est installé dans le cadre des mises à jour, vous devez ensuite redémarrer le système :
reboot
9 Modifier le shell par défaut
/bin/sh est un lien symbolique vers /bin/dash, cependant nous avons besoin de /bin/bash, pas de /bin/dash. C'est pourquoi nous procédons comme suit :
dpkg-reconfigure dash
Utiliser dash comme shell système par défaut (/bin/sh) ? <-- Non
Si vous ne le faites pas, l'installation d'ISPConfig échouera.
10 Désactiver AppArmor
AppArmor est une extension de sécurité (similaire à SELinux) qui devrait fournir une sécurité étendue. À mon avis, vous n'en avez pas besoin pour configurer un système sécurisé, et cela cause généralement plus de problèmes que d'avantages (pensez-y après avoir effectué une semaine de dépannage car un service ne fonctionnait pas comme prévu, puis vous découvrez que tout allait bien, seul AppArmor était à l'origine du problème). Par conséquent, je le désactive (c'est indispensable si vous souhaitez installer ISPConfig plus tard).
Nous pouvons le désactiver comme ceci :
/etc/init.d/apparmor stop
 update-rc.d -f apparmor remove
 apt-get remove apparmor apparmor-utils
11 Synchroniser l'horloge système
C'est une bonne idée de synchroniser l'horloge système avec un NTP (n réseau t temps p rotocol) sur Internet. Exécutez simplement
apt-get install ntp ntpdate
et l'heure de votre système sera toujours synchronisée.
Le serveur parfait - Ubuntu 13.04 (Apache2, BIND, Dovecot, ISPConfig 3) - Page 4
12 Installer Postfix, Dovecot, MySQL, phpMyAdmin, rkhunter, binutils
Nous pouvons installer Postfix, Dovecot, MySQL, rkhunter et binutils avec une seule commande :
apt-get install postfix postfix-mysql postfix-doc mysql-client mysql-server openssl getmail4 rkhunter binutils dovecot-imapd dovecot-pop3d dovecot-mysql dovecot-sieve sudo
Les questions suivantes vous seront posées :
Nouveau mot de passe pour l'utilisateur "root" MySQL :<-- yourrootsqlpassword
Répétez le mot de passe pour l'utilisateur MySQL "root" :<-- yourrootsqlpassword
Type général de configuration de messagerie :<-- Site Internet
Nom de messagerie système :<-- serveur1.exemple.com
Ouvrez ensuite les ports TLS/SSL et de soumission dans Postfix :
vi /etc/postfix/master.cf
Décommentez les sections de soumission et smtps comme suit - ajoutez la ligne -o smtpd_client_restrictions=permit_sasl_authenticated,reject aux deux sections et laissez tout commenté par la suite :
[...] submission inet n - - - - smtpd -o syslog_name=postfix/submission -o smtpd_tls_security_level=encrypt -o smtpd_sasl_auth_enable=yes -o smtpd_client_restrictions=permit_sasl_authenticated,reject # -o smtpd_reject_unlisted_recipient=no # -o smtpd_client_restrictions=$mua_client_restrictions # -o smtpd_helo_restrictions=$mua_helo_restrictions # -o smtpd_sender_restrictions=$mua_sender_restrictions # -o smtpd_recipient_restrictions=permit_sasl_authenticated,reject # -o milter_macro_daemon_name=ORIGINATING smtps inet n - - - - smtpd -o syslog_name=postfix/smtps -o smtpd_tls_wrappermode=yes -o smtpd_sasl_auth_enable=yes -o smtpd_client_restrictions=permit_sasl_authenticated,reject # -o smtpd_reject_unlisted_recipient=no # -o smtpd_client_restrictions=$mua_client_restrictions # -o smtpd_helo_restrictions=$mua_helo_restrictions # -o smtpd_sender_restrictions=$mua_sender_restrictions # -o smtpd_recipient_restrictions=permit_sasl_authenticated,reject # -o milter_macro_daemon_name=ORIGINATING [...] |
Redémarrez ensuite Postfix :
/etc/init.d/postfix restart
Nous voulons que MySQL écoute sur toutes les interfaces, pas seulement sur localhost, donc nous éditons /etc/mysql/my.cnf et commentons la ligne bind-address =127.0.0.1 :
vi /etc/mysql/my.cnf
[...] # Instead of skip-networking the default is now to listen only on # localhost which is more compatible and is not less secure. #bind-address = 127.0.0.1 [...] |
Ensuite, nous redémarrons MySQL :
/etc/init.d/mysql restart
Vérifiez maintenant que la mise en réseau est activée. Exécuter
netstat -tap | grep mysql
Le résultat devrait ressembler à ceci :
example@unixlinux.online:~# netstat -tap | grep mysql
 tcp        0      0 *:mysql                 *:*                     LISTEN      21298/mysqld
 example@unixlinux.online:~#
13 Installer Amavisd-new, SpamAssassin et Clamav
Pour installer amavisd-new, SpamAssassin et ClamAV, nous exécutons
apt-get install amavisd-new spamassassin clamav clamav-daemon zoo unzip bzip2 arj nomarch lzop cabextract apt-listchanges libnet-ldap-perl libauthen-sasl-perl clamav-docs daemon libio-string-perl libio-socket-ssl-perl libnet-ident-perl zip libnet-dns-perl
La configuration d'ISPConfig 3 utilise amavisd qui charge la bibliothèque de filtres SpamAssassin en interne, nous pouvons donc arrêter SpamAssassin pour libérer de la RAM :
/etc/init.d/spamassassin stop
 update-rc.d -f spamassassin remove
14 Installer Apache2, PHP5, phpMyAdmin, FCGI, suExec, Pear et mcrypt
Apache2, PHP5, phpMyAdmin, FCGI, suExec, Pear et mcrypt peuvent être installés comme suit :
apt-get install apache2 apache2.2-common apache2-doc apache2-mpm-prefork apache2-utils libexpat1 ssl-cert libapache2-mod-php5 php5 php5-common php5-gd php5-mysql php5-imap phpmyadmin php5-cli php5-cgi libapache2-mod-fcgid apache2-suexec php-pear php-auth php5-mcrypt mcrypt php5-imagick imagemagick libapache2-mod-suphp libruby libapache2-mod-ruby libapache2-mod-python php5-curl php5-intl php5-memcache php5-memcached php5-ming php5-ps php5-pspell php5-recode php5-snmp php5-sqlite php5-tidy php5-xmlrpc php5-xsl memcached
Vous verrez la question suivante :
Serveur Web à reconfigurer automatiquement :<-- apache2
Configurer la base de données pour phpmyadmin avec dbconfig-common ? <-- Non
Exécutez ensuite la commande suivante pour activer les modules Apache suexec, rewrite, ssl, actions et include (plus dav, dav_fs et auth_digest si vous souhaitez utiliser WebDAV) :
a2enmod suexec rewrite ssl actions include
a2enmod dav_fs dav auth_digest
Ouvrez ensuite /etc/apache2/mods-available/suphp.conf...
vi /etc/apache2/mods-available/suphp.conf
... et commentez la section
<IfModule mod_suphp.c>
    #<FilesMatch "\.ph(p3?|tml)$">
    #    SetHandler application/x-httpd-suphp
    #</FilesMatch>
        AddType application/x-httpd-suphp .php .php3 .php4 .php5 .phtml
        suPHP_AddHandler application/x-httpd-suphp

    <Directory />
        suPHP_Engine on
    </Directory>

    # By default, disable suPHP for debian packaged web applications as files
    # are owned by root and cannot be executed by suPHP because of min_uid.
    <Directory /usr/share>
        suPHP_Engine off
    </Directory>

# # Use a specific php config file (a dir which contains a php.ini file)
#       suPHP_ConfigPath /etc/php5/cgi/suphp/
# # Tells mod_suphp NOT to handle requests with the type <mime-type>.
#       suPHP_RemoveHandler <mime-type>
</IfModule> |
Redémarrez ensuite Apache :
/etc/init.d/apache2 restart
Si vous souhaitez héberger des fichiers Ruby avec l'extension .rb sur vos sites Web créés via ISPConfig, vous devez commenter la ligne application/x-ruby rb dans /etc/mime.types :
vi /etc/mime.types
[...] #application/x-ruby rb [...] |
(Ceci n'est nécessaire que pour les fichiers .rb ; les fichiers Ruby avec l'extension .rbx sont prêts à l'emploi.)
Redémarrez ensuite Apache :
/etc/init.d/apache2 restart
14.1 Xcache
Xcache est un cache d'opcode PHP gratuit et ouvert pour la mise en cache et l'optimisation du code intermédiaire PHP. Il est similaire à d'autres cacheurs d'opcodes PHP, tels que eAccelerator et APC. Il est fortement recommandé d'en installer un pour accélérer votre page PHP.
Xcache peut être installé comme suit :
apt-get install php5-xcache
Maintenant, redémarrez Apache :
/etc/init.d/apache2 restart
14.2 PHP-FPM
À partir d'ISPConfig 3.0.5, il existe un mode PHP supplémentaire que vous pouvez sélectionner pour une utilisation avec Apache :PHP-FPM.
Pour utiliser PHP-FPM avec Apache, nous avons besoin du module Apache mod_fastcgi (veuillez ne pas le confondre avec mod_fcgid - ils sont très similaires, mais vous ne pouvez pas utiliser PHP-FPM avec mod_fcgid). Nous pouvons installer PHP-FPM et mod_fastcgi comme suit :
apt-get install libapache2-mod-fastcgi php5-fpm
Assurez-vous d'activer le module et de redémarrer Apache :
a2enmod actions fastcgi alias
 /etc/init.d/apache2 restart
14.3 Versions PHP supplémentaires
À partir d'ISPConfig 3.0.5, il est possible d'avoir plusieurs versions de PHP sur un serveur (sélectionnables via ISPConfig) qui peuvent être exécutées via FastCGI et PHP-FPM. Pour savoir comment créer des versions PHP supplémentaires (PHP-FPM et FastCGI) et comment configurer ISPConfig, veuillez consulter ce tutoriel :Comment utiliser plusieurs versions de PHP (PHP-FPM et FastCGI) avec ISPConfig 3 (Ubuntu 12.10) (fonctionne pour Ubuntu 13.04 également).
15 Installer Mailman
Depuis la version 3.0.4, ISPConfig permet également de gérer (créer/modifier/supprimer) des listes de diffusion Mailman. Si vous souhaitez utiliser cette fonctionnalité, installez Mailman comme suit :
apt-get install mailman
Sélectionnez au moins une langue, par exemple :
Langues à prendre en charge :<-- fr (anglais)
Liste de sites manquante <-- Ok
Avant de pouvoir démarrer Mailman, une première liste de diffusion appelée mailman doit être créée :
newlist mailman
example@unixlinux.online:~# newlist mailman
Saisissez l'adresse e-mail de la personne qui gère la liste : <-- l'adresse e-mail de l'administrateur, par ex. example@unixlinux.online
mot de passe initial mailman : <-- mot de passe admin pour la liste mailman
Pour finir la création de votre liste de mailing, vous devez modifier votre /etc/aliases (ou
l'équivalent) fichier en ajoutant les lignes suivantes, et éventuellement en exécutant le programme
`newaliases' :
## mailman mailing list
mailman : "|/var/lib/mailman/mail/mailman post mailman"
mailman-admin : "|/var/lib/mailman/mail/mailman admin mailman"
mailman-bounces : "|/var/lib/mailman/mail/mailman rebondit mailman"
mailman-confirm : "|/var/lib/mailman/mail/mailman confirm mailman"
mailman-join : "|/var/lib/mailman/mail/mailman join mailman"
mailman -congé : "|/var/lib/mailman/mail/mailman quitter mailman"
mailman-owner : "|/var/lib/mailman/mail/mailman owner mailman"
mailman-request : " |/var/lib/mailman/mail/mailman request mailman"
mailman-subscribe : "|/var/lib/mailman/mail/mailman subscribe mailm an"
mailman-unsubscribe : "|/var/lib/mailman/mail/mailman unsubscribe mailman"
Appuyez sur Entrée pour notifier le propriétaire du mailman... <-- ENTER
exemple@unixlinux.online :~#
Ouvrez ensuite /etc/aliases...
vi /etc/aliases
... et ajoutez les lignes suivantes :
[...] ## mailman mailing list mailman: "|/var/lib/mailman/mail/mailman post mailman" mailman-admin: "|/var/lib/mailman/mail/mailman admin mailman" mailman-bounces: "|/var/lib/mailman/mail/mailman bounces mailman" mailman-confirm: "|/var/lib/mailman/mail/mailman confirm mailman" mailman-join: "|/var/lib/mailman/mail/mailman join mailman" mailman-leave: "|/var/lib/mailman/mail/mailman leave mailman" mailman-owner: "|/var/lib/mailman/mail/mailman owner mailman" mailman-request: "|/var/lib/mailman/mail/mailman request mailman" mailman-subscribe: "|/var/lib/mailman/mail/mailman subscribe mailman" mailman-unsubscribe: "|/var/lib/mailman/mail/mailman unsubscribe mailman" |
Exécuter
newaliases
ensuite et relancez Postfix :
/etc/init.d/postfix restart
Enfin, nous devons activer la configuration de Mailman Apache :
ln -s /etc/mailman/apache.conf /etc/apache2/conf.d/mailman.conf
Cela définit l'alias /cgi-bin/mailman/ pour tous les vhosts Apache, ce qui signifie que vous pouvez accéder à l'interface d'administration Mailman pour une liste à http://
Sous http://
Redémarrez ensuite Apache :
/etc/init.d/apache2 restart
Démarrez ensuite le démon Mailman :
/etc/init.d/mailman start
Le serveur parfait - Ubuntu 13.04 (Apache2, BIND, Dovecot, ISPConfig 3) - Page 5
16 Installer PureFTPd et quota
PureFTPd et quota peuvent être installés avec la commande suivante :
apt-get install pure-ftpd-common pure-ftpd-mysql quota quotatool
Editez le fichier /etc/default/pure-ftpd-common...
vi /etc/default/pure-ftpd-common
... et assurez-vous que le mode de démarrage est défini sur autonome et définissez VIRTUALCHROOT=true :
[...] STANDALONE_OR_INETD=standalone [...] VIRTUALCHROOT=true [...] |
Nous configurons maintenant PureFTPd pour autoriser les sessions FTP et TLS. FTP est un protocole très peu sûr car tous les mots de passe et toutes les données sont transférés en texte clair. En utilisant TLS, toute la communication peut être cryptée, ce qui rend le FTP beaucoup plus sécurisé.
Si vous souhaitez autoriser les sessions FTP et TLS, exécutez
echo 1 > /etc/pure-ftpd/conf/TLS
Pour utiliser TLS, nous devons créer un certificat SSL. Je le crée dans /etc/ssl/private/, donc je crée d'abord ce répertoire :
mkdir -p /etc/ssl/private/
Ensuite, nous pouvons générer le certificat SSL comme suit :
openssl req -x509 -nodes -days 7300 -newkey rsa:2048 -keyout /etc/ssl/private/pure-ftpd.pem -out /etc/ssl/private/pure-ftpd.pem
Nom du pays (code à 2 lettres) [AU] :<-- Saisissez le nom de votre pays (par exemple, "DE").
Nom de l'état ou de la province (nom complet) [Some-State] :<-- Saisissez votre état ou Nom de la province.
Nom de la localité (par exemple, ville) [] :<-- Saisissez votre ville.
Nom de l'organisation (par exemple, société) [Internet Widgits Pty Ltd] :<-- Saisissez le nom de votre organisation (par exemple, le nom de votre entreprise).
Nom de l'unité organisationnelle (par exemple, section) [] :<-- Saisissez le nom de votre unité organisationnelle (par exemple, "Service informatique").
Nom commun (par exemple, VOTRE nom) [] :<-- Saisissez le nom de domaine complet du système (par exemple, "serveur1.exemple.com").
Adresse e-mail [] :<-- Saisissez votre adresse e-mail.
Modifiez les autorisations du certificat SSL :
chmod 600 /etc/ssl/private/pure-ftpd.pem
Redémarrez ensuite PureFTPd :
/etc/init.d/pure-ftpd-mysql restart
Modifiez /etc/fstab. Le mien ressemble à ceci (j'ai ajouté ,usrjquota=quota.user,grpjquota=quota.group,jqfmt=vfsv0 à la partition avec le point de montage /):
vi /etc/fstab
# /etc/fstab: static file system information. # # Use 'blkid' to print the universally unique identifier for a # device; this may be used with UUID= as a more robust way to name devices # that works even if disks are added and removed. See fstab(5). # # <file system> <mount point> <type> <options> <dump> <pass> /dev/mapper/server1--vg-root / ext4 errors=remount-ro,usrjquota=quota.user,grpjquota=quota.group,jqfmt=vfsv0 0 1 # /boot was on /dev/sda1 during installation UUID=9b8299f1-b2a2-4231-9ba1-4540fad76b0f /boot ext2 defaults 0 2 /dev/mapper/server1--vg-swap_1 none swap sw 0 0 |
Pour activer le quota, exécutez ces commandes :
mount -o remount /
quotacheck -avugm
 quotaon -avug
17 Installer le serveur DNS BIND
BIND peut être installé comme suit :
apt-get install bind9 dnsutils
18 Installer Vlogger, Webalizer et AWstats
Vlogger, Webalizer et AWstats peuvent être installés comme suit :
apt-get install vlogger webalizer awstats geoip-database libclass-dbi-mysql-perl
Ouvrez ensuite /etc/cron.d/awstats...
vi /etc/cron.d/awstats
... et commentez tout ce qui se trouve dans ce fichier :
#MAILTO=root #*/10 * * * * www-data [ -x /usr/share/awstats/tools/update.sh ] && /usr/share/awstats/tools/update.sh # Generate static reports: #10 03 * * * www-data [ -x /usr/share/awstats/tools/buildstatic.sh ] && /usr/share/awstats/tools/buildstatic.sh |
19 Installer Jailkit
Jailkit n'est nécessaire que si vous souhaitez chrooter les utilisateurs SSH. Il peut être installé comme suit (important :Jailkit doit être installé avant ISPConfig - il ne peut pas être installé après !) :
apt-get install build-essential autoconf automake1.9 libtool flex bison debhelper binutils-gold
cd /tmp
 wget http://olivier.sessink.nl/jailkit/jailkit-2.15.tar.gz
 tar xvfz jailkit-2.15.tar.gz
 cd jailkit-2.15
 ./debian/rules binary
Vous pouvez maintenant installer le package Jailkit .deb comme suit :
cd ..
 dpkg -i jailkit_2.15-1_*.deb
 rm -rf jailkit-2.15*
20 Installer fail2ban
Ceci est facultatif mais recommandé, car le moniteur ISPConfig essaie d'afficher le journal :
apt-get install fail2ban
Pour que fail2ban surveille PureFTPd et Dovecot, créez le fichier /etc/fail2ban/jail.local :
vi /etc/fail2ban/jail.local
[pureftpd] enabled = true port = ftp filter = pureftpd logpath = /var/log/syslog maxretry = 3 [dovecot-pop3imap] enabled = true filter = dovecot-pop3imap action = iptables-multiport[name=dovecot-pop3imap, port="pop3,pop3s,imap,imaps", protocol=tcp] logpath = /var/log/mail.log maxretry = 5 [sasl] enabled = true port = smtp filter = sasl logpath = /var/log/mail.log maxretry = 3 |
Créez ensuite les deux fichiers de filtre suivants :
vi /etc/fail2ban/filter.d/pureftpd.conf
[Definition] failregex = .*pure-ftpd: \(.*@<HOST>\) \[WARNING\] Authentication failed for user.* ignoreregex = |
vi /etc/fail2ban/filter.d/dovecot-pop3imap.conf
[Definition] failregex = (?: pop3-login|imap-login): .*(?:Authentication failure|Aborted login \(auth failed|Aborted login \(tried to use disabled|Disconnected \(auth failed|Aborted login \(\d+ authentication attempts).*rip=(?P<host>\S*),.* ignoreregex = |
Redémarrez ensuite fail2ban :
/etc/init.d/fail2ban restart
The Perfect Server - Ubuntu 13.04 (Apache2, BIND, Dovecot, ISPConfig 3) - Page 6
21 Install SquirrelMail
To install the SquirrelMail webmail client, run
apt-get install squirrelmail
Configurez ensuite SquirrelMail :
squirrelmail-configure
Nous devons dire à SquirrelMail que nous utilisons Dovecot-IMAP/-POP3 :
SquirrelMail Configuration : Read: config.php (1.4.0)
---------------------------------------------------------
Main Menu --
1. Organization Preferences
2. Server Settings
3. Folder Defaults
4. General Options
5. Themes
6. Address Books
7. Message of the Day (MOTD)
8. Plugins
9. Database
10. Languages
D. Set pre-defined settings for specific IMAP servers
C Turn color on
S Save data
Q Quit
Command >> <-- D
SquirrelMail Configuration : Read: config.php
---------------------------------------------------------
While we have been building SquirrelMail, we have discovered some
preferences that work better with some servers that don't work so
well with others. If you select your IMAP server, this option will
set some pre-defined settings for that server.
Please note that you will still need to go through and make sure
everything is correct. Cela ne change pas tout. There are
only a few settings that this will change.
Please select your IMAP server:
bincimap = Binc IMAP server
courier = Courier IMAP server
cyrus = Cyrus IMAP server
dovecot = Dovecot Secure IMAP server
exchange = Microsoft Exchange IMAP server
hmailserver = hMailServer
macosx = Mac OS X Mailserver
mercury32 = Mercury/32
uw = University of Washington's IMAP server
gmail = IMAP access to Google mail (Gmail) accounts
quit = Do not change anything
Command >> <-- dovecot
SquirrelMail Configuration : Read: config.php
---------------------------------------------------------
While we have been building SquirrelMail, we have discovered some
preferences that work better with some servers that don't work so
well with others. If you select your IMAP server, this option will
set some pre-defined settings for that server.
Please note that you will still need to go through and make sure
everything is correct. Cela ne change pas tout. There are
only a few settings that this will change.
Please select your IMAP server:
bincimap = Binc IMAP server
courier = Courier IMAP server
cyrus = Cyrus IMAP server
dovecot = Dovecot Secure IMAP server
exchange = Microsoft Exchange IMAP server
hmailserver = hMailServer
macosx = Mac OS X Mailserver
mercury32 = Mercury/32
uw = University of Washington's IMAP server
gmail = IMAP access to Google mail (Gmail) accounts
quit = Do not change anything
Command >> dovecot
imap_server_type = dovecot
default_folder_prefix =
trash_folder = Trash
sent_folder = Sent
draft_folder = Drafts
show_prefix_option = false
default_sub_of_inbox = false
show_co ntain_subfolders_option = false
optional_delimiter = detect
delete_folder = false
Press any key to continue... <-- press a key
SquirrelMail Configuration : Read: config.php (1.4.0)
---------------------------------------------------------
Main Menu --
1. Organization Preferences
2. Server Settings
3. Folder Defaults
4. General Options
5. Themes
6. Address Books
7. Message of the Day (MOTD)
8. Plugins
9. Database
10. Languages
D. Set pre-defined settings for specific IMAP servers
C Turn color on
S Save data
Q Quit
Command >> <-- S
SquirrelMail Configuration : Read: config.php (1.4.0)
---------------------------------------------------------
Main Menu --
1. Organization Preferences
2. Server Settings
3. Folder Defaults
4 . General Options
5. Themes
6. Address Books
7. Message of the Day (MOTD)
8. Plugins
9. Database
10. Languages
D. Set pre-defined settings for specific IMAP servers
C Turn color on
S Save data
Q Quit
Command >> <-- Q
Now we will configure SquirrelMail so that you can use it from within your web sites (created through ISPConfig) by using the /squirrelmail or /webmail aliases. So if your website is www.example.com, you will be able to access SquirrelMail using www.example.com/squirrelmail or www.example.com/webmail.
SquirrelMail's Apache configuration is in the file /etc/squirrelmail/apache.conf, but this file isn't loaded by Apache because it is not in the /etc/apache2/conf.d/ directory. Therefore we create a symlink called squirrelmail.conf in the /etc/apache2/conf.d/ directory that points to /etc/squirrelmail/apache.conf and reload Apache afterwards:
cd /etc/apache2/conf.d/
 ln -s ../../squirrelmail/apache.conf squirrelmail.conf
 /etc/init.d/apache2 reload
Ouvrez maintenant /etc/apache2/conf.d/squirrelmail.conf...
vi /etc/apache2/conf.d/squirrelmail.conf
... and add the following lines to the
[...]
<Directory /usr/share/squirrelmail>
  Options FollowSymLinks
  <IfModule mod_php5.c>
    AddType application/x-httpd-php .php
    php_flag magic_quotes_gpc Off
    php_flag track_vars On
    php_admin_flag allow_url_fopen Off
    php_value include_path .
    php_admin_value upload_tmp_dir /var/lib/squirrelmail/tmp
    php_admin_value open_basedir /usr/share/squirrelmail:/etc/squirrelmail:/var/lib/squirrelmail:/etc/hostname:/etc/mailname
    php_flag register_globals off
  </IfModule>
  <IfModule mod_dir.c>
    DirectoryIndex index.php
  </IfModule>

  # access to configtest is limited by default to prevent information leak
  <Files configtest.php>
    order deny,allow
    deny from all
    allow from 127.0.0.1
  </Files>
</Directory>
[...] |
Créez le répertoire /var/lib/squirrelmail/tmp...
mkdir /var/lib/squirrelmail/tmp
... et faites en sorte qu'il appartienne à l'utilisateur www-data :
chown www-data /var/lib/squirrelmail/tmp
Recharger Apache :
/etc/init.d/apache2 reload
C'est déjà fait - /etc/apache2/conf.d/squirrelmail.conf définit un alias appelé /squirrelmail qui pointe vers le répertoire d'installation de SquirrelMail /usr/share/squirrelmail.
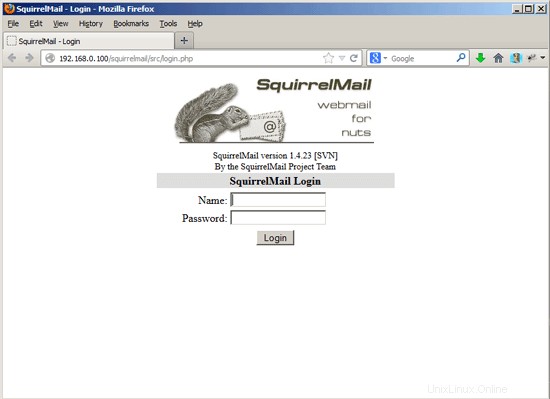
Vous pouvez désormais accéder à SquirrelMail depuis votre site Web comme suit :
http://192.168.0.100/squirrelmail
 http://www.example.com/squirrelmail
You can also access it from the ISPConfig control panel vhost (after you have installed ISPConfig, see the next chapter) as follows (this doesn't need any configuration in ISPConfig):
http://server1.example.com:8080/squirrelmail
If you'd like to use the alias /webmail instead of /squirrelmail, simply open /etc/apache2/conf.d/squirrelmail.conf...
vi /etc/apache2/conf.d/squirrelmail.conf
... and add the line Alias /webmail /usr/share/squirrelmail:
Alias /squirrelmail /usr/share/squirrelmail Alias /webmail /usr/share/squirrelmail [...] |
Then reload Apache:
/etc/init.d/apache2 reload
Now you can access Squirrelmail as follows:
http://192.168.0.100/webmail
http://www.example.com/webmail
http://server1.example.com:8080/webmail (after you have installed ISPConfig, see the next chapter)
If you'd like to define a vhost like webmail.example.com where your users can access SquirrelMail, you'd have to add the following vhost configuration to /etc/apache2/conf.d/squirrelmail.conf:
vi /etc/apache2/conf.d/squirrelmail.conf
[...] <VirtualHost 1.2.3.4:80> DocumentRoot /usr/share/squirrelmail ServerName webmail.example.com </VirtualHost> |
Make sure you replace 1.2.3.4 with the correct IP address of your server. Of course, there must be a DNS record for webmail.example.com that points to the IP address that you use in the vhost configuration. Also make sure that the vhost webmail.example.com does not exist in ISPConfig (otherwise both vhosts will interfere with each other!).
Now reload Apache...
/etc/init.d/apache2 reload
... and you can access SquirrelMail under http://webmail.example.com!
22 Install ISPConfig 3
To install ISPConfig 3 from the latest released version, do this:
cd /tmp
 wget http://www.ispconfig.org/downloads/ISPConfig-3-stable.tar.gz
 tar xfz ISPConfig-3-stable.tar.gz
 cd ispconfig3_install/install/
La prochaine étape consiste à exécuter
php -q install.php
This will start the ISPConfig 3 installer. The installer will configure all services like Postfix, Dovecot, etc. for you. A manual setup as required for ISPConfig 2 (perfect setup guides) is not necessary.
example@unixlinux.online:/tmp/ispconfig3_install/install# php -q install.php
--------------------------------------------------------------------------------
_____ ___________ _____ __ _ ____
|_ _/ ___| ___ \ / __ \ / _(_) /__ \
| | \ `--.| |_/ / | / \/ ___ _ __ | |_ _ __ _ _/ /
| | `--. \ __/ | | / _ \| '_ \| _| |/ _` | |_ |
_| |_/\__/ / | | \__/\ (_) | | | | | | | (_| | ___\ \
\___/\____/\_| \____/\___/|_| |_|_| |_|\__, | \____/
__/ |
|___/
--------------------------------------------------------------------------------
>> Initial configuration
Operating System: 13.04 UNKNOWN
Following will be a few questions for primary configuration so be careful.
Default values are in [brackets] and can be accepted with
Tap in "quit" (without the quotes) to stop the installer.
Select language (en,de) [en]: <-- ENTER
Installation mode (standard,expert) [standard]: <-- ENTER
Full qualified hostname (FQDN) of the server, eg server1.domain.tld [server1.example.com]: <-- ENTER
MySQL server hostname [localhost]: <-- ENTER
MySQL root username [root]: <-- ENTER
MySQL root password []: <-- yourrootsqlpassword
MySQL database to create [dbispconfig]: <-- ENTER
MySQL charset [utf8]: <-- ENTER
Generating a 4096 bit RSA private key
............................................................................++
.....................++
writing new private key to 'smtpd.key'
-----
You are about to be asked to enter information that will be incorporated
into your certificate request.
What you are about to enter is what is called a Distinguished Name or a DN.
There are quite a few fields but you can leave some blank
For some fields there will be a default value,
If you enter '.', the field will be left blank.
-----
Country Name (2 letter code) [AU]: <-- ENTER
State or Province Name (full name) [Some-State]: <-- ENTER
Locality Name (eg, city) []: <-- ENTER
Organization Name (eg, company) [Internet Widgits Pty Ltd]: <-- ENTER
Organizational Unit Na me (eg, section) []: <-- ENTER
Common Name (e.g. server FQDN or YOUR name) []: <-- ENTER
Email Address []: <-- ENTER
Configuring Jailkit
Configuring Dovecot
Configuring Spamassassin
Configuring Amavisd
Configuring Getmail
Configuring Pureftpd
Configuring BIND
Configuring Apache
Configuring Vlogger
Configuring Apps vhost
Configuring Bastille Firewall
Configuring Fail2ban
Installing ISPConfig
ISPConfig Port [8080]: <-- ENTER
Do you want a secure (SSL) connection to the ISPConfig web interface (y,n) [y]: <-- ENTER
Generating RSA private key, 4096 bit long modulus
..........++
......++
e is 65537 (0x10001)
You are about to be asked to enter information that will be incorporated
into your certificate request.
What you are about to enter is what is called a Distinguished Name or a DN.
There are quite a few fields but you can leave some blank
For some fields there will be a defau lt value,
If you enter '.', the field will be left blank.
-----
Country Name (2 letter code) [AU]: <-- ENTER
State or Province Name (full name) [Some-State]: <-- ENTER
Locality Name (eg, city) []: <-- ENTER
Organization Name (eg, company) [Internet Widgits Pty Ltd]: <-- ENTER
Organizational Unit Name (eg, section) []: <-- ENTER
Common Name (e.g. server FQDN or YOUR name) []: <-- ENTER
Email Address []: <-- ENTER
Please enter the following 'extra' attributes
to be sent with your certificate request
A challenge password []: <-- ENTER
An optional company name []: <-- ENTER
writing RSA key
Configuring DBServer
Installing ISPConfig crontab
no crontab for root
no crontab for getmail
Restarting services ...
Rather than invoking init scripts through /etc/init.d, use the service(8)
utility, e.g. service mysql restart
Since the script you are attempting to invoke has been converted to an
Upstart job, you may also use the stop(8) and then start(8) utilities,
e.g. stop mysql ; start mysql. The restart(8) utility is also available.
mysql stop/waiting
mysql start/running, process 2817
* Stopping Postfix Mail Transport Agent postfix
/usr/sbin/postconf: warning: /etc/postfix/main.cf: undefined parameter: virtual_mailbox_limit_maps
...done.
* Starting Postfix Mail Transport Agent postfix
postconf: warning: /etc/postfix/main.cf: undefined parameter: virtual_mailbox_limit_maps
postconf: warning: /etc/postfix/main.cf: undefined parameter: virtual_mailbox_limit_maps
postconf: warning: /etc/postfix/main.cf: undefined parameter: virtual_mailbox_limit_maps
postconf: warning: /etc/postfix/main.cf: undefined parameter: virtual_mailbox_limit_maps
postconf: warning: /etc/postfix/main.cf: undefined parameter: virtual_mailbox_limit_maps
postconf: warning: /etc/postfix/main.cf: undefined parameter: virtual_mailbox_limit_maps
/usr/sbin/postconf: warning: /etc/postfix/main.cf: undefined parameter: virtual_mail box_limit_maps
/usr/sbin/postconf: warning: /etc/postfix/main.cf: undefined parameter: virtual_mailbox_limit_maps
/usr/sbin/postconf: warning: /etc/postfix/main.cf: undefined parameter: virtual_mailbox_limit_maps
/usr/sbin/postconf: warning: /etc/postfix/main.cf: undefined parameter: virtual_mailbox_limit_maps
/usr/sbin/postconf: warning: /etc/postfix/main.cf: undefined parameter: virtual_mailbox_limit_maps
/usr/sbin/postconf: warning: /etc/postfix/main.cf: undefined parameter: virtual_mailbox_limit_maps
/usr/sbin/postconf: warning: /etc/postfix/main.cf: undefined parameter: virtual_mailbox_limit_maps
/usr/sbin/postconf: warning: /etc/postfix/main.cf: undefined parameter: virtual_mailbox_limit_maps
/usr/sbin/postconf: warning: /etc/postfix/main.cf: undefined parameter: virtual_mailbox_limit_maps
/usr/sbin/postconf: warning: /etc/postfix/main.cf: undefined parameter: virtual_mailbox_limit_maps
/usr/sbin/postconf: warning: /etc/ postfix/main.cf: undefined parameter: virtual_mailbox_limit_maps
/usr/sbin/postconf: warning: /etc/postfix/main.cf: undefined parameter: virtual_mailbox_limit_maps
/usr/sbin/postconf: warning: /etc/postfix/main.cf: undefined parameter: virtual_mailbox_limit_maps
/usr/sbin/postconf: warning: /etc/postfix/main.cf: undefined parameter: virtual_mailbox_limit_maps
/usr/sbin/postconf: warning: /etc/postfix/main.cf: undefined parameter: virtual_mailbox_limit_maps
/usr/sbin/postconf: warning: /etc/postfix/main.cf: undefined parameter: virtual_mailbox_limit_maps
...done.
Stopping amavisd: amavisd-new.
Starting amavisd: amavisd-new.
* Stopping ClamAV daemon clamd
...done.
* Starting ClamAV daemon clamd
...done.
Rather than invoking init scripts through /etc/init.d, use the service(8)
utility, e.g. service dovecot restart
Since the script you are attempting to invoke has been converted to an
Upstart job, you may also use the stop(8) and then start(8) utilities,
e.g. stop dovecot ; start dovecot. The restart(8) utility is also available.
dovecot stop/waiting
dovecot start/running, process 3962
* Restarting web server apache2
[Fri Apr 26 00:55:00 2013] [warn] NameVirtualHost *:443 has no VirtualHosts
[Fri Apr 26 00:55:00 2013] [warn] NameVirtualHost *:80 has no VirtualHosts
[Fri Apr 26 00:55:01 2013] [warn] NameVirtualHost *:443 has no VirtualHosts
[Fri Apr 26 00:55:01 2013] [warn] NameVirtualHost *:80 has no VirtualHosts
... waiting ...done.
Restarting ftp server: Running: /usr/sbin/pure-ftpd-mysql-virtualchroot -l mysql:/etc/pure-ftpd/db/mysql.conf -l pam -A -b -u 1000 -D -H -Y 1 -E -8 UTF-8 -O clf:/var/log/pure-ftpd/transfer.log -B
Installation completed.
example@unixlinux.online:/tmp/ispconfig3_install/install#
The installer automatically configures all underlying services, so no manual configuration is needed.
You now also have the possibility to let the installer create an SSL vhost for the ISPConfig control panel, so that ISPConfig can be accessed using https:// instead of http://. To achieve this, just press ENTER when you see this question:Do you want a secure (SSL) connection to the ISPConfig web interface (y,n) [y]:.
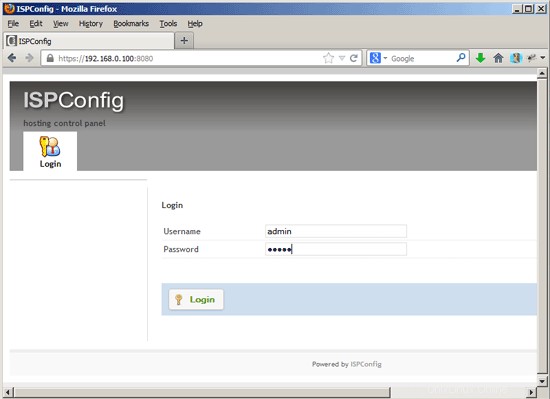
Afterwards you can access ISPConfig 3 under http(s)://server1.example.com:8080/ or http(s)://192.168.0.100:8080/ ( http or https depends on what you chose during installation). Connectez-vous avec le nom d'utilisateur admin et le mot de passe admin (vous devez changer le mot de passe par défaut après votre première connexion) :
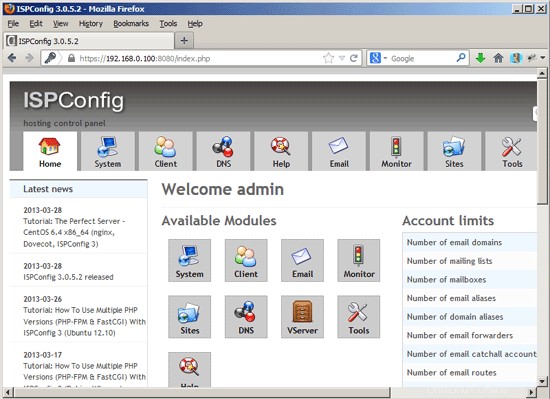
The system is now ready to be used.
22.1 ISPConfig 3 Manual
In order to learn how to use ISPConfig 3, I strongly recommend to download the ISPConfig 3 Manual.
On more than 300 pages, it covers the concept behind ISPConfig (admin, resellers, clients), explains how to install and update ISPConfig 3, includes a reference for all forms and form fields in ISPConfig together with examples of valid inputs, and provides tutorials for the most common tasks in ISPConfig 3. It also lines out how to make your server more secure and comes with a troubleshooting section at the end.
22.2 ISPConfig Monitor App For Android
Avec l'application ISPConfig Monitor, vous pouvez vérifier l'état de votre serveur et savoir si tous les services fonctionnent comme prévu. Vous pouvez vérifier les ports TCP et UDP et envoyer un ping à vos serveurs. In addition to that you can use this app to request details from servers that have ISPConfig installed (please note that the minimum installed ISPConfig 3 version with support for the ISPConfig Monitor App is 3.0.3.3! ); these details include everything you know from the Monitor module in the ISPConfig Control Panel (e.g. services, mail and system logs, mail queue, CPU and memory info, disk usage, quota, OS details, RKHunter log, etc.), and of course, as ISPConfig is multiserver-capable, you can check all servers that are controlled from your ISPConfig master server.
Pour obtenir des instructions de téléchargement et d'utilisation, veuillez visiter http://www.ispconfig.org/ispconfig-3/ispconfig-monitor-app-for-android/.
23 Additional Notes
23.1 OpenVZ
If the Ubuntu server that you've just set up in this tutorial is an OpenVZ container (virtual machine), you should do this on the host system (I'm assuming that the ID of the OpenVZ container is 101 - replace it with the correct VPSID on your system):
VPSID=101
 for CAP in CHOWN DAC_READ_SEARCH SETGID SETUID NET_BIND_SERVICE NET_ADMIN SYS_CHROOT SYS_NICE CHOWN DAC_READ_SEARCH SETGID SETUID NET_BIND_SERVICE NET_ADMIN SYS_CHROOT SYS_NICE
 do
   vzctl set $VPSID --capability ${CAP}:on --save
 done
24 Links
- Ubuntu:http://www.ubuntu.com/
- ISPConfig:http://www.ispconfig.org/