Chef est une plateforme d'automatisation qui configure et gère votre infrastructure. Il transforme l'infrastructure en code. Il s'agit d'un outil de gestion de configuration basé sur Ruby. Cette plateforme d'automatisation se compose d'un poste de travail Chef, d'un serveur Chef et de clients Chef qui sont les nœuds gérés par le serveur Chef. Tous les fichiers de configuration, recettes, livres de cuisine, modèles, etc. du chef sont créés et testés sur le poste de travail Chef et sont téléchargés sur le serveur Chef, puis il les distribue sur tous les nœuds possibles enregistrés au sein des organisations. C'est un cadre d'automatisation idéal pour Ceph et OpenStack. Non seulement cela nous donne un contrôle total, mais c'est super facile à utiliser.
Dans cet article, j'explique les étapes que j'ai suivies pour implémenter un environnement d'automatisation Chef sur mes serveurs CentOS 7.
Pré-requis
- Il est recommandé d'avoir un nom d'hôte FQDN
- Chef ne prend en charge que l'architecture 64 bits
- Des configurations appropriées de réseau/pare-feu/hôtes sont recommandées
Comment fonctionne Chef ?
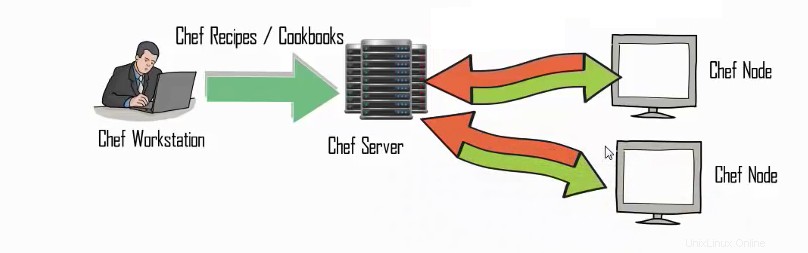
Chef comprend un poste de travail configuré pour développer les recettes et les livres de cuisine. Il est également configuré pour exécuter le couteau et se synchronise avec le chef-repo pour le maintenir à jour. Il aide à configurer la politique organisationnelle, y compris la définition des rôles et des environnements et la garantie que les données critiques sont stockées dans des sacs de données. Une fois ces recettes/livres de cuisine testés dans les postes de travail, nous pouvons les télécharger sur notre serveur Chef. Le serveur Chef stocke ces recettes et les attribue aux nœuds en fonction de leurs besoins. Fondamentalement, les nœuds communiquent uniquement avec le serveur chef et prennent des instructions et des recettes à partir de là.
Dans ma configuration de démonstration, j'ai trois serveurs à savoir
- chefserver.test20.com - Chef serveur
- chefwork.test20.com - Poste de travail Chef
- chefnode.test20.com - Noeud Chef
Commençons par construire Workstation.
Configurer un poste de travail
Tout d'abord, connectez-vous à notre serveur chefwork, puis téléchargez le package de développement Chef. Une fois le package téléchargé, nous pouvons installer le package à l'aide de la commande rpm.
root@chefwork ~]# wget https://packages.chef.io/stable/el/7/chefdk-0.14.25-1.el7.x86_64.rpm
--2016-05-20 03:47:31-- https://packages.chef.io/stable/el/7/chefdk-0.14.25-1.el7.x86_64.rpm
Resolving packages.chef.io (packages.chef.io)... 75.126.118.188, 108.168.243.150
Connecting to packages.chef.io (packages.chef.io)|75.126.118.188|:443... connected.
HTTP request sent, awaiting response... 302
Location: https://akamai.bintray.com/87/879656c7736ef2a061937c1f45c623e99fd57aaa2f6d802e9799d333d7e5342f?__gda__=exp=1463716772~hmac=ef9ce287129ab2f035449b76a1adc32b7bf8cae37f018f59da5a642d3e2650fc&response-content-disposition=attachment%3Bfilename%3D%22chefdk-0.14.25-1.el7.x86_64.rpm%22&response-content-type=application%2Foctet-stream [following]
--2016-05-20 03:47:32-- https://akamai.bintray.com/87/879656c7736ef2a061937c1f45c623e99fd57aaa2f6d802e9799d333d7e5342f?__gda__=exp=1463716772~hmac=ef9ce287129ab2f035449b76a1adc32b7bf8cae37f018f59da5a642d3e2650fc&response-content-disposition=attachment%3Bfilename%3D%22chefdk-0.14.25-1.el7.x86_64.rpm%22&response-content-type=application%2Foctet-stream
Resolving akamai.bintray.com (akamai.bintray.com)... 104.123.250.232
Connecting to akamai.bintray.com (akamai.bintray.com)|104.123.250.232|:443... connected.
HTTP request sent, awaiting response... 200 OK
Length: 143927478 (137M) [application/octet-stream]
Saving to: ‘chefdk-0.14.25-1.el7.x86_64.rpm’

100%[====================================================================================================>] 14,39,27,478 2.52MB/s in 55s

2016-05-20 03:48:29 (2.49 MB/s) - ‘chefdk-0.14.25-1.el7.x86_64.rpm’ saved [143927478/143927478]

[root@chefwork ~]# rpm -ivh chefdk-0.14.25-1.el7.x86_64.rpm
warning: chefdk-0.14.25-1.el7.x86_64.rpm: Header V4 DSA/SHA1 Signature, key ID 83ef826a: NOKEY
Preparing... ################################# [100%]
Updating / installing...
1:chefdk-0.14.25-1.el7 ################################# [100%]
Thank you for installing Chef Development Kit!
Qu'est-ce que ChefDK ?
Le kit de développement Chef contient tout ce dont vous avez besoin pour démarrer avec Chef, ainsi que les outils essentiels à la gestion du code.
- Il contient un nouvel outil de ligne de commande, "chef"
- Le gestionnaire de dépendances de livres de cuisine Berkshelf
- Cadre de test d'intégration Test Kitchen.
- ChefSpec pour tester la syntaxe du livre de recettes
- Foodcritic, un outil d'analyse de code statique sur les livres de cuisine.
- Il dispose également de tous les outils Chef tels que Chef Client, Knife, Ohai et Chef Zero
Commençons par créer quelques recettes dans le poste de travail et testons-les localement pour nous assurer qu'elles fonctionnent.
Créez un dossier nommé chef-repo sur /root/ et à l'intérieur de ce dossier, nous pouvons créer nos recettes.
[root@chefwork ~]# mkdir chef-repo
[root@chefwork ~]# cd chef-repo

Creating a recipe called hello.rb.
[root@chefwork chef-repo]# vim hello.rb
[root@chefwork chef-repo]#
[root@chefwork chef-repo]# cat hello.rb
file '/etc/motd' do
content 'Welcome to Chef'
end
Cette recette hello.rb crée un fichier nommé /etc/motd avec le contenu "Bienvenue chez Chef". Cette recette utilise le fichier de ressources pour améliorer cette tâche. Nous pouvons maintenant exécuter cette recette pour vérifier son fonctionnement.
[root@chefwork chef-repo]# chef-apply hello.rb
Recipe: (chef-apply cookbook)::(chef-apply recipe)
* file[/etc/motd] action create (up to date)

Confirm the recipe execution:

[root@chefwork chef-repo]# cat /etc/motd
Welcome to Chef
Suppression du fichier
Nous pouvons modifier notre fichier de recette pour supprimer le fichier créé et exécuter en utilisant la commande chef-apply comme ci-dessous :
[root@chefwork chef-repo]# cat hello.rb
file '/etc/motd' do
action :delete
end

[root@chefwork chef-repo]# chef-apply hello.rb
Recipe: (chef-apply cookbook)::(chef-apply recipe)
* file[/etc/motd] action delete
- delete file /etc/motd
Installer un paquet
Nous modifions notre fichier de recette pour installer le package httpd sur notre serveur et copions un fichier index.html à la racine du document par défaut pour confirmer l'installation. Le package et les ressources de service sont utilisés pour implémenter cela. L'action par défaut pour une ressource de package est l'installation, nous n'avons donc pas besoin de spécifier cette action séparément.
[root@chefwork chef-conf]# cat hello.rb
package 'httpd'
service 'httpd' do
action [:enable, :start]
end

file '/var/www/html/index.html' do
content 'Welcome to Apache in Chef'
end
[root@chefwork chef-conf]# chef-apply hello.rb
Recipe: (chef-apply cookbook)::(chef-apply recipe)
* yum_package[httpd] action install
 - install version 2.4.6-40.el7.centos.1 of package httpd
 * service[httpd] action enable
 - enable service service[httpd]
 * service[httpd] action start
 - start service service[httpd]
 * file[/var/www/html/index.html] action create (up to date)
L'exécution de la commande décrit clairement chaque instance de la recette. Il installe le package Apache, active et démarre le service httpd sur le serveur. Et il crée un fichier index.html dans la racine du document par défaut avec le contenu "Bienvenue dans Apache dans Chef". Nous pouvons donc le vérifier en exécutant l'adresse IP du serveur dans le navigateur.

Créer des livres de cuisine
Nous pouvons maintenant créer notre premier livre de recettes, créer un dossier appelé chef-repo sous le répertoire /root et exécuter la commande "chef generate cookbook [cookbook name]" pour générer notre livre de recettes.
root@chefwork chef-repo]# mkdir cookbooks
[root@chefwork chef-repo]# cd cookbooks/
[root@chefwork cookbooks]# chef generate cookbook httpd_deploy
Installing Cookbook Gems:
Compiling Cookbooks...
Recipe: code_generator::cookbook
* directory[/root/chef-repo/cookbook/httpd_deploy] action create
- create new directory /root/chef-repo/cookbook/httpd_deploy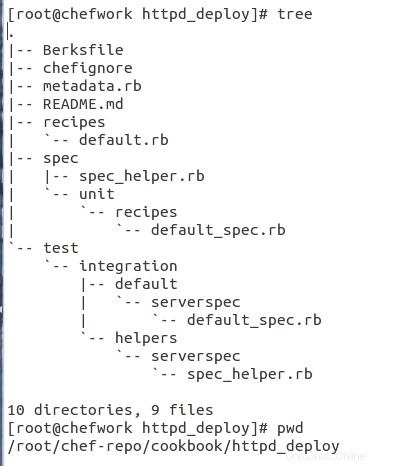
Il s'agit de la structure de fichiers du livre de recettes créé, voyons l'utilisation de ces fichiers/dossiers à l'intérieur du livre de recettes un par un.
Fichier Berks :C'est le fichier de configuration, qui indique principalement à BerkShelf quelles sont les dépendances du livre de recettes, qui peuvent être spécifiées directement dans ce fichier ou indirectement via metadata.rb. Il indique également à Berkshelf où rechercher ces dépendances.
Chefignore :Il indique à Chef quels fichiers doivent être ignorés lors du téléchargement d'un livre de recettes sur le serveur Chef.
metadata.rb :Il contient des méta-informations sur votre livre de cuisine, telles que le nom, les contacts ou la description. Il peut également indiquer les dépendances du livre de recettes.
LISEZMOI.md :Il contient le point d'entrée de la documentation pour le dépôt.
Recettes :Contient les recettes du livre de cuisine. Cela commence par l'exécution du fichier default.rb.
default.rb :Le format de recette par défaut.
spécifications :Il stockera les cas de tests unitaires de vos bibliothèques.
tester :Il stockera les cas de test unitaires de vos recettes.
Création d'un modèle
Ensuite, nous allons créer un fichier modèle pour nous-mêmes. Plus tôt, nous avons créé un fichier avec un certain contenu, mais cela ne peut pas être adapté à nos recettes et à nos structures de livre de cuisine. Voyons donc comment créer un modèle.
[root@chefwork cookbook]# chef generate template httpd_deploy index.html
Installing Cookbook Gems:
Compiling Cookbooks...
Recipe: code_generator::template
* directory[./httpd_deploy/templates/default] action create
- create new directory ./httpd_deploy/templates/default
* template[./httpd_deploy/templates/default/index.html.erb] action create
- create new file ./httpd_deploy/templates/default/index.html.erb
- update content in file ./httpd_deploy/templates/default/index.html.erb from none to e3b0c4
(diff output suppressed by config)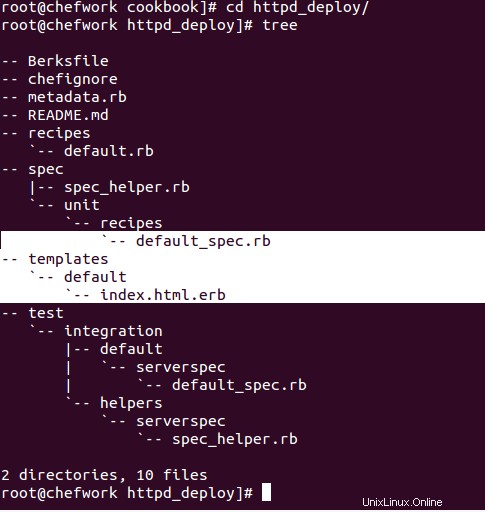
Maintenant, si vous voyez notre structure de fichiers de livre de cuisine, il y a un dossier créé avec le modèle de nom avec index.html.erb dossier. Nous pouvons modifier notre fichier de modèle index.html.erb et l'ajouter à notre recette comme ci-dessous :
root@chefwork default]# cat index.html.erb
Welcome to Chef Apache Deployment
[root@chefwork default]# pwd
/root/chef-repo/cookbook/httpd_deploy/templates/default
Création de la recette avec ce modèle
[root@chefwork recipes]# pwd
/root/chef-repo/cookbook/httpd_deploy/recipes
[root@chefwork recipes]# cat default.rb
#
# Cookbook Name:: httpd_deploy
# Recipe:: default
#
# Copyright (c) 2016 The Authors, All Rights Reserved.
package 'httpd'
service 'httpd' do
action [:enable, :start]
end

template '/var/www/html/index.html' do
 source 'index.html.erb'
end
Revenez maintenant à notre dossier chef-repo et exécutez/testez notre recette sur notre poste de travail.
[root@chefwork chef-repo]# chef-client --local-mode --runlist 'recipe[httpd_deploy]'
[2016-05-20T05:44:40+00:00] WARN: No config file found or specified on command line, using command line options.
Starting Chef Client, version 12.10.24
resolving cookbooks for run list: ["httpd_deploy"]
Synchronizing Cookbooks:
- httpd_deploy (0.1.0)
Installing Cookbook Gems:
Compiling Cookbooks...
Converging 3 resources
Recipe: httpd_deploy::default
* yum_package[httpd] action install
 - install version 2.4.6-40.el7.centos.1 of package httpd
 * service[httpd] action enable
 - enable service service[httpd]
 * service[httpd] action start
 - start service service[httpd]
* template[/var/www/html/index.html] action create
 - update content in file /var/www/html/index.html from 152204 to 748cbd
 --- /var/www/html/index.html 2016-05-20 04:18:38.553231745 +0000
 +++ /var/www/html/.chef-index.html20160520-20425-1bez4qs 2016-05-20 05:44:47.344848833 +0000
 @@ -1,2 +1,2 @@
 -Welcome to Apache in Chef
 +Welcome to Chef Apache Deployment

Running handlers:
Running handlers complete
Chef Client finished, 4/4 resources updated in 06 seconds

[root@chefwork chef-repo]# cat /var/www/html/index.html
Welcome to Chef Apache Deployment
Selon notre recette, Apache est installé sur notre poste de travail, le service est démarré et activé au démarrage. Et un fichier de modèle a été créé sur notre racine de document par défaut.
Nous avons maintenant testé notre station de travail. Il est temps de configurer le serveur Chef.
Configuration du serveur Chef
Tout d'abord, connectez-vous à notre serveur Chef "chefserver.test20.com" et téléchargez le package du serveur chef compatible avec notre version OS.
[root@chefserver ~]# wget https://packages.chef.io/stable/el/7/chef-server-core-12.6.0-1.el7.x86_64.rpm
--2016-05-20 07:23:46-- https://packages.chef.io/stable/el/7/chef-server-core-12.6.0-1.el7.x86_64.rpm
Resolving packages.chef.io (packages.chef.io)... 75.126.118.188, 108.168.243.150
Connecting to packages.chef.io (packages.chef.io)|75.126.118.188|:443... connected.
HTTP request sent, awaiting response... 302
Location: https://akamai.bintray.com/5a/5a36d0ffa692bf788e90315171582a758d4c5d8033a892dca9a81d3c03c44d14?__gda__=exp=1463729747~hmac=86e28bf2d5197154c84b571330b4c897006c2cb7f14cc9fc386c62d8b6e34c2d&response-content-disposition=attachment%3Bfilename%3D%22chef-server-core-12.6.0-1.el7.x86_64.rpm%22&response-content-type=application%2Foctet-stream [following]
--2016-05-20 07:23:47-- https://akamai.bintray.com/5a/5a36d0ffa692bf788e90315171582a758d4c5d8033a892dca9a81d3c03c44d14?__gda__=exp=1463729747~hmac=86e28bf2d5197154c84b571330b4c897006c2cb7f14cc9fc386c62d8b6e34c2d&response-content-disposition=attachment%3Bfilename%3D%22chef-server-core-12.6.0-1.el7.x86_64.rpm%22&response-content-type=application%2Foctet-stream
Resolving akamai.bintray.com (akamai.bintray.com)... 23.15.249.68
Connecting to akamai.bintray.com (akamai.bintray.com)|23.15.249.68|:443... connected.
HTTP request sent, awaiting response... 200 OK
Length: 481817688 (459M) [application/octet-stream]
Saving to: ‘chef-server-core-12.6.0-1.el7.x86_64.rpm’

100%[====================================================================================================>] 48,18,17,688 2.90MB/s in 3m 53s

[root@chefserver ~]# rpm -ivh chef-server-core-12.6.0-1.el7.x86_64.rpm
warning: chef-server-core-12.6.0-1.el7.x86_64.rpm: Header V4 DSA/SHA1 Signature, key ID 83ef826a: NOKEY
Preparing... ################################# [100%]
Updating / installing...
1:chef-server-core-12.6.0-1.el7 ################################# [100%]
Maintenant, notre serveur Chef est installé. Mais nous devons reconfigurer le serveur Chef pour activer et démarrer tous les services qui sont composés dans le serveur Chef. Nous pouvons exécuter cette commande pour reconfigurer.
root@chefserver ~]# chef-server-ctl reconfigure
Starting Chef Client, version 12.10.26
resolving cookbooks for run list: ["private-chef::default"]
Synchronizing Cookbooks:
- enterprise (0.10.0)
- apt (2.9.2)
- yum (3.10.0)
- openssl (4.4.0)
- chef-sugar (3.3.0)
- packagecloud (0.0.18)
- runit (1.6.0)
- private-chef (0.1.0)
Installing Cookbook Gems:
Compiling Cookbooks...
[2016-05-19T02:38:37+00:00] WARN: Chef::Provider::AptRepository already exists! Cannot create deprecation class for LWRP provider apt_repository from cookbook apt
Chef Client finished, 394/459 resources updated in 04 minutes 05 seconds
Chef Server Reconfigured!
Veuillez confirmer l'état du service et ses pid en exécutant cette commande.
[root@chefserver ~]# chef-server-ctl status
run: bookshelf: (pid 6140) 162s; run: log: (pid 6156) 162s
run: nginx: (pid 6051) 165s; run: log: (pid 6295) 156s
run: oc_bifrost: (pid 5987) 167s; run: log: (pid 6022) 167s
run: oc_id: (pid 6038) 165s; run: log: (pid 6042) 165s
run: opscode-erchef: (pid 6226) 159s; run: log: (pid 6214) 161s
run: opscode-expander: (pid 6102) 162s; run: log: (pid 6133) 162s
run: opscode-solr4: (pid 6067) 164s; run: log: (pid 6095) 163s
run: postgresql: (pid 5918) 168s; run: log: (pid 5960) 168s
run: rabbitmq: (pid 5876) 168s; run: log: (pid 5869) 169s
run: redis_lb: (pid 5795) 290s; run: log: (pid 6280) 156s
Hourra!! Notre Chef Serveur est prêt :). Nous pouvons maintenant installer la console de gestion pour obtenir une interface Web pour gérer notre serveur Chef.
Installation de la console de gestion pour Chef Server
Nous pouvons installer la console de gestion en exécutant simplement cette commande "chef-server-ctl install chef-manag e" du serveur chef.
[root@chefserver ~]# chef-server-ctl install chef-manage
Starting Chef Client, version 12.10.26
resolving cookbooks for run list: ["private-chef::add_ons_wrapper"]
Synchronizing Cookbooks:
- enterprise (0.10.0)
- apt (2.9.2)
- yum (3.10.0)
- openssl (4.4.0)
- runit (1.6.0)
- chef-sugar (3.3.0)
- packagecloud (0.0.18)
- private-chef (0.1.0)
Installing Cookbook Gems:
Compiling Cookbooks...
Converging 4 resources
Recipe: private-chef::add_ons_wrapper
* ruby_block[addon_install_notification_chef-manage] action nothing (skipped due to action :nothing)
* remote_file[/var/opt/opscode/local-mode-cache/chef-manage-2.3.0-1.el7.x86_64.rpm] action create
- create new file /var/opt/opscode/local-mode-cache/chef-manage-2.3.0-1.el7.x86_64.rpm
- update content in file /var/opt/opscode/local-mode-cache/chef-manage-2.3.0-1.el7.x86_64.rpm from none to 098cc4
(file sizes exceed 10000000 bytes, diff output suppressed)
* ruby_block[locate_addon_package_chef-manage] action run
- execute the ruby block locate_addon_package_chef-manage
* yum_package[chef-manage] action install
- install version 2.3.0-1.el7 of package chef-manage
* ruby_block[addon_install_notification_chef-manage] action create
- execute the ruby block addon_install_notification_chef-manage

Running handlers:
-- Installed Add-On Package: chef-manage
- #<Class:0x00000006032b80>::AddonInstallHandler
Running handlers complete
Chef Client finished, 4/5 resources updated in 02 minutes 39 seconds
Après avoir installé la console de gestion, nous devons reconfigurer le serveur chef pour redémarrer le serveur chef et ses services afin de mettre à jour ces modifications.
[root@chefserver ~]# opscode-manage-ctl reconfigure
To use this software, you must agree to the terms of the software license agreement.
Press any key to continue.
Type 'yes' to accept the software license agreement, or anything else to cancel.
yes
Starting Chef Client, version 12.4.1
resolving cookbooks for run list: ["omnibus-chef-manage::default"]
Synchronizing Cookbooks:
- omnibus-chef-manage
- chef-server-ingredient
- enterprise
Recipe: omnibus-chef-manage::default
* private_chef_addon[chef-manage] action create (up to date)
Recipe: omnibus-chef-manage::config
Running handlers:
Running handlers complete
Chef Client finished, 62/79 resources updated in 44.764229437 seconds
chef-manage Reconfigured!

[root@chefserver ~]# chef-server-ctl reconfigure
Maintenant que notre console de gestion est prête, nous devons configurer notre utilisateur administrateur pour gérer notre serveur Chef.
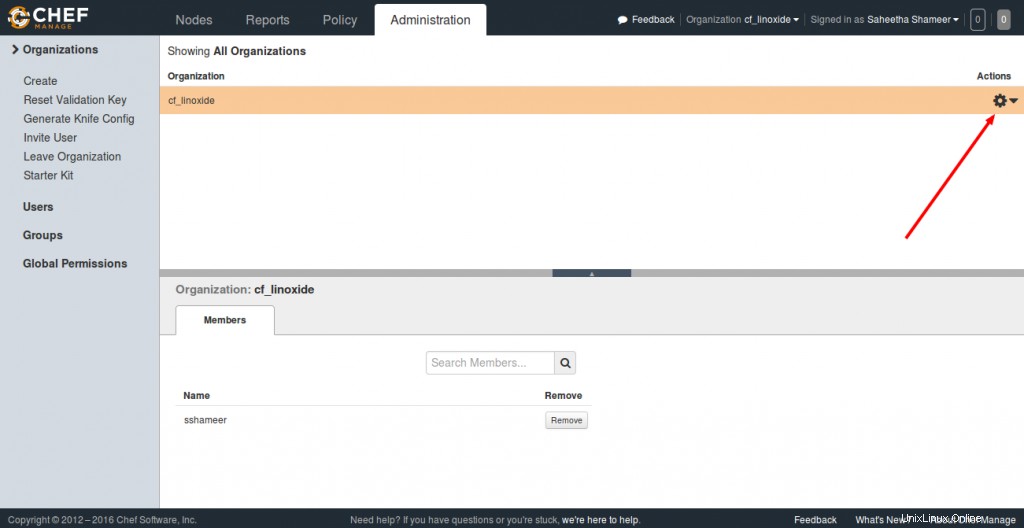
Création d'un utilisateur administrateur/d'une organisation
J'ai créé l'utilisateur administrateur nommé chefadmin avec une organisation linox sur mon serveur chef pour le gérer. Nous pouvons créer l'utilisateur en utilisant la commande chef chef-server-ctl user-create et l'organisation à l'aide de la commandechef-server-ctl org-create.
root@chefserver ~]# chef-server-ctl user-create chefadmin saheetha shameer saheetha@gmail.com 'chef123' --filename /root/.chef/chefadmin.pem
[root@chefserver ~]#

[root@chefserver .chef]# chef-server-ctl org-create linox Chef Linoxide --association_user chefadmin --filename /root/.chef/linoxvalidator.pem
Nos clés sont enregistrées dans le dossier /root/.chef dossier. Nous devons copier ces clés du serveur Chef vers le poste de travail pour lancer la communication entre notre serveur Chef et le poste de travail.
Copier les clés
Je copie mes clés d'utilisateur et de validateur du serveur Chef vers le poste de travail pour améliorer la connexion entre les serveurs.
[root@chefserver .chef]# scp chefadmin.pem root@139.162.35.39:/root/chef-repo/.chef/
The authenticity of host '139.162.35.39 (139.162.35.39)' can't be established.
ECDSA key fingerprint is 5b:0b:07:85:9a:fb:b6:59:51:07:7f:14:1b:07:07:f0.
Are you sure you want to continue connecting (yes/no)? yes
Warning: Permanently added '139.162.35.39' (ECDSA) to the list of known hosts.
root@139.162.35.39's password:
chefadmin.pem 100% 1678 1.6KB/s 00:00
[root@chefserver .chef]#

[root@chefserver .chef]# scp linoxvalidator.pem root@139.162.35.39:/root/chef-repo/.chef/
The authenticity of host '139.162.35.39 (139.162.35.39)' can't be established.
ECDSA key fingerprint is 5b:0b:07:85:9a:fb:b6:59:51:07:7f:14:1b:07:07:f0.
Are you sure you want to continue connecting (yes/no)? yes
Warning: Permanently added '139.162.35.39' (ECDSA) to the list of known hosts.
root@139.162.35.39's password:
linoxvalidator.pem 100% 1678 1.6KB/s 00:00
[root@chefserver .chef]#

Now login to our Management console for our Chef server with the user/password  "chefadmin" created.
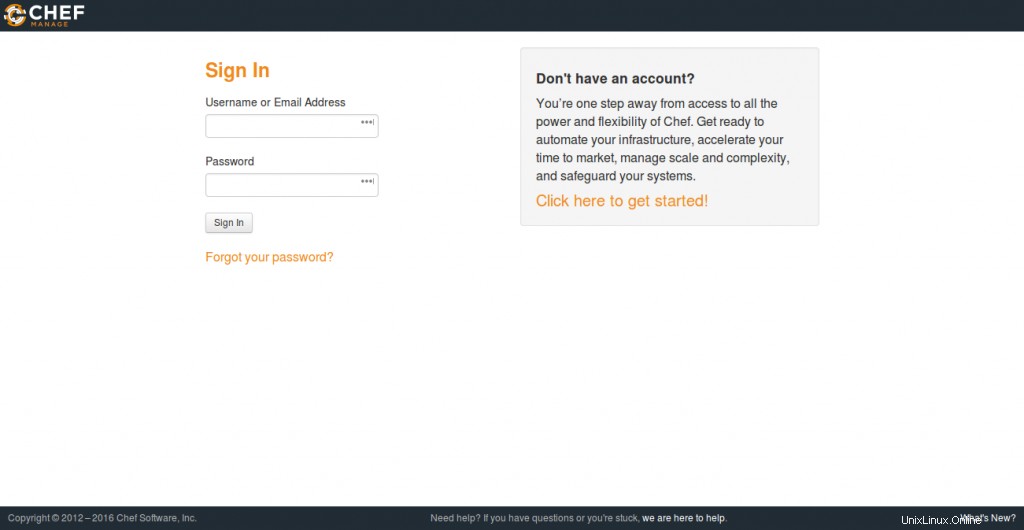
Il vous sera demandé de créer une organisation à partir du panneau lors de l'inscription. Créez-en simplement un autre.
Télécharger le kit de démarrage pour WorkStation
Choisissez l'une de vos organisations et téléchargez le kit de démarrage du serveur Chef vers notre poste de travail.
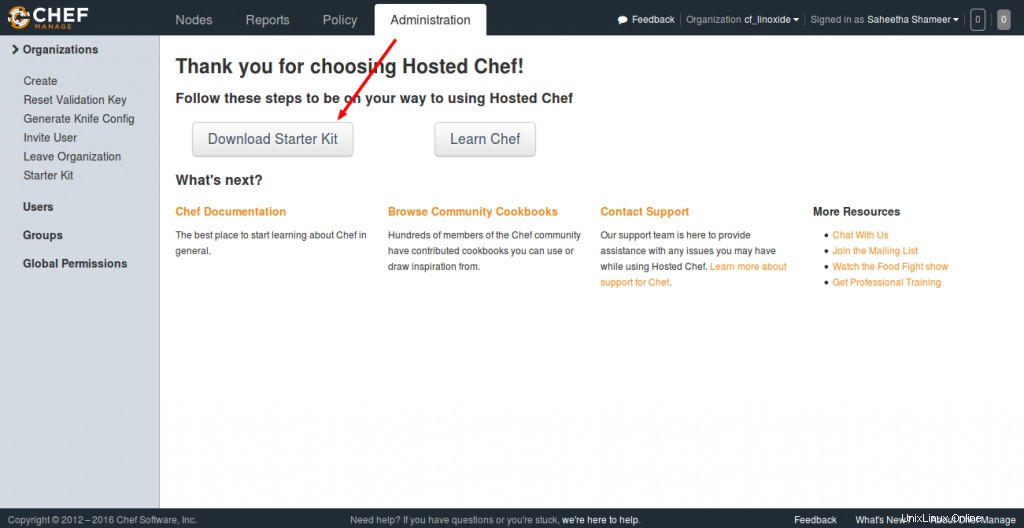
Après avoir téléchargé ce kit. Déplacez-le dans votre dossier Workstation / root et extrayez-le. Cela vous fournit un kit de démarrage par défaut pour démarrer avec votre serveur Chef. Il comprend un chef-repo.
root@chefwork ~]# ls
chef-starter.zip hello.rb
[root@chefwork~]# unzip chef-starter.zip
Archive: chef-starter.zip
creating: chef-repo/cookbooks/
creating: chef-repo/cookbooks/starter/
creating: chef-repo/cookbooks/starter/recipes/
inflating: chef-repo/cookbooks/starter/recipes/default.rb
creating: chef-repo/cookbooks/starter/files/
creating: chef-repo/cookbooks/starter/files/default/
inflating: chef-repo/cookbooks/starter/files/default/sample.txt
creating: chef-repo/cookbooks/starter/templates/
creating: chef-repo/cookbooks/starter/templates/default/
inflating: chef-repo/cookbooks/starter/templates/default/sample.erb
inflating: chef-repo/cookbooks/starter/metadata.rb
creating: chef-repo/cookbooks/starter/attributes/
inflating: chef-repo/cookbooks/starter/attributes/default.rb
inflating: chef-repo/cookbooks/chefignore
inflating: chef-repo/README.md
inflating: chef-repo/.gitignore
creating: chef-repo/.chef/
creating: chef-repo/roles/
inflating: chef-repo/.chef/knife.rb
inflating: chef-repo/roles/starter.rb
inflating: chef-repo/.chef/chefadmin.pem
inflating: chef-repo/.chef/ln_blog-validator.pem
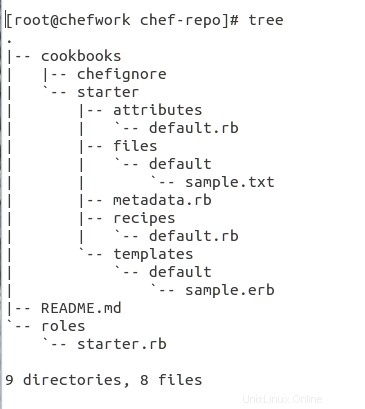
Il s'agit de la structure de fichiers du référentiel Chef téléchargé. Il contient toutes les structures de fichiers requises pour commencer.
Supermarché de livres de cuisine
Les livres de cuisine du chef sont disponibles dans le supermarché du livre de cuisine, nous pouvons aller au supermarché du chef ici. Téléchargez les livres de cuisine requis à partir de là. Je télécharge l'un des livres de recettes pour installer Apache à partir de là.
root@chefwork chef-repo]# knife cookbook site download learn_chef_httpd
Downloading learn_chef_httpd from Supermarket at version 0.2.0 to /root/chef-repo/learn_chef_httpd-0.2.0.tar.gz
Cookbook saved: /root/chef-repo/learn_chef_httpd-0.2.0.tar.gz

Extract this cookbook inside the "cookbooks" folder.

[root@chefwork chef-repo]# tar -xvf learn_chef_httpd-0.2.0.tar.gz

Tous les fichiers requis sont automatiquement créés sous ce livre de recettes. Nous n'avons pas eu besoin d'apporter de modifications. Vérifions notre description de recette dans notre dossier de recettes.
[root@chefwork recipes]# cat default.rb
#
# Cookbook Name:: learn_chef_httpd
# Recipe:: default
#
# Copyright (C) 2014
#
#
#
package 'httpd'

service 'httpd' do
 action [:enable, :start]
end

template '/var/www/html/index.html' do
 source 'index.html.erb'
end

service 'iptables' do
 action :stop
end
[root@chefwork recipes]#
[root@chefwork recipes]# pwd
/root/chef-repo/cookbooks/learn_chef_httpd/recipes
[root@chefwork recipes]#
Il nous suffit donc de télécharger ce livre de recettes sur notre serveur Chef car il a l'air parfait.
Validation de la connexion entre le serveur et le poste de travail
Avant de télécharger le livre de recettes, nous devons vérifier et confirmer la connexion entre notre serveur Chef et Workstation. Tout d'abord, assurez-vous d'avoir le bon fichier de configuration de Knife.
[root@chefwork .chef]# cat knife.rb
current_dir = File.dirname(__FILE__)
log_level :info
log_location STDOUT
node_name "chefadmin"
client_key "#{current_dir}/chefadmin.pem"
validation_client_name "linox-validator"
validation_key "#{current_dir}/linox-validator.pem"
chef_server_url "https://chefserver.test20.com:443/organizations/linox"

cookbook_path ["#{current_dir}/../cookbooks"]
Ce fichier de configuration se trouve à /root/chef-repo/.chef dossier. Les parties en surbrillance sont les principales choses à prendre en compte. Vous pouvez maintenant exécuter cette commande pour vérifier les connexions.
root@chefwork .chef]# knife client list
ERROR: SSL Validation failure connecting to host: chefserver.test20.com - SSL_connect returned=1 errno=0 state=error: certificate verify failed
ERROR: Could not establish a secure connection to the server.
Use `knife ssl check` to troubleshoot your SSL configuration.
If your Chef Server uses a self-signed certificate, you can use
`knife ssl fetch` to make knife trust the server's certificates.

Original Exception: OpenSSL::SSL::SSLError: SSL Error connecting to https://chefserver.test20.com/clients - SSL_connect returned=1 errno=0 state=error: certificate verify failed
Vous pouvez voir un rapport d'erreur SSL. Afin de corriger cette erreur, nous devons récupérer le certificat SSL pour notre serveur Chef et le stocker dans le dossier /root/.chef/trusted_certs. Nous pouvons le faire en exécutant cette commande.
root@chefwork .chef]# knife ssl fetch
WARNING: Certificates from chefserver.test20.com will be fetched and placed in your trusted_cert
directory (/root/chef-repo/.chef/trusted_certs).

Knife has no means to verify these are the correct certificates. You should
verify the authenticity of these certificates after downloading.

Adding certificate for chefserver.test20.com in /root/chef-repo/.chef/trusted_certs/chefserver_test20_com.crt

Verifying the SSL:

[root@chefwork .chef]# knife ssl check
Connecting to host chefserver.test20.com:443
Successfully verified certificates from `chefserver.test20.com'

[root@chefwork .chef]# knife client list
chefnode
linox-validator
[root@chefwork .chef]# knife user list
chefadmin
Télécharger le livre de recettes
Nous pouvons télécharger notre livre de cuisine sur notre serveur de chef à partir du poste de travail en utilisant la commande knife comme ci-dessous :
#knife livre de cuisine télécharger learn_chef_httpd
[root@chefwork cookbooks]# knife cookbook upload learn_chef_httpd
Uploading learn_chef_httpd [0.2.0]
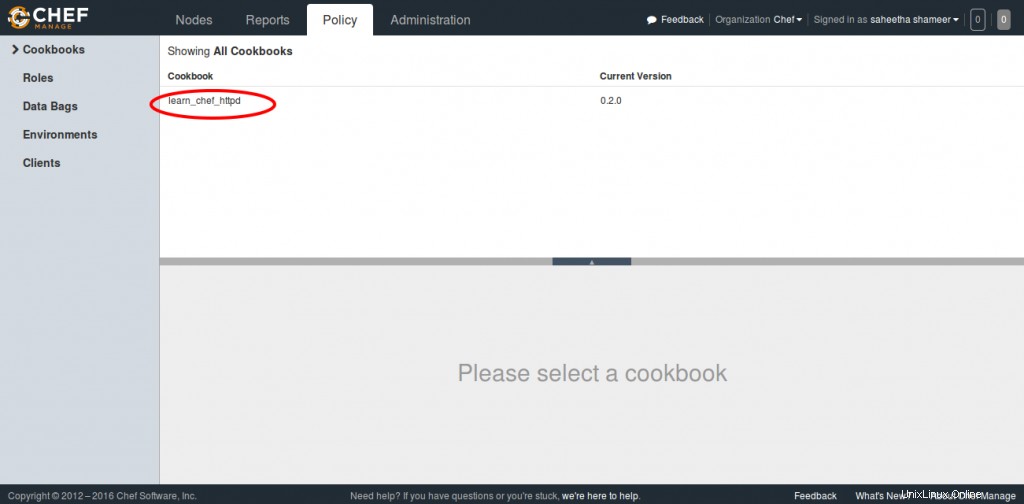
Uploaded 1 cookbook.Vérifiez le livre de recettes à partir de la console Chef Server Management.
Ajouter un nœud
Il s'agit de la dernière étape de l'implémentation de Chef. Nous avons configuré un poste de travail, un serveur Chef, puis nous devons maintenant ajouter nos clients au serveur Chef pour l'automatisation. J'ajoute mon chefnode au serveur à l'aide de la commande knife bootstrap comme ci-dessous :
[root@chefwork cookbooks]# knife bootstrap 45.33.76.60 --ssh-user root --ssh-password dkfue@321 --node-name chefnode
Creating new client for chefnode
Creating new node for chefnode
Connecting to 45.33.76.60
45.33.76.60 -----> Installing Chef Omnibus (-v 12)
45.33.76.60 downloading https://omnitruck-direct.chef.io/chef/install.sh
45.33.76.60 to file /tmp/install.sh.5457/install.sh
45.33.76.60 trying wget...
45.33.76.60 el 7 x86_64
45.33.76.60 Getting information for chef stable 12 for el...
45.33.76.60 downloading https://omnitruck-direct.chef.io/stable/chef/metadata?v=12&p=el&pv=7&m=x86_64
45.33.76.60 to file /tmp/install.sh.5466/metadata.txt
45.33.76.60 trying wget...
45.33.76.60 sha1 4def83368a1349959fdaf0633c4d288d5ae229ce
45.33.76.60 sha256 6f00c7bdf96a3fb09494e51cd44f4c2e5696accd356fc6dc1175d49ad06fa39f
45.33.76.60 url https://packages.chef.io/stable/el/7/chef-12.10.24-1.el7.x86_64.rpm
45.33.76.60 version 12.10.24
45.33.76.60 downloaded metadata file looks valid...
45.33.76.60 downloading https://packages.chef.io/stable/el/7/chef-12.10.24-1.el7.x86_64.rpm
45.33.76.60 to file /tmp/install.sh.5466/chef-12.10.24-1.el7.x86_64.rpm
45.33.76.60 trying wget...
45.33.76.60 Comparing checksum with sha256sum...
45.33.76.60 Installing chef 12
45.33.76.60 installing with rpm...
45.33.76.60 warning: /tmp/install.sh.5466/chef-12.10.24-1.el7.x86_64.rpm: Header V4 DSA/SHA1 Signature, key ID 83ef826a: NOKEY
45.33.76.60 Preparing... ################################# [100%]
45.33.76.60 Updating / installing...
45.33.76.60 1:chef-12.10.24-1.el7 ################################# [100%]
45.33.76.60 Thank you for installing Chef!
45.33.76.60 Starting the first Chef Client run...
45.33.76.60 Starting Chef Client, version 12.10.24
45.33.76.60 resolving cookbooks for run list: []
45.33.76.60 Synchronizing Cookbooks:
45.33.76.60 Installing Cookbook Gems:
45.33.76.60 Compiling Cookbooks...
45.33.76.60 [2016-05-20T15:36:41+00:00] WARN: Node chefnode has an empty run list.
45.33.76.60 Converging 0 resources
45.33.76.60
45.33.76.60 Running handlers:
45.33.76.60 Running handlers complete
45.33.76.60 Chef Client finished, 0/0 resources updated in 08 seconds
[root@chefwork chef-repo]#
Cette commande initialisera également l'installation du client Chef dans le nœud Chef. Vous pouvez le vérifier à partir de la CLI sur le poste de travail à l'aide des commandes knife ci-dessous :
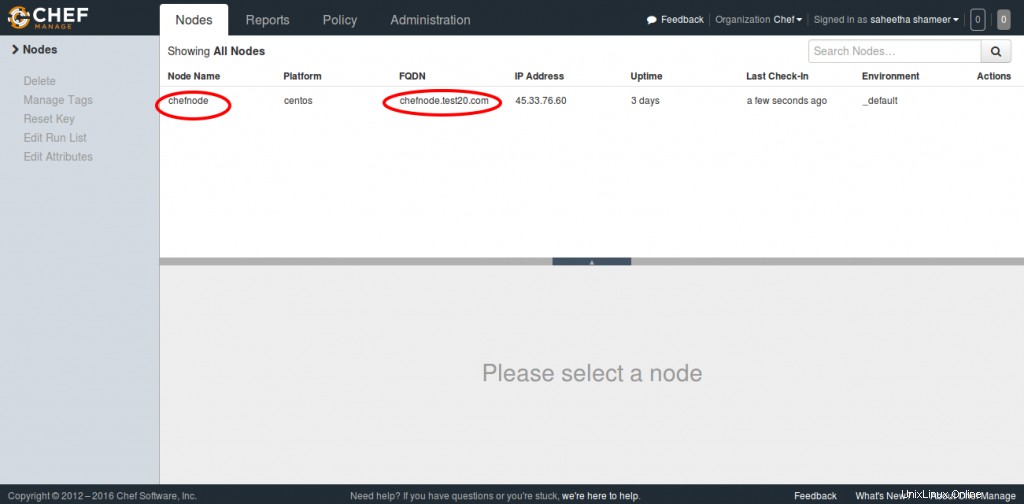
[root@chefwork chef-repo]# knife node list
chefnode

[root@chefwork chef-repo]# knife node show chefnode
Node Name: chefnode
Environment: _default
FQDN: chefnode.test20.com
IP: 45.33.76.60
Run List: recipe[learn_chef_httpd]
Roles:
Recipes:
Platform: centos 7.2.1511
Tags:
Verifying it from the Management console.
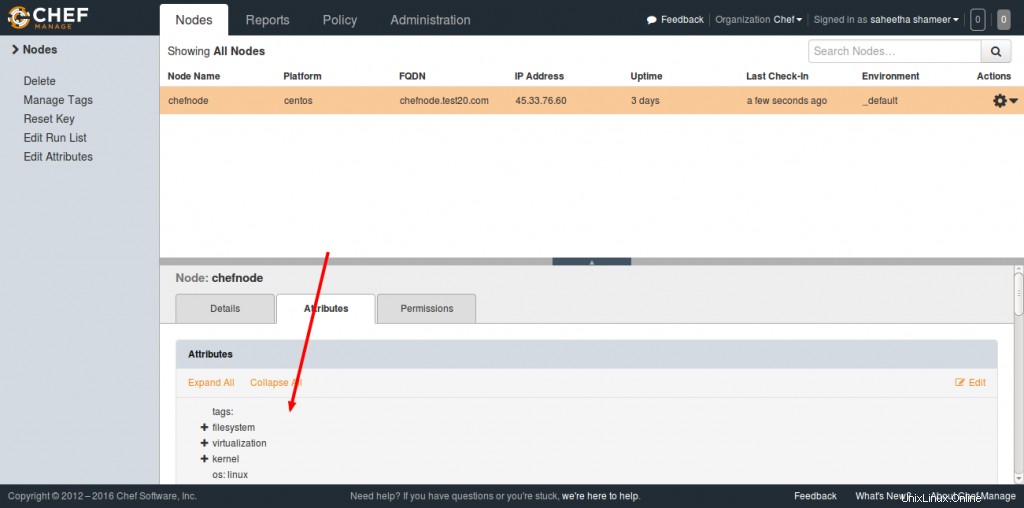
We can get more information regarding the added node by selecting the node and viewing the Attributes section.
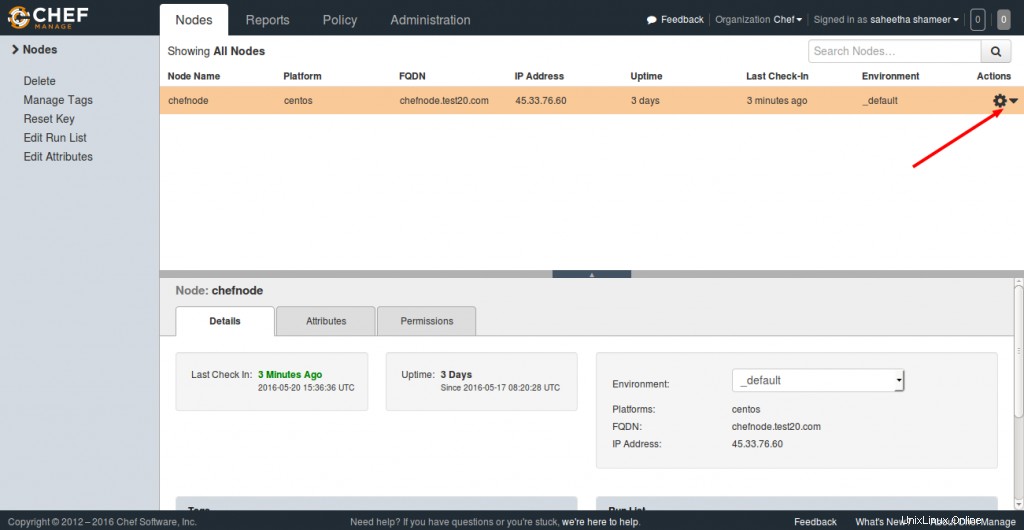
Managing Node Run List
Let's see how we can add a cookbook to the node and manage its runlist from the Chef server. As you see in the screenshot, you can click the Actions tab and select the Edit Runlist option to manage the runlist.
In the Available Recipes, you can see our learn_chef_httpd recipe, you can drag that from the available packages to the current run list and save the runlist.
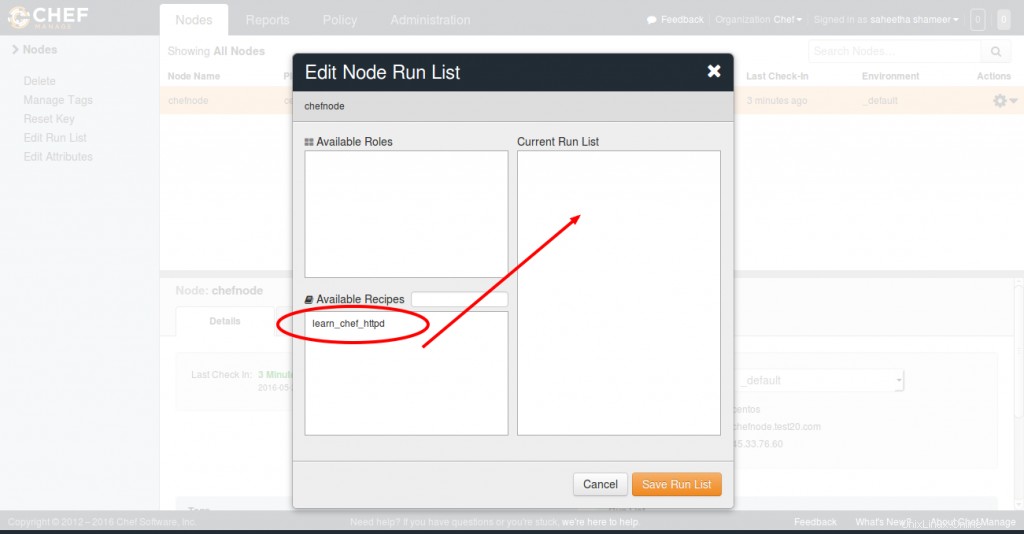
Now login to your node and just run the command chef-client to execute your runlist.
root@chefnode ~]# chef-client
Starting Chef Client, version 12.10.24
resolving cookbooks for run list: ["learn_chef_httpd"]
Synchronizing Cookbooks:
- learn_chef_httpd (0.2.0)
Installing Cookbook Gems:
Compiling Cookbooks...
Converging 4 resources
Recipe: learn_chef_httpd::default
* yum_package[httpd] action install
Similarly, we can add any number of nodes to your Chef Server depending on its configuration and hardware. I hope this article provided you with the basic understanding of Chef implementation. I would recommend your valuable comments and suggestions on this. Thank you for reading this :)
Happy Automation with Chef!!