Ce tutoriel est Copyright (c) 2013 par Falko Timme. Il est dérivé d'un tutoriel de Christoph Haas que vous pouvez trouver sur http://workaround.org. Vous êtes libre d'utiliser ce didacticiel sous la licence Creative Commons 2.5 ou toute version ultérieure.
Ce document décrit comment installer un serveur de messagerie Postfix basé sur des utilisateurs et des domaines virtuels, c'est-à-dire des utilisateurs et des domaines qui se trouvent dans une base de données MySQL. Je montrerai également l'installation et la configuration de Courier (Courier-POP3, Courier-IMAP), afin que Courier puisse s'authentifier auprès de la même base de données MySQL que Postfix utilise.
Le serveur Postfix résultant est capable de SMTP-AUTH et TLS et quota (le quota n'est pas intégré à Postfix par défaut, je vais montrer comment patcher votre Postfix de manière appropriée). Les mots de passe sont stockés dans crypté formulaire dans la base de données (la plupart des documents que j'ai trouvés traitaient de mots de passe en texte brut, ce qui représente un risque pour la sécurité). En plus de cela, ce tutoriel couvre l'installation de Amavisd , SpamAssassin et ClamAV afin que les e-mails soient analysés à la recherche de spam et de virus. Je montrerai également comment installer SquirrelMail en tant qu'interface de messagerie Web afin que les utilisateurs puissent lire et envoyer des e-mails et modifier leurs mots de passe.
L'avantage d'une telle configuration "virtuelle" (utilisateurs et domaines virtuels dans une base de données MySQL) est qu'elle est bien plus performante qu'une configuration basée sur des utilisateurs système "réels". Avec cette configuration virtuelle, votre serveur de messagerie peut gérer des milliers de domaines et d'utilisateurs. De plus, il est plus facile à administrer car vous n'avez à vous occuper de la base de données MySQL que lorsque vous ajoutez de nouveaux utilisateurs/domaines ou modifiez ceux qui existent déjà. Plus de commandes postmap pour créer des fichiers db, plus de rechargement de Postfix, etc. Pour l'administration de la base de données MySQL, vous pouvez utiliser des outils basés sur le Web comme phpMyAdmin qui sera également installé dans ce guide. Le troisième avantage est que les utilisateurs ont une adresse e-mail comme nom d'utilisateur (au lieu d'un nom d'utilisateur + une adresse e-mail), ce qui est plus facile à comprendre et à retenir.
Ce guide est conçu comme un guide pratique ; il ne couvre pas les arrière-plans théoriques. Ils sont traités dans de nombreux autres documents sur le Web.
Ce document est fourni sans garantie d'aucune sorte ! Je tiens à dire que ce n'est pas la seule façon de mettre en place un tel système. Il existe de nombreuses façons d'atteindre cet objectif, mais c'est la voie que je prends. Je n'émets aucune garantie que cela fonctionnera pour vous !
1 Remarque préliminaire
Ce didacticiel est basé sur CentOS 6.3 x86_64, vous devez donc configurer une installation de base du serveur CentOS 6.3 avant de poursuivre ce didacticiel. Le système doit avoir une adresse IP statique. J'utilise 192.168.0.100 comme adresse IP dans ce tutoriel et server1.example.com comme nom d'hôte.
Vous devez vous assurer que le pare-feu est désactivé (au moins pour le moment) et que SELinux est désactivé (c'est important !).
2 Activer des référentiels supplémentaires et installer certains logiciels
Nous importons d'abord les clés GPG pour les packages logiciels :
rpm --import /etc/pki/rpm-gpg/RPM-GPG-KEY*
Ensuite, nous activons les référentiels RPMforge et EPEL sur notre système CentOS car de nombreux packages que nous allons installer au cours de ce didacticiel ne sont pas disponibles dans les référentiels CentOS 6.3 officiels :
rpm --import http://dag.wieers.com/rpm/packages/RPM-GPG-KEY.dag.txt
cd /tmp
wget http://pkgs.repoforge.org/rpmforge-release/rpmforge-release-0.5.2-2.el6.rf.x86_64.rpm
rpm -ivh rpmforge-release-0.5.2-2.el6.rf.x86_64.rpm
(Si le lien ci-dessus ne fonctionne plus, vous pouvez trouver la version actuelle de rpmforge-release ici :http://packages.sw.be/rpmforge-release/)
rpm --import https://fedoraproject.org/static/0608B895.txt
wget http://dl.fedoraproject.org/pub/epel/6/x86_64/epel-release-6-8.noarch.rpm
rpm -ivh epel-release-6-8.noarch.rpm
yum install yum-priorities
Modifier /etc/yum.repos.d/epel.repo...
vi /etc/yum.repos.d/epel.repo
... et ajoutez la ligne priority=10 à la section [epel] :
[epel] name=Extra Packages for Enterprise Linux 6 - $basearch #baseurl=http://download.fedoraproject.org/pub/epel/6/$basearch mirrorlist=https://mirrors.fedoraproject.org/metalink?repo=epel-6&arch=$basearch failovermethod=priority enabled=1 priority=10 gpgcheck=1 gpgkey=file:///etc/pki/rpm-gpg/RPM-GPG-KEY-EPEL-6 [...] |
Ensuite, nous mettons à jour nos packages existants sur le système :
yum update
Maintenant, nous installons quelques logiciels dont nous aurons besoin plus tard :
yum groupinstall 'Development Tools'
3 Installer Apache, MySQL, phpMyAdmin
Tout cela peut être installé avec une seule commande (y compris les packages dont nous avons besoin pour construire Courier-IMAP) :
yum install ntp httpd mysql-server php php-mysql php-mbstring rpm-build gcc mysql-devel openssl-devel cyrus-sasl-devel pkgconfig zlib-devel phpMyAdmin pcre-devel openldap-devel postgresql-devel expect libtool-ltdl-devel openldap-servers libtool gdbm-devel pam-devel gamin-devel libidn-devel db4-devel mod_ssl telnet sqlite-devel
4 Installer Courier-IMAP, Courier-Authlib et Maildrop
Malheureusement, il n'y a pas de packages RPM pour Courier-IMAP, Courier-Authlib et Maildrop, nous devons donc les créer nous-mêmes.
Les packages RPM ne doivent pas être compilés en tant que root; courier-imap refusera même de compiler s'il détecte que la compilation est exécutée en tant qu'utilisateur root. Par conséquent, nous créons maintenant un compte d'utilisateur normal (falko dans cet exemple) et lui donnons un mot de passe :
useradd -m -s /bin/bash falko
passwd falko
Nous aurons besoin de la commande sudo plus tard pour que l'utilisateur falko puisse compiler et installer les packages rpm. Mais d'abord, nous devons autoriser falko à exécuter toutes les commandes en utilisant sudo :
Exécuter
visudo
Dans le fichier qui s'ouvre, il y a une racine de ligne ALL=(ALL) ALL. Ajoutez une ligne similaire pour falko juste en dessous de cette ligne :
[...] |
Nous sommes maintenant prêts à construire notre package rpm. Devenez d'abord l'utilisateur falko :
su falko
Ensuite, nous créons notre environnement de construction :
mkdir $HOME/rpm
mkdir $HOME/rpm/SOURCES
mkdir $HOME/rpm/SPECS
mkdir $HOME/rpm/BUILD
mkdir $HOME/rpm/BUILDROOT
mkdir $HOME/rpm/SRPMS
mkdir $HOME/rpm/RPMS
mkdir $HOME/rpm/RPMS/i386
mkdir $HOME/rpm/RPMS/x86_64
echo "%_topdir $HOME/rpm" >> $HOME/.rpmmacros
Maintenant, nous créons un répertoire de téléchargements et téléchargeons les fichiers source depuis http://www.courier-mta.org/download.php :
mkdir $HOME/downloads
cd $HOME/downloads
wget --no-check-certificate https://sourceforge.net/projects/courier/files/authlib/0.65.0/courier-authlib-0.65.0.tar.bz2/download
wget --no-check-certificate https://sourceforge.net/projects/courier/files/imap/4.12.0/courier-imap-4.12.0.tar.bz2/download
wget --no-check-certificate https://sourceforge.net/projects/courier/files/maildrop/2.6.0/maildrop-2.6.0.tar.bz2/download
Maintenant (toujours dans $HOME/downloads) nous pouvons construire courier-authlib :
sudo rpmbuild -ta courier-authlib-0.65.0.tar.bz2
Après le processus de construction, les packages rpm se trouvent dans /root/rpmbuild/RPMS/x86_64 (/root/rpmbuild/RPMS/i386 si vous êtes sur un système i386). La commande
sudo ls -l /root/rpmbuild/RPMS/x86_64
vous montre les packages RPM disponibles :
[[email protected] downloads]$ sudo ls -l /root/rpmbuild/RPMS/x86_64
total 544
-rw-r--r-- 1 root root 126728 Mar  4 12:49 courier-authlib-0.65.0-1.el6.x86_64.rpm
-rw-r--r-- 1 root root 274772 Mar  4 12:49 courier-authlib-debuginfo-0.65.0-1.el6.x86_64.rpm
-rw-r--r-- 1 root root  37824 Mar  4 12:49 courier-authlib-devel-0.65.0-1.el6.x86_64.rpm
-rw-r--r-- 1 root root  17256 Mar  4 12:49 courier-authlib-ldap-0.65.0-1.el6.x86_64.rpm
-rw-r--r-- 1 root root  12000 Mar  4 12:49 courier-authlib-mysql-0.65.0-1.el6.x86_64.rpm
-rw-r--r-- 1 root root  12984 Mar  4 12:49 courier-authlib-pgsql-0.65.0-1.el6.x86_64.rpm
-rw-r--r-- 1 root root   8244 Mar  4 12:49 courier-authlib-pipe-0.65.0-1.el6.x86_64.rpm
-rw-r--r-- 1 root root  10620 Mar  4 12:49 courier-authlib-sqlite-0.65.0-1.el6.x86_64.rpm
-rw-r--r-- 1 root root  34644 Mar  4 12:49 courier-authlib-userdb-0.65.0-1.el6.x86_64.rpm
[[email protected] downloads]$
Sélectionnez ceux que vous souhaitez installer et installez-les comme ceci :
sudo rpm -ivh /root/rpmbuild/RPMS/x86_64/courier-authlib-0.65.0-1.el6.x86_64.rpm /root/rpmbuild/RPMS/x86_64/courier-authlib-mysql-0.65.0-1.el6.x86_64.rpm /root/rpmbuild/RPMS/x86_64/courier-authlib-devel-0.65.0-1.el6.x86_64.rpm
Revenons maintenant à notre répertoire de téléchargement :
cd $HOME/downloads
Exécutez les commandes suivantes pour créer les répertoires requis/modifier les autorisations de répertoire (car sinon le processus de génération de Courier-Imap échouera) :
sudo mkdir -p /var/cache/ccache/tmp
sudo chmod o+rwx /var/cache/ccache/
sudo chmod 777 /var/cache/ccache/tmp
Maintenant, lancez à nouveau rpmbuild, cette fois sans sudo, sinon la compilation échouera car elle a été exécutée en tant que root :
rpmbuild -ta courier-imap-4.12.0.tar.bz2
Après le processus de construction, les packages rpm peuvent être trouvés dans $HOME/rpm/RPMS/x86_64 ($HOME/rpm/RPMS/i386 si vous êtes sur un système i386) :
cd $HOME/rpm/RPMS/x86_64
La commande
ls -l
vous montre les packages RPM disponibles :
[[email protected] x86_64]$ ls -l
total 1116
-rw-rw-r-- 1 falko falko 332112 Mar  4 12:53 courier-imap-4.12.0-1.x86_64.rpm
-rw-rw-r-- 1 falko falko 805288 Mar  4 12:53 courier-imap-debuginfo-4.12.0-1.x86_64.rpm
[[email protected] x86_64]$
Vous pouvez installer courier-imap comme ceci :
sudo rpm -ivh courier-imap-4.12.0-1.x86_64.rpm
Revenons maintenant à notre répertoire de téléchargement :
cd $HOME/downloads
et exécutez à nouveau rpmbuild, cette fois pour créer un package maildrop :
sudo rpmbuild -ta maildrop-2.6.0.tar.bz2
Après le processus de construction, les packages rpm se trouvent dans /root/rpmbuild/RPMS/x86_64 (/root/rpmbuild/RPMS/i386 si vous êtes sur un système i386). La commande
sudo ls -l /root/rpmbuild/RPMS/x86_64
vous montre les packages RPM disponibles :
[[email protected] downloads]$ sudo ls -l /root/rpmbuild/RPMS/x86_64
total 1732
-rw-r--r-- 1 root root 126728 Mar  4 12:49 courier-authlib-0.65.0-1.el6.x86_64.rpm
-rw-r--r-- 1 root root 274772 Mar  4 12:49 courier-authlib-debuginfo-0.65.0-1.el6.x86_64.rpm
-rw-r--r-- 1 root root  37824 Mar  4 12:49 courier-authlib-devel-0.65.0-1.el6.x86_64.rpm
-rw-r--r-- 1 root root  17256 Mar  4 12:49 courier-authlib-ldap-0.65.0-1.el6.x86_64.rpm
-rw-r--r-- 1 root root  12000 Mar  4 12:49 courier-authlib-mysql-0.65.0-1.el6.x86_64.rpm
-rw-r--r-- 1 root root  12984 Mar  4 12:49 courier-authlib-pgsql-0.65.0-1.el6.x86_64.rpm
-rw-r--r-- 1 root root   8244 Mar  4 12:49 courier-authlib-pipe-0.65.0-1.el6.x86_64.rpm
-rw-r--r-- 1 root root  10620 Mar  4 12:49 courier-authlib-sqlite-0.65.0-1.el6.x86_64.rpm
-rw-r--r-- 1 root root  34644 Mar  4 12:49 courier-authlib-userdb-0.65.0-1.el6.x86_64.rpm
-rw-r--r-- 1 root root 286752 Mar  4 13:03 maildrop-2.6.0-1.x86_64.rpm
-rw-r--r-- 1 root root 751304 Mar  4 13:03 maildrop-debuginfo-2.6.0-1.x86_64.rpm
-rw-r--r-- 1 root root 102052 Mar  4 13:03 maildrop-devel-2.6.0-1.x86_64.rpm
-rw-r--r-- 1 root root  66184 Mar  4 13:03 maildrop-man-2.6.0-1.x86_64.rpm
[[email protected] downloads]$
Vous pouvez maintenant installer maildrop comme ceci :
sudo rpm -ivh /root/rpmbuild/RPMS/x86_64/maildrop-2.6.0-1.x86_64.rpm
Après avoir compilé et installé tous les packages nécessaires, vous pouvez redevenir root en tapant
exit
5 Appliquer le correctif de quota à Postfix
Nous devons récupérer le rpm source de Postfix, le patcher avec le patch de quota, créer un nouveau package rpm Postfix et l'installer.
cd /usr/src
wget http://vault.centos.org/6.3/os/Source/SPackages/postfix-2.6.6-2.2.el6_1.src.rpm
rpm -ivh postfix-2.6.6-2.2.el6_1.src.rpm
La dernière commande affichera des avertissements que vous pouvez ignorer :
warning: user mockbuild does not exist - using root
warning: group mockbuild does not exist - using root
cd /root/rpmbuild/SOURCES
wget http://vda.sourceforge.net/VDA/postfix-2.6.5-vda-ng.patch.gz
gunzip postfix-2.6.5-vda-ng.patch.gz
cd /root/rpmbuild/SPECS/
Il faut maintenant éditer le fichier postfix.spec :
vi postfix.spec
Ajoutez Patch0 :postfix-2.6.5-vda-ng.patch à la strophe # Patches et %patch0 -p1 -b .vda-ng à la strophe %setup -q :
[...] |
Ensuite, nous construisons notre nouveau package RPM Postfix avec quota et prise en charge de MySQL :
rpmbuild -ba postfix.spec
Notre package RPM Postfix est créé dans /root/rpmbuild/RPMS/x86_64 (/root/rpmbuild/RPMS/i386 si vous êtes sur un système i386), nous y allons donc :
cd /root/rpmbuild/RPMS/x86_64
La commande
ls -l
vous montre les packages disponibles :
[[email protected] x86_64]# ls -l
total 10748
-rw-r--r-- 1 root root  126728 Mar  4 12:49 courier-authlib-0.65.0-1.el6.x86_64.rpm
-rw-r--r-- 1 root root  274772 Mar  4 12:49 courier-authlib-debuginfo-0.65.0-1.el6.x86_64.rpm
-rw-r--r-- 1 root root   37824 Mar  4 12:49 courier-authlib-devel-0.65.0-1.el6.x86_64.rpm
-rw-r--r-- 1 root root   17256 Mar  4 12:49 courier-authlib-ldap-0.65.0-1.el6.x86_64.rpm
-rw-r--r-- 1 root root   12000 Mar  4 12:49 courier-authlib-mysql-0.65.0-1.el6.x86_64.rpm
-rw-r--r-- 1 root root   12984 Mar  4 12:49 courier-authlib-pgsql-0.65.0-1.el6.x86_64.rpm
-rw-r--r-- 1 root root    8244 Mar  4 12:49 courier-authlib-pipe-0.65.0-1.el6.x86_64.rpm
-rw-r--r-- 1 root root   10620 Mar  4 12:49 courier-authlib-sqlite-0.65.0-1.el6.x86_64.rpm
-rw-r--r-- 1 root root   34644 Mar  4 12:49 courier-authlib-userdb-0.65.0-1.el6.x86_64.rpm
-rw-r--r-- 1 root root  286752 Mar  4 13:03 maildrop-2.6.0-1.x86_64.rpm
-rw-r--r-- 1 root root  751304 Mar  4 13:03 maildrop-debuginfo-2.6.0-1.x86_64.rpm
-rw-r--r-- 1 root root  102052 Mar  4 13:03 maildrop-devel-2.6.0-1.x86_64.rpm
-rw-r--r-- 1 root root   66184 Mar  4 13:03 maildrop-man-2.6.0-1.x86_64.rpm
-rw-r--r-- 1 root root 2138908 Mar  4 13:15 postfix-2.6.6-2.2.el6.x86_64.rpm
-rw-r--r-- 1 root root 7021184 Mar  4 13:15 postfix-debuginfo-2.6.6-2.2.el6.x86_64.rpm
-rw-r--r-- 1 root root   61752 Mar  4 13:15 postfix-perl-scripts-2.6.6-2.2.el6.x86_64.rpm
[[email protected] x86_64]#
Pour vous assurer qu'aucune version de postfix n'a été précédemment installée sur votre système, utilisez :
yum remove postfix
Choisissez le package Postfix et installez-le comme ceci :
rpm -ivh postfix-2.6.6-2.2.el6.x86_64.rpm
6 Définir les mots de passe MySQL et configurer phpMyAdmin
Démarrer MySQL :
chkconfig --levels 235 mysqld on
/etc/init.d/mysqld start
Définissez ensuite des mots de passe pour le compte root MySQL :
mysql_secure_installation
[[email protected] ~]# mysql_secure_installation
REMARQUE : L'EXÉCUTION DE TOUTES LES PARTIES DE CE SCRIPT EST RECOMMANDÉE POUR TOUS MySQL
SERVEURS EN PRODUCTION ! VEUILLEZ LIRE ATTENTIVEMENT CHAQUE ÉTAPE !
Afin de se connecter à MySQL pour le sécuriser, nous aurons besoin du mot de passe
actuel pour l'utilisateur root. Si vous venez d'installer MySQL, et
vous n'avez pas défini le mot de passe root encore , le mot de passe sera vide,
vous devez donc juste appuyer sur entrée ici.
Entrez mot de passe actuel pour root (entrez pour aucun) : <-- ENTER
OK, mot de passe utilisé avec succès , continuons ...
La définition du mot de passe root assure que personne ne peut se connecter à MySQL
utilisateur root sans l'autorisation appropriée.
Définir le mot de passe root ? [O/n] <-- ENTRER
Nouveau mot de passe : <-- votremotdepasseqlracine
Saisissez à nouveau le nouveau mot de passe : <-- votremotdepasseqlracine
Le mot de passe a été mis à jour avec succès !
Rechargement des tables de privilèges. .
... Succès !
Par défaut, une installation de MySQL a un utilisateur anonyme, permettant à n'importe qui
de se connecter à MySQL sans avoir avoir un compte d'utilisateur créé pour
eux. Ceci est un conçu uniquement pour les tests, et pour rendre l'installation
un peu plus fluide. Vous devriez les supprimer avant de passer dans un
environnement de production.
Supprimer les utilisateurs anonymes ? [O/n] <-- ENTER
... Succès !
Normalement, root ne devrait être autorisé à se connecter depuis 'localhost'. Cela
assure que quelqu'un ne ne peut pas deviner le mot de passe root depuis le réseau.
Interdire la connexion root à distance ? [O/n] <-- ENTER
... Succès !
Par défaut, MySQL est fourni avec une base de données nommée 'test' à laquelle n'importe qui peut
accéder. Cela est également conçu uniquement pour les tests et devrait être supprimé
avant de passer dans un environnement de production .
Supprimer la base de données de test et y accéder ? [O/n] <-- ENTER
- Suppression de la base de données de test...
... Réussite !
- Suppression des privilèges sur la base de données de test...
... Réussite !
Recharger les tableaux de privilèges garantira que tout les changements apportés jusqu'à présent
prendront effet immédiatement.
Recharger les tableaux de privilèges maintenant ? [O/n] <-- ENTER
... Réussi !
Nettoyage ...
Tout fait ! Si vous avez complété toutes les étapes ci-dessus, votre installation de MySQL
devrait maintenant être sécurisée.
Merci d'utiliser MySQL !
[[ e-mail protégé] ~]#
Maintenant, nous configurons phpMyAdmin. Nous modifions la configuration d'Apache afin que phpMyAdmin autorise les connexions non seulement à partir de l'hôte local (en commentant la strophe
vi /etc/httpd/conf.d/phpMyAdmin.conf
[...] |
Ensuite, nous créons les liens de démarrage du système pour Apache et le démarrons :
chkconfig --levels 235 httpd on
/etc/init.d/httpd start
Vous pouvez maintenant diriger votre navigateur vers http://server1.example.com/phpMyAdmin/ ou http://192.168.0.100/phpMyAdmin/ et vous connecter avec le nom d'utilisateur root et votre nouveau mot de passe root MySQL.
7 Créer la base de données MySQL pour Postfix/Courier
Nous créons une base de données appelée mail :
mysqladmin -u root -p create mail
Ensuite, nous passons au shell MySQL :
mysql -u root -p
Sur le shell MySQL, nous créons l'utilisateur mail_admin avec le mot de passe mail_admin_password (remplacez-le par votre propre mot de passe) qui a les privilèges SELECT, INSERT, UPDATE, DELETE sur la base de données de messagerie. Cet utilisateur sera utilisé par Postfix et Courier pour se connecter à la base mail :
GRANT SELECT, INSERT, UPDATE, DELETE ON mail.* TO 'mail_admin'@'localhost' IDENTIFIED BY 'mail_admin_password';
GRANT SELECT, INSERT, UPDATE, DELETE ON mail.* TO 'mail_admin'@'localhost.localdomain' IDENTIFIED BY 'mail_admin_password';
FLUSH PRIVILEGES;
Toujours sur le shell MySQL, nous créons les tables dont Postfix et Courier ont besoin :
USE mail;
CREATE TABLE domains (
domain varchar(50) NOT NULL,
PRIMARY KEY (domain) )
ENGINE=MyISAM;
CREATE TABLE forwardings (
source varchar(80) NOT NULL,
destination TEXT NOT NULL,
PRIMARY KEY (source) )
ENGINE=MyISAM;
CREATE TABLE users (
email varchar(80) NOT NULL,
password varchar(20) NOT NULL,
quota bigint(20) DEFAULT '10485760',
PRIMARY KEY (email)
) ENGINE=MyISAM;
CREATE TABLE transport (
domain varchar(128) NOT NULL default '',
transport varchar(128) NOT NULL default '',
UNIQUE KEY domain (domain)
) ENGINE=MyISAM;
quit;
Comme vous l'avez peut-être remarqué, avec le quit; commande, nous avons quitté le shell MySQL et sommes de retour sur le shell Linux.
Les domaines table stockera chaque domaine virtuel pour lequel Postfix devrait recevoir des e-mails (par exemple, example.com ).
| domaine |
| exemple.com |
Les transferts table sert à créer un alias d'une adresse e-mail à une autre, par ex. transférer les e-mails pour [email protected] à [email protected] .
| source | destination |
| [email protected] | [email protected] |
Les utilisateurs La table stocke tous les utilisateurs virtuels (c'est-à-dire les adresses e-mail, car l'adresse e-mail et le nom d'utilisateur sont identiques) et les mots de passe (en format crypté formulaire !) et une valeur de quota pour chaque boîte aux lettres (dans cet exemple, la valeur par défaut est de 10485760 octets, ce qui signifie 10 Mo).
| mot de passe | quota | |
| [email protected] | No9.E4skNvGa. ("secret" sous forme cryptée) | 10485760 |
Le transport table est facultative, elle est destinée aux utilisateurs avancés. Il permet de transférer les e-mails d'utilisateurs uniques, de domaines entiers ou de tous les e-mails vers un autre serveur. Par exemple,
| domaine | transport |
| exemple.com | smtp :[1.2.3.4] |
transmettra tous les e-mails pour example.com via le protocole smtp au serveur avec l'adresse IP 1.2.3.4 (les crochets [] signifie "ne pas rechercher l'enregistrement DNS MX" (ce qui est logique pour les adresses IP...). Si vous utilisez un nom de domaine complet (FQDN) à la place, vous n'utiliserez pas les crochets.).
8 Configurer Postfix
Maintenant, nous devons dire à Postfix où il peut trouver toutes les informations dans la base de données. Par conséquent, nous devons créer six fichiers texte. Vous remarquerez que je dis à Postfix de se connecter à MySQL sur l'adresse IP 127.0.0.1 au lieu de localhost . C'est parce que Postfix s'exécute dans une prison chroot et n'a pas accès au socket MySQL auquel il essaierait de se connecter si je disais à Postfix d'utiliser localhost . Si j'utilise 127.0.0.1 Postfix utilise le réseau TCP pour se connecter à MySQL, ce qui ne pose aucun problème même dans une prison chroot (l'alternative serait de déplacer le socket MySQL dans la prison chroot, ce qui cause d'autres problèmes).
Créons maintenant nos six fichiers texte.
vi /etc/postfix/mysql-virtual_domains.cf
user = mail_admin |
vi /etc/postfix/mysql-virtual_forwardings.cf
user = mail_admin |
vi /etc/postfix/mysql-virtual_mailboxes.cf
user = mail_admin |
vi /etc/postfix/mysql-virtual_email2email.cf
user = mail_admin |
vi /etc/postfix/mysql-virtual_transports.cf
user = mail_admin |
vi /etc/postfix/mysql-virtual_mailbox_limit_maps.cf
user = mail_admin |
chmod o= /etc/postfix/mysql-virtual_*.cf
chgrp postfix /etc/postfix/mysql-virtual_*.cf
Maintenant, nous créons un utilisateur et un groupe appelé vmail avec le répertoire personnel /home/vmail . C'est là que toutes les boîtes aux lettres seront stockées.
groupadd -g 5000 vmail
useradd -g vmail -u 5000 vmail -d /home/vmail -m
Ensuite, nous effectuons une configuration de Postfix. Assurez-vous de remplacer server1.example.com avec un FQDN valide, sinon votre Postfix risque de ne pas fonctionner correctement !
postconf -e 'myhostname = server1.example.com'
postconf -e 'mydestination = server1.example.com, localhost, localhost.localdomain'
postconf -e 'mynetworks = 127.0.0.0/8'
postconf -e 'virtual_alias_domains ='
postconf -e ' virtual_alias_maps = proxy:mysql:/etc/postfix/mysql-virtual_forwardings.cf, mysql:/etc/postfix/mysql-virtual_email2email.cf'
postconf -e 'virtual_mailbox_domains = proxy:mysql:/etc/postfix/mysql-virtual_domains.cf'
postconf -e 'virtual_mailbox_maps = proxy:mysql:/etc/postfix/mysql-virtual_mailboxes.cf'
postconf -e 'virtual_mailbox_base = /home/vmail'
postconf -e 'virtual_uid_maps = static:5000'
postconf -e 'virtual_gid_maps = static:5000'
postconf -e 'smtpd_sasl_auth_enable = yes'
postconf -e 'broken_sasl_auth_clients = yes'
postconf -e 'smtpd_sasl_authenticated_header = yes'
postconf -e 'smtpd_recipient_restrictions = permit_mynetworks, permit_sasl_authenticated, reject_unauth_destination'
postconf -e 'smtpd_use_tls = yes'
postconf -e 'smtpd_tls_cert_file = /etc/postfix/smtpd.cert'
postconf -e 'smtpd_tls_key_file = /etc/postfix/smtpd.key'
postconf -e 'transport_maps = proxy:mysql:/etc/postfix/mysql-virtual_transports.cf'
postconf -e 'virtual_create_maildirsize = yes'
postconf -e 'virtual_maildir_extended = yes'
postconf -e 'virtual_mailbox_limit_maps = proxy:mysql:/etc/postfix/mysql-virtual_mailbox_limit_maps.cf'
postconf -e 'virtual_mailbox_limit_override = yes'
postconf -e 'virtual_maildir_limit_message = "The user you are trying to reach is over quota."'
postconf -e 'virtual_overquota_bounce = yes'
postconf -e 'proxy_read_maps = $local_recipient_maps $mydestination $virtual_alias_maps $virtual_alias_domains $virtual_mailbox_maps $virtual_mailbox_domains $relay_recipient_maps $relay_domains $canonical_maps $sender_canonical_maps $recipient_canonical_maps $relocated_maps $transport_maps $mynetworks $virtual_mailbox_limit_maps'
postconf -e 'inet_interfaces = all'
Ensuite, nous créons le certificat SSL nécessaire pour TLS :
cd /etc/postfix
openssl req -new -outform PEM -out smtpd.cert -newkey rsa:2048 -nodes -keyout smtpd.key -keyform PEM -days 365 -x509
Nom du pays (code à 2 lettres) [XX] :<-- Entrez le nom de votre pays (par exemple, "DE").
Nom de l'État ou de la province (nom complet) [] :<-- Entrez le nom de votre État ou de la province .
Nom de la localité (par exemple, ville) [Ville par défaut] :<-- Saisissez votre ville.
Nom de l'organisation (par exemple, société) [Default Company Ltd] :<-- Saisissez le nom de votre organisation (par exemple, , le nom de votre entreprise).
Nom de l'unité organisationnelle (par exemple, section) [] :<-- Saisissez le nom de votre unité organisationnelle (par exemple, "Service informatique").
Nom commun (par exemple, votre nom ou le nom d'hôte de votre serveur) [] :<-- Saisissez le nom de domaine complet du système (par exemple, "serveur1.exemple.com").
Adresse e-mail [] :<-- Saisissez votre adresse e-mail.
Modifiez ensuite les permissions du smtpd.key :
chmod o= /etc/postfix/smtpd.key
9 Configurer Saslauthd
Modifiez /etc/sasl2/smtpd.conf. Cela devrait ressembler à ceci :
vi /etc/sasl2/smtpd.conf
pwcheck_method: authdaemond |
Ensuite, désactivez Sendmail et démarrez Postfix, saslauthd et courier-authlib :
chmod 755 /var/spool/authdaemon
chkconfig --levels 235 courier-authlib on
/etc/init.d/courier-authlib start
chkconfig --levels 235 sendmail off
chkconfig --levels 235 postfix on
chkconfig --levels 235 saslauthd on
/etc/init.d/sendmail stop
/etc/init.d/postfix start
/etc/init.d/saslauthd start
10 Configurer Courier
Nous devons maintenant dire à Courier qu'il doit s'authentifier auprès de notre base de données MySQL. Tout d'abord, éditez /etc/authlib/authdaemonrc et changez la valeur de authmodulelist pour qu'il lise
vi /etc/authlib/authdaemonrc
[...] |
Modifiez ensuite /etc/authlib/authmysqlrc. Cela devrait ressembler exactement à ceci (encore une fois, assurez-vous de remplir les détails de la base de données correcte) :
cp /etc/authlib/authmysqlrc /etc/authlib/authmysqlrc_orig
cat /dev/null > /etc/authlib/authmysqlrc
vi /etc/authlib/authmysqlrc
MYSQL_SERVER localhost |
Redémarrez ensuite Courier :
chkconfig --levels 235 courier-imap on
/etc/init.d/courier-authlib restart
/etc/init.d/courier-imap restart
Lorsque courier-imap est démarré pour la première fois, il crée automatiquement les fichiers de certificat /usr/lib/courier-imap/share/imapd.pem et /usr/lib/courier-imap/share/pop3d.pem à partir de /usr /lib/courier-imap/etc/imapd.cnf et /usr/lib/courier-imap/etc/pop3d.cnf. Étant donné que les fichiers .cnf contiennent la ligne CN=localhost, mais que notre serveur s'appelle server1.example.com, les certificats peuvent causer des problèmes lorsque vous utilisez des connexions TLS. Pour résoudre ce problème, nous supprimons les deux certificats...
cd /usr/lib/courier-imap/share
rm -f imapd.pem
rm -f pop3d.pem
... et remplacez les lignes CN=localhost dans /usr/lib/courier-imap/etc/imapd.cnf et /usr/lib/courier-imap/etc/pop3d.cnf par CN=server1.example.com:
vi /usr/lib/courier-imap/etc/imapd.cnf
[...] |
vi /usr/lib/courier-imap/etc/pop3d.cnf
[...] |
Ensuite, nous recréons les deux certificats...
./mkimapdcert
./mkpop3dcert
... et redémarrez courier-authlib et courier-imap :
/etc/init.d/courier-authlib restart
/etc/init.d/courier-imap restart
En courant
telnet localhost pop3
vous pouvez voir si votre serveur POP3 fonctionne correctement. Il devrait renvoyer +OK bonjour . (tapez quitter pour revenir au shell Linux) :
[[email protected] share]# telnet localhost pop3
Essai ::1...
Connecté à localhost.
Le caractère d'échappement est '^]'.
+OK Bonjour .
<-- quitter
+OK Meilleure chance la prochaine fois.
Connexion fermée par un hôte étranger.
[[email protected] partager]#
11 Modifier /etc/aliases
Maintenant, nous devrions ouvrir /etc/aliases. Assurez-vous que postmaster pointe vers root et root vers votre propre nom d'utilisateur ou votre adresse e-mail, par ex. comme ceci :
vi /etc/aliases
[...] |
ou comme ceci (si l'administrateur est votre propre nom d'utilisateur) :
[...] |
Chaque fois que vous modifiez /etc/aliases, vous devez exécuter
newaliases
ensuite et relancez Postfix :
/etc/init.d/postfix restart
12 Installer Amavisd-new, SpamAssassin et ClamAV
Pour installer amavisd-new, spamassassin et clamav, exécutez la commande suivante :
yum install amavisd-new spamassassin clamav clamd unzip bzip2 unrar perl-DBD-mysql
Maintenant, nous devons éditer /etc/amavisd/amavisd.conf.
vi /etc/amavisd/amavisd.conf
Dans ce fichier, nous changeons cinq endroits :
1) Changer
$mydomain = 'example.com'; # a convenient default for other settings |
à
$mydomain = 'localhost'; |
2) Changer
$sa_tag_level_deflt = 2.0; # add spam info headers if at, or above that level |
à
$sa_tag_level_deflt = 2.0; # add spam info headers if at, or above that level |
(Bien sûr, vous pouvez ajuster les scores de spam à votre guise.)
3) Changer
# @lookup_sql_dsn = |
à
# @lookup_sql_dsn = |
(Assurez-vous de remplir les détails de la base de données correcte !)
4) Changer
# $recipient_delimiter = '+'; # undef disables address extensions altogether |
à
$recipient_delimiter = undef; # undef disables address extensions altogether |
5) Changer
$final_virus_destiny = D_DISCARD; |
à
$final_virus_destiny = D_REJECT; |
(Of course, it's up to you to decide what should happen with spam and viruses. I decide to accept spam (D_PASS) so that Spam can be filtered in my email client with a simple filter rule (based on the subject that gets rewritten by amavisd-new if it thinks a mail is spam). The allowed actions (D_PASS, D_DISCARD, D_BOUNCE, and D_REJECT) are explained here:http://www.ijs.si/software/amavisd/amavisd-new-docs.html#actions)
After my changes, /etc/amavisd/amavisd.conf looks like this:
use strict;
# a minimalistic configuration file for amavisd-new with all necessary settings
#
# see amavisd.conf-default for a list of all variables with their defaults;
# see amavisd.conf-sample for a traditional-style commented file;
# for more details see documentation in INSTALL, README_FILES/*
# and at http://www.ijs.si/software/amavisd/amavisd-new-docs.html
# COMMONLY ADJUSTED SETTINGS:
# @bypass_virus_checks_maps = (1); # controls running of anti-virus code
# @bypass_spam_checks_maps = (1); # controls running of anti-spam code
# $bypass_decode_parts = 1; # controls running of decoders&dearchivers
$max_servers = 2; # num of pre-forked children (2..30 is common), -m
$daemon_user = 'amavis'; # (no default; customary: vscan or amavis), -u
$daemon_group = 'amavis'; # (no default; customary: vscan or amavis), -g
$mydomain = 'localhost';
#$mydomain = 'example.com';   # a convenient default for other settings
$MYHOME = '/var/spool/amavisd'; # a convenient default for other settings, -H
$TEMPBASE = "$MYHOME/tmp"; # working directory, needs to exist, -T
$ENV{TMPDIR} = $TEMPBASE; # environment variable TMPDIR, used by SA, etc.
$QUARANTINEDIR = undef; # -Q
# $quarantine_subdir_levels = 1; # add level of subdirs to disperse quarantine
# $release_format = 'resend'; # 'attach', 'plain', 'resend'
# $report_format = 'arf'; # 'attach', 'plain', 'resend', 'arf'
# $daemon_chroot_dir = $MYHOME; # chroot directory or undef, -R
$db_home = "$MYHOME/db"; # dir for bdb nanny/cache/snmp databases, -D
# $helpers_home = "$MYHOME/var"; # working directory for SpamAssassin, -S
$lock_file = "/var/run/amavisd/amavisd.lock"; # -L
$pid_file = "/var/run/amavisd/amavisd.pid"; # -P
#NOTE: create directories $MYHOME/tmp, $MYHOME/var, $MYHOME/db manually
$log_level = 0; # verbosity 0..5, -d
$log_recip_templ = undef; # disable by-recipient level-0 log entries
$DO_SYSLOG = 1; # log via syslogd (preferred)
$syslog_facility = 'mail'; # Syslog facility as a string
# e.g.: mail, daemon, user, local0, ... local7
$syslog_priority = 'debug'; # Syslog base (minimal) priority as a string,
# choose from: emerg, alert, crit, err, warning, notice, info, debug
$enable_db = 1; # enable use of BerkeleyDB/libdb (SNMP and nanny)
$enable_global_cache = 1; # enable use of libdb-based cache if $enable_db=1
$nanny_details_level = 2; # nanny verbosity: 1: traditional, 2: detailed
$enable_dkim_verification = 1; # enable DKIM signatures verification
$enable_dkim_signing = 1; # load DKIM signing code, keys defined by dkim_key
@local_domains_maps = ( [".$mydomain"] ); # list of all local domains
@mynetworks = qw( 127.0.0.0/8 [::1] [FE80::]/10 [FEC0::]/10
10.0.0.0/8 172.16.0.0/12 192.168.0.0/16 );
$unix_socketname = "$MYHOME/amavisd.sock"; # amavisd-release or amavis-milter
# option(s) -p overrides $inet_socket_port and $unix_socketname
$inet_socket_port = 10024; # listen on this local TCP port(s)
# $inet_socket_port = [10024,10026]; # listen on multiple TCP ports
$policy_bank{'MYNETS'} = { # mail originating from @mynetworks
originating => 1, # is true in MYNETS by default, but let's make it explicit
os_fingerprint_method => undef, # don't query p0f for internal clients
};
# it is up to MTA to re-route mail from authenticated roaming users or
# from internal hosts to a dedicated TCP port (such as 10026) for filtering
$interface_policy{'10026'} = 'ORIGINATING';
$policy_bank{'ORIGINATING'} = { # mail supposedly originating from our users
originating => 1, # declare that mail was submitted by our smtp client
allow_disclaimers => 1, # enables disclaimer insertion if available
# notify administrator of locally originating malware
virus_admin_maps => ["virusalert\@$mydomain"],
spam_admin_maps => ["virusalert\@$mydomain"],
warnbadhsender => 1,
# forward to a smtpd service providing DKIM signing service
forward_method => 'smtp:[127.0.0.1]:10027',
# force MTA conversion to 7-bit (e.g. before DKIM signing)
smtpd_discard_ehlo_keywords => ['8BITMIME'],
bypass_banned_checks_maps => [1], # allow sending any file names and types
terminate_dsn_on_notify_success => 0, # don't remove NOTIFY=SUCCESS option
};
$interface_policy{'SOCK'} = 'AM.PDP-SOCK'; # only applies with $unix_socketname
# Use with amavis-release over a socket or with Petr Rehor's amavis-milter.c
# (with amavis-milter.c from this package or old amavis.c client use 'AM.CL'):
$policy_bank{'AM.PDP-SOCK'} = {
protocol => 'AM.PDP',
auth_required_release => 0, # do not require secret_id for amavisd-release
};
$sa_tag_level_deflt  = 2.0;  # add spam info headers if at, or above that level
$sa_tag2_level_deflt = 4.0;  # add 'spam detected' headers at that level
$sa_kill_level_deflt = $sa_tag2_level_deflt;  # triggers spam evasive actions (e.g. blocks mail)
$sa_dsn_cutoff_level = 10;   # spam level beyond which a DSN is not sent

#$sa_tag_level_deflt  = 2.0;  # add spam info headers if at, or above that level
#$sa_tag2_level_deflt = 6.2;  # add 'spam detected' headers at that level
#$sa_kill_level_deflt = 6.9;  # triggers spam evasive actions (e.g. blocks mail)
#$sa_dsn_cutoff_level = 10;   # spam level beyond which a DSN is not sent
$sa_crediblefrom_dsn_cutoff_level = 18; # likewise, but for a likely valid From
# $sa_quarantine_cutoff_level = 25; # spam level beyond which quarantine is off
$penpals_bonus_score = 8; # (no effect without a @storage_sql_dsn database)
$penpals_threshold_high = $sa_kill_level_deflt; # don't waste time on hi spam
$bounce_killer_score = 100; # spam score points to add for joe-jobbed bounces
$sa_mail_body_size_limit = 400*1024; # don't waste time on SA if mail is larger
$sa_local_tests_only = 0; # only tests which do not require internet access?
# @lookup_sql_dsn =
#   ( ['DBI:mysql:database=mail;host=127.0.0.1;port=3306', 'user1', 'passwd1'],
#     ['DBI:mysql:database=mail;host=host2', 'username2', 'password2'],
#     ["DBI:SQLite:dbname=$MYHOME/sql/mail_prefs.sqlite", '', ''] );
# @storage_sql_dsn = @lookup_sql_dsn;  # none, same, or separate database
@lookup_sql_dsn =
( ['DBI:mysql:database=mail;host=127.0.0.1;port=3306', 'mail_admin', 'mail_admin_password'] );
$sql_select_policy = 'SELECT "Y" as local FROM domains WHERE CONCAT("@",domain) IN (%k)';
$sql_select_white_black_list = undef; # undef disables SQL white/blacklisting
$recipient_delimiter = '+'; # (default is '+')
$replace_existing_extension = 1; # (default is false)
$localpart_is_case_sensitive = 0; # (default is false)
# $timestamp_fmt_mysql = 1; # if using MySQL *and* msgs.time_iso is TIMESTAMP;
# defaults to 0, which is good for non-MySQL or if msgs.time_iso is CHAR(16)
$virus_admin = undef; # notifications recip.
$mailfrom_notify_admin = undef; # notifications sender
$mailfrom_notify_recip = undef; # notifications sender
$mailfrom_notify_spamadmin = undef; # notifications sender
$mailfrom_to_quarantine = ''; # null return path; uses original sender if undef
@addr_extension_virus_maps = ('virus');
@addr_extension_banned_maps = ('banned');
@addr_extension_spam_maps = ('spam');
@addr_extension_bad_header_maps = ('badh');
$recipient_delimiter = undef; # undef disables address extensions altogether
# $recipient_delimiter = '+';  # undef disables address extensions altogether
# when enabling addr extensions do also Postfix/main.cf: recipient_delimiter=+
$path = '/usr/local/sbin:/usr/local/bin:/usr/sbin:/sbin:/usr/bin:/bin';
# $dspam = 'dspam';
$MAXLEVELS = 14;
$MAXFILES = 1500;
$MIN_EXPANSION_QUOTA = 100*1024; # bytes (default undef, not enforced)
$MAX_EXPANSION_QUOTA = 300*1024*1024; # bytes (default undef, not enforced)
$sa_spam_subject_tag = '***SPAM*** ';
$defang_virus = 1; # MIME-wrap passed infected mail
$defang_banned = 1; # MIME-wrap passed mail containing banned name
# for defanging bad headers only turn on certain minor contents categories:
$defang_by_ccat{+CC_BADH.",3"} = 1; # NUL or CR character in header
$defang_by_ccat{+CC_BADH.",5"} = 1; # header line longer than 998 characters
$defang_by_ccat{+CC_BADH.",6"} = 1; # header field syntax error
# OTHER MORE COMMON SETTINGS (defaults may suffice):
# $myhostname = 'host.example.com'; # must be a fully-qualified domain name!
# $notify_method = 'smtp:[127.0.0.1]:10025';
# $forward_method = 'smtp:[127.0.0.1]:10025'; # set to undef with milter!
$final_virus_destiny      = D_REJECT;
$final_banned_destiny     = D_REJECT;
$final_spam_destiny       = D_PASS;
$final_bad_header_destiny = D_PASS;

#$final_virus_destiny      = D_DISCARD;
#$final_banned_destiny     = D_BOUNCE;
#$final_spam_destiny       = D_DISCARD;
#$final_bad_header_destiny = D_BOUNCE;
# $bad_header_quarantine_method = undef;
# $os_fingerprint_method = 'p0f:*:2345'; # to query p0f-analyzer.pl
## hierarchy by which a final setting is chosen:
## policy bank (based on port or IP address) -> *_by_ccat
## *_by_ccat (based on mail contents) -> *_maps
## *_maps (based on recipient address) -> final configuration value
# SOME OTHER VARIABLES WORTH CONSIDERING (see amavisd.conf-default for all)
# $warnbadhsender,
# $warnvirusrecip, $warnbannedrecip, $warnbadhrecip, (or @warn*recip_maps)
#
# @bypass_virus_checks_maps, @bypass_spam_checks_maps,
# @bypass_banned_checks_maps, @bypass_header_checks_maps,
#
# @virus_lovers_maps, @spam_lovers_maps,
# @banned_files_lovers_maps, @bad_header_lovers_maps,
#
# @blacklist_sender_maps, @score_sender_maps,
#
# $clean_quarantine_method, $virus_quarantine_to, $banned_quarantine_to,
# $bad_header_quarantine_to, $spam_quarantine_to,
#
# $defang_bad_header, $defang_undecipherable, $defang_spam
# REMAINING IMPORTANT VARIABLES ARE LISTED HERE BECAUSE OF LONGER ASSIGNMENTS
@keep_decoded_original_maps = (new_RE(
qr'^MAIL$', # retain full original message for virus checking
qr'^MAIL-UNDECIPHERABLE$', # recheck full mail if it contains undecipherables
qr'^(ASCII(?! cpio)|text|uuencoded|xxencoded|binhex)'i,
# qr'^Zip archive data', # don't trust Archive::Zip
));
# for $banned_namepath_re (a new-style of banned table) see amavisd.conf-sample
$banned_filename_re = new_RE(
### BLOCKED ANYWHERE
# qr'^UNDECIPHERABLE$', # is or contains any undecipherable components
qr'^\.(exe-ms|dll)$', # banned file(1) types, rudimentary
# qr'^\.(exe|lha|tnef|cab|dll)$', # banned file(1) types
### BLOCK THE FOLLOWING, EXCEPT WITHIN UNIX ARCHIVES:
# [ qr'^\.(gz|bz2)$' => 0 ], # allow any in gzip or bzip2
[ qr'^\.(rpm|cpio|tar)$' => 0 ], # allow any in Unix-type archives
qr'.\.(pif|scr)$'i, # banned extensions - rudimentary
# qr'^\.zip$', # block zip type
### BLOCK THE FOLLOWING, EXCEPT WITHIN ARCHIVES:
# [ qr'^\.(zip|rar|arc|arj|zoo)$'=> 0 ], # allow any within these archives
qr'^application/x-msdownload$'i, # block these MIME types
qr'^application/x-msdos-program$'i,
qr'^application/hta$'i,
# qr'^message/partial$'i, # rfc2046 MIME type
# qr'^message/external-body$'i, # rfc2046 MIME type
# qr'^(application/x-msmetafile|image/x-wmf)$'i, # Windows Metafile MIME type
# qr'^\.wmf$', # Windows Metafile file(1) type
# block certain double extensions in filenames
qr'\.[^./]*[A-Za-z][^./]*\.\s*(exe|vbs|pif|scr|bat|cmd|com|cpl|dll)[.\s]*$'i,
# qr'\{[0-9a-f]{8}(-[0-9a-f]{4}){3}-[0-9a-f]{12}\}?'i, # Class ID CLSID, strict
# qr'\{[0-9a-z]{4,}(-[0-9a-z]{4,}){0,7}\}?'i, # Class ID extension CLSID, loose
qr'.\.(exe|vbs|pif|scr|cpl)$'i, # banned extension - basic
# qr'.\.(exe|vbs|pif|scr|cpl|bat|cmd|com)$'i, # banned extension - basic+cmd
# qr'.\.(ade|adp|app|bas|bat|chm|cmd|com|cpl|crt|emf|exe|fxp|grp|hlp|hta|
# inf|ins|isp|js|jse|lnk|mda|mdb|mde|mdw|mdt|mdz|msc|msi|msp|mst|
# ops|pcd|pif|prg|reg|scr|sct|shb|shs|vb|vbe|vbs|
# wmf|wsc|wsf|wsh)$'ix, # banned ext - long
# qr'.\.(ani|cur|ico)$'i, # banned cursors and icons filename
# qr'^\.ani$', # banned animated cursor file(1) type
# qr'.\.(mim|b64|bhx|hqx|xxe|uu|uue)$'i, # banned extension - WinZip vulnerab.
);
# See http://support.microsoft.com/default.aspx?scid=kb;EN-US;q262631
# and http://www.cknow.com/vtutor/vtextensions.htm
# ENVELOPE SENDER SOFT-WHITELISTING / SOFT-BLACKLISTING
@score_sender_maps = ({ # a by-recipient hash lookup table,
# results from all matching recipient tables are summed
# ## per-recipient personal tables (NOTE: positive: black, negative: white)
# '[email protected]' => [{'[email protected]' => 10.0}],
# '[email protected]' => [{'.ebay.com' => -3.0}],
# '[email protected]' => [{'[email protected]' => -7.0,
# '.cleargreen.com' => -5.0}],
## site-wide opinions about senders (the '.' matches any recipient)
'.' => [ # the _first_ matching sender determines the score boost
new_RE( # regexp-type lookup table, just happens to be all soft-blacklist
[qr'^(bulkmail|offers|cheapbenefits|earnmoney|foryou)@'i => 5.0],
[qr'^(greatcasino|investments|lose_weight_today|market\.alert)@'i=> 5.0],
[qr'^(money2you|MyGreenCard|new\.tld\.registry|opt-out|opt-in)@'i=> 5.0],
[qr'^(optin|saveonlsmoking2002k|specialoffer|specialoffers)@'i => 5.0],
[qr'^(stockalert|stopsnoring|wantsome|workathome|yesitsfree)@'i => 5.0],
[qr'^(your_friend|greatoffers)@'i => 5.0],
[qr'^(inkjetplanet|marketopt|MakeMoney)\d*@'i => 5.0],
),
# read_hash("/var/amavis/sender_scores_sitewide"),
{ # a hash-type lookup table (associative array)
'[email protected]' => -3.0,
'[email protected]' => -3.0,
'[email protected]' => -3.0,
'[email protected]' => -3.0,
'securityfocus.com' => -3.0,
'[email protected]' => -3.0,
'[email protected]' => -3.0,
'[email protected]' => -3.0,
'[email protected]'=> -3.0,
'[email protected]' => -3.0,
'spamassassin.apache.org' => -3.0,
'[email protected]' => -3.0,
'[email protected]' => -3.0,
'[email protected]' => -3.0,
'[email protected]' => -3.0,
'[email protected]' => -3.0,
'[email protected]' => -3.0,
'[email protected]' => -3.0,
'[email protected]' => -3.0,
'[email protected]' => -3.0,
'[email protected]' => -3.0,
'[email protected]' => -3.0,
'[email protected]' => -3.0,
'[email protected]' => -3.0,
'[email protected]' => -3.0,
'[email protected]' => -5.0,
'[email protected]' => -3.0,
'returns.groups.yahoo.com' => -3.0,
'[email protected]' => -3.0,
lc('[email protected]') => -3.0,
lc('[email protected]') => -5.0,
# soft-blacklisting (positive score)
'[email protected]' => 3.0,
'.example.net' => 1.0,
},
], # end of site-wide tables
});
@decoders = (
['mail', \&do_mime_decode],
['asc', \&do_ascii],
['uue', \&do_ascii],
['hqx', \&do_ascii],
['ync', \&do_ascii],
['F', \&do_uncompress, ['unfreeze','freeze -d','melt','fcat'] ],
['Z', \&do_uncompress, ['uncompress','gzip -d','zcat'] ],
['gz', \&do_uncompress, 'gzip -d'],
['gz', \&do_gunzip],
['bz2', \&do_uncompress, 'bzip2 -d'],
['lzo', \&do_uncompress, 'lzop -d'],
['rpm', \&do_uncompress, ['rpm2cpio.pl','rpm2cpio'] ],
['cpio', \&do_pax_cpio, ['pax','gcpio','cpio'] ],
['tar', \&do_pax_cpio, ['pax','gcpio','cpio'] ],
['deb', \&do_ar, 'ar'],
# ['a', \&do_ar, 'ar'], # unpacking .a seems an overkill
['zip', \&do_unzip],
['7z', \&do_7zip, ['7zr','7za','7z'] ],
['rar', \&do_unrar, ['rar','unrar'] ],
['arj', \&do_unarj, ['arj','unarj'] ],
['arc', \&do_arc, ['nomarch','arc'] ],
['zoo', \&do_zoo, ['zoo','unzoo'] ],
['lha', \&do_lha, 'lha'],
# ['doc', \&do_ole, 'ripole'],
['cab', \&do_cabextract, 'cabextract'],
['tnef', \&do_tnef_ext, 'tnef'],
['tnef', \&do_tnef],
# ['sit', \&do_unstuff, 'unstuff'], # broken/unsafe decoder
['exe', \&do_executable, ['rar','unrar'], 'lha', ['arj','unarj'] ],
);
@av_scanners = (
# ### http://www.clanfield.info/sophie/ (http://www.vanja.com/tools/sophie/)
# ['Sophie',
# \&ask_daemon, ["{}/\n", '/var/run/sophie'],
# qr/(?x)^ 0+ ( : | [\000\r\n]* $)/m, qr/(?x)^ 1 ( : | [\000\r\n]* $)/m,
# qr/(?x)^ [-+]? \d+ : (.*?) [\000\r\n]* $/m ],
# ### http://www.csupomona.edu/~henson/www/projects/SAVI-Perl/
# ['Sophos SAVI', \&sophos_savi ],
# ### http://www.clamav.net/
['ClamAV-clamd',
\&ask_daemon, ["CONTSCAN {}\n", "/var/spool/amavisd/clamd.sock"],
qr/\bOK$/m, qr/\bFOUND$/m,
qr/^.*?: (?!Infected Archive)(.*) FOUND$/m ],
# # NOTE: run clamd under the same user as amavisd, or run it under its own
# # uid such as clamav, add user clamav to the amavis group, and then add
# # AllowSupplementaryGroups to clamd.conf;
# # NOTE: match socket name (LocalSocket) in clamav.conf to the socket name in
# # this entry; when running chrooted one may prefer socket "$MYHOME/clamd".
# ### http://www.clamav.net/ and CPAN (memory-hungry! clamd is preferred)
# # note that Mail::ClamAV requires perl to be build with threading!
# ['Mail::ClamAV', \&ask_clamav, "*", [0], [1], qr/^INFECTED: (.+)/m ],
# ### http://www.openantivirus.org/
# ['OpenAntiVirus ScannerDaemon (OAV)',
# \&ask_daemon, ["SCAN {}\n", '127.0.0.1:8127'],
# qr/^OK/m, qr/^FOUND: /m, qr/^FOUND: (.+)/m ],
# ### http://www.vanja.com/tools/trophie/
# ['Trophie',
# \&ask_daemon, ["{}/\n", '/var/run/trophie'],
# qr/(?x)^ 0+ ( : | [\000\r\n]* $)/m, qr/(?x)^ 1 ( : | [\000\r\n]* $)/m,
# qr/(?x)^ [-+]? \d+ : (.*?) [\000\r\n]* $/m ],
# ### http://www.grisoft.com/
# ['AVG Anti-Virus',
# \&ask_daemon, ["SCAN {}\n", '127.0.0.1:55555'],
# qr/^200/m, qr/^403/m, qr/^403 .*?: ([^\r\n]+)/m ],
# ### http://www.f-prot.com/
# ['F-Prot fpscand', # F-PROT Antivirus for BSD/Linux/Solaris, version 6
# \&ask_daemon,
# ["SCAN FILE {}/*\n", '127.0.0.1:10200'],
# qr/^(0|8|64) /m,
# qr/^([1235679]|1[01345]) |<[^>:]*(?i)(infected|suspicious|unwanted)/m,
# qr/(?i)<[^>:]*(?:infected|suspicious|unwanted)[^>:]*: ([^>]*)>/m ],
# ### http://www.f-prot.com/
# ['F-Prot f-protd', # old version
# \&ask_daemon,
# ["GET {}/*?-dumb%20-archive%20-packed HTTP/1.0\r\n\r\n",
# ['127.0.0.1:10200', '127.0.0.1:10201', '127.0.0.1:10202',
# '127.0.0.1:10203', '127.0.0.1:10204'] ],
# qr/(?i)<summary[^>]*>clean<\/summary>/m,
# qr/(?i)<summary[^>]*>infected<\/summary>/m,
# qr/(?i)<name>(.+)<\/name>/m ],
# ### http://www.sald.com/, http://www.dials.ru/english/, http://www.drweb.ru/
# ['DrWebD', \&ask_daemon, # DrWebD 4.31 or later
# [pack('N',1). # DRWEBD_SCAN_CMD
# pack('N',0x00280001). # DONT_CHANGEMAIL, IS_MAIL, RETURN_VIRUSES
# pack('N', # path length
# length("$TEMPBASE/amavis-yyyymmddTHHMMSS-xxxxx/parts/pxxx")).
# '{}/*'. # path
# pack('N',0). # content size
# pack('N',0),
# '/var/drweb/run/drwebd.sock',
# # '/var/amavis/var/run/drwebd.sock', # suitable for chroot
# # '/usr/local/drweb/run/drwebd.sock', # FreeBSD drweb ports default
# # '127.0.0.1:3000', # or over an inet socket
# ],
# qr/\A\x00[\x10\x11][\x00\x10]\x00/sm, # IS_CLEAN,EVAL_KEY; SKIPPED
# qr/\A\x00[\x00\x01][\x00\x10][\x20\x40\x80]/sm,# KNOWN_V,UNKNOWN_V,V._MODIF
# qr/\A.{12}(?:infected with )?([^\x00]+)\x00/sm,
# ],
# # NOTE: If using amavis-milter, change length to:
# # length("$TEMPBASE/amavis-milter-xxxxxxxxxxxxxx/parts/pxxx").
### http://www.kaspersky.com/ (kav4mailservers)
['KasperskyLab AVP - aveclient',
['/usr/local/kav/bin/aveclient','/usr/local/share/kav/bin/aveclient',
'/opt/kav/5.5/kav4mailservers/bin/aveclient','aveclient'],
'-p /var/run/aveserver -s {}/*',
[0,3,6,8], qr/\b(INFECTED|SUSPICION|SUSPICIOUS)\b/m,
qr/(?:INFECTED|WARNING|SUSPICION|SUSPICIOUS) (.+)/m,
],
# NOTE: one may prefer [0],[2,3,4,5], depending on how suspicious,
# currupted or protected archives are to be handled
### http://www.kaspersky.com/
['KasperskyLab AntiViral Toolkit Pro (AVP)', ['avp'],
'-* -P -B -Y -O- {}', [0,3,6,8], [2,4], # any use for -A -K ?
qr/infected: (.+)/m,
sub {chdir('/opt/AVP') or die "Can't chdir to AVP: $!"},
sub {chdir($TEMPBASE) or die "Can't chdir back to $TEMPBASE $!"},
],
### The kavdaemon and AVPDaemonClient have been removed from Kasperky
### products and replaced by aveserver and aveclient
['KasperskyLab AVPDaemonClient',
[ '/opt/AVP/kavdaemon', 'kavdaemon',
'/opt/AVP/AvpDaemonClient', 'AvpDaemonClient',
'/opt/AVP/AvpTeamDream', 'AvpTeamDream',
'/opt/AVP/avpdc', 'avpdc' ],
"-f=$TEMPBASE {}", [0,8], [3,4,5,6], qr/infected: ([^\r\n]+)/m ],
# change the startup-script in /etc/init.d/kavd to:
# DPARMS="-* -Y -dl -f=/var/amavis /var/amavis"
# (or perhaps: DPARMS="-I0 -Y -* /var/amavis" )
# adjusting /var/amavis above to match your $TEMPBASE.
# The '-f=/var/amavis' is needed if not running it as root, so it
# can find, read, and write its pid file, etc., see 'man kavdaemon'.
# defUnix.prf: there must be an entry "*/var/amavis" (or whatever
# directory $TEMPBASE specifies) in the 'Names=' section.
# cd /opt/AVP/DaemonClients; configure; cd Sample; make
# cp AvpDaemonClient /opt/AVP/
# su - vscan -c "${PREFIX}/kavdaemon ${DPARMS}"
### http://www.centralcommand.com/
['CentralCommand Vexira (new) vascan',
['vascan','/usr/lib/Vexira/vascan'],
"-a s --timeout=60 --temp=$TEMPBASE -y $QUARANTINEDIR ".
"--log=/var/log/vascan.log {}",
[0,3], [1,2,5],
qr/(?x)^\s* (?:virus|iworm|macro|mutant|sequence|trojan)\ found:\ ( [^\]\s']+ )\ \.\.\.\ /m ],
# Adjust the path of the binary and the virus database as needed.
# 'vascan' does not allow to have the temp directory to be the same as
# the quarantine directory, and the quarantine option can not be disabled.
# If $QUARANTINEDIR is not used, then another directory must be specified
# to appease 'vascan'. Move status 3 to the second list if password
# protected files are to be considered infected.
### http://www.avira.com/
### Avira AntiVir (formerly H+BEDV) or (old) CentralCommand Vexira Antivirus
['Avira AntiVir', ['antivir','vexira'],
'--allfiles -noboot -nombr -rs -s -z {}', [0], qr/ALERT:|VIRUS:/m,
qr/(?x)^\s* (?: ALERT: \s* (?: \[ | [^']* ' ) |
(?i) VIRUS:\ .*?\ virus\ '?) ( [^\]\s']+ )/m ],
# NOTE: if you only have a demo version, remove -z and add 214, as in:
# '--allfiles -noboot -nombr -rs -s {}', [0,214], qr/ALERT:|VIRUS:/,
### http://www.commandsoftware.com/
['Command AntiVirus for Linux', 'csav',
'-all -archive -packed {}', [50], [51,52,53],
qr/Infection: (.+)/m ],
### http://www.symantec.com/
['Symantec CarrierScan via Symantec CommandLineScanner',
'cscmdline', '-a scan -i 1 -v -s 127.0.0.1:7777 {}',
qr/^Files Infected:\s+0$/m, qr/^Infected\b/m,
qr/^(?:Info|Virus Name):\s+(.+)/m ],
### http://www.symantec.com/
['Symantec AntiVirus Scan Engine',
'savsecls', '-server 127.0.0.1:7777 -mode scanrepair -details -verbose {}',
[0], qr/^Infected\b/m,
qr/^(?:Info|Virus Name):\s+(.+)/m ],
# NOTE: check options and patterns to see which entry better applies
# ### http://www.f-secure.com/products/anti-virus/ version 4.65
# ['F-Secure Antivirus for Linux servers',
# ['/opt/f-secure/fsav/bin/fsav', 'fsav'],
# '--delete=no --disinf=no --rename=no --archive=yes --auto=yes '.
# '--dumb=yes --list=no --mime=yes {}', [0], [3,6,8],
# qr/(?:infection|Infected|Suspected): (.+)/m ],
### http://www.f-secure.com/products/anti-virus/ version 5.52
['F-Secure Antivirus for Linux servers',
['/opt/f-secure/fsav/bin/fsav', 'fsav'],
'--virus-action1=report --archive=yes --auto=yes '.
'--dumb=yes --list=no --mime=yes {}', [0], [3,4,6,8],
qr/(?:infection|Infected|Suspected|Riskware): (.+)/m ],
# NOTE: internal archive handling may be switched off by '--archive=no'
# to prevent fsav from exiting with status 9 on broken archives
# ### http://www.avast.com/
# ['avast! Antivirus daemon',
# \&ask_daemon, # greets with 220, terminate with QUIT
# ["SCAN {}\015\012QUIT\015\012", '/var/run/avast4/mailscanner.sock'],
# qr/\t\[\+\]/m, qr/\t\[L\]\t/m, qr/\t\[L\]\t([^[ \t\015\012]+)/m ],
# ### http://www.avast.com/
# ['avast! Antivirus - Client/Server Version', 'avastlite',
# '-a /var/run/avast4/mailscanner.sock -n {}', [0], [1],
# qr/\t\[L\]\t([^[ \t\015\012]+)/m ],
['CAI InoculateIT', 'inocucmd', # retired product
'-sec -nex {}', [0], [100],
qr/was infected by virus (.+)/m ],
# see: http://www.flatmtn.com/computer/Linux-Antivirus_CAI.html
### http://www3.ca.com/Solutions/Product.asp?ID=156 (ex InoculateIT)
['CAI eTrust Antivirus', 'etrust-wrapper',
'-arc -nex -spm h {}', [0], [101],
qr/is infected by virus: (.+)/m ],
# NOTE: requires suid wrapper around inocmd32; consider flag: -mod reviewer
# see http://marc.theaimsgroup.com/?l=amavis-user&m=109229779912783
### http://mks.com.pl/english.html
['MkS_Vir for Linux (beta)', ['mks32','mks'],
'-s {}/*', [0], [1,2],
qr/--[ \t]*(.+)/m ],
### http://mks.com.pl/english.html
['MkS_Vir daemon', 'mksscan',
'-s -q {}', [0], [1..7],
qr/^... (\S+)/m ],
# ### http://www.nod32.com/, version v2.52 (old)
# ['ESET NOD32 for Linux Mail servers',
# ['/opt/eset/nod32/bin/nod32cli', 'nod32cli'],
# '--subdir --files -z --sfx --rtp --adware --unsafe --pattern --heur '.
# '-w -a --action-on-infected=accept --action-on-uncleanable=accept '.
# '--action-on-notscanned=accept {}',
# [0,3], [1,2], qr/virus="([^"]+)"/m ],
# ### http://www.eset.com/, version v2.7 (old)
# ['ESET NOD32 Linux Mail Server - command line interface',
# ['/usr/bin/nod32cli', '/opt/eset/nod32/bin/nod32cli', 'nod32cli'],
# '--subdir {}', [0,3], [1,2], qr/virus="([^"]+)"/m ],
# ### http://www.eset.com/, version 2.71.12
# ['ESET Software ESETS Command Line Interface',
# ['/usr/bin/esets_cli', 'esets_cli'],
# '--subdir {}', [0], [1,2,3], qr/virus="([^"]+)"/m ],
### http://www.eset.com/, version 3.0
['ESET Software ESETS Command Line Interface',
['/usr/bin/esets_cli', 'esets_cli'],
'--subdir {}', [0], [1,2,3],
qr/:\s*action="(?!accepted)[^"]*"\n.*:\s*virus="([^"]*)"/m ],
## http://www.nod32.com/, NOD32LFS version 2.5 and above
['ESET NOD32 for Linux File servers',
['/opt/eset/nod32/sbin/nod32','nod32'],
'--files -z --mail --sfx --rtp --adware --unsafe --pattern --heur '.
'-w -a --action=1 -b {}',
[0], [1,10], qr/^object=.*, virus="(.*?)",/m ],
# Experimental, based on posting from Rado Dibarbora (Dibo) on 2002-05-31
# ['ESET Software NOD32 Client/Server (NOD32SS)',
# \&ask_daemon2, # greets with 200, persistent, terminate with QUIT
# ["SCAN {}/*\r\n", '127.0.0.1:8448' ],
# qr/^200 File OK/m, qr/^201 /m, qr/^201 (.+)/m ],
### http://www.norman.com/products_nvc.shtml
['Norman Virus Control v5 / Linux', 'nvcc',
'-c -l:0 -s -u -temp:$TEMPBASE {}', [0,10,11], [1,2,14],
qr/(?i).* virus in .* -> \'(.+)\'/m ],
### http://www.pandasoftware.com/
['Panda CommandLineSecure 9 for Linux',
['/opt/pavcl/usr/bin/pavcl','pavcl'],
'-auto -aex -heu -cmp -nbr -nor -nos -eng -nob {}',
qr/Number of files infected[ .]*: 0+(?!\d)/m,
qr/Number of files infected[ .]*: 0*[1-9]/m,
qr/Found virus :\s*(\S+)/m ],
# NOTE: for efficiency, start the Panda in resident mode with 'pavcl -tsr'
# before starting amavisd - the bases are then loaded only once at startup.
# To reload bases in a signature update script:
# /opt/pavcl/usr/bin/pavcl -tsr -ulr; /opt/pavcl/usr/bin/pavcl -tsr
# Please review other options of pavcl, for example:
# -nomalw, -nojoke, -nodial, -nohackt, -nospyw, -nocookies
# ### http://www.pandasoftware.com/
# ['Panda Antivirus for Linux', ['pavcl'],
# '-TSR -aut -aex -heu -cmp -nbr -nor -nso -eng {}',
# [0], [0x10, 0x30, 0x50, 0x70, 0x90, 0xB0, 0xD0, 0xF0],
# qr/Found virus :\s*(\S+)/m ],
# GeCAD AV technology is acquired by Microsoft; RAV has been discontinued.
# Check your RAV license terms before fiddling with the following two lines!
# ['GeCAD RAV AntiVirus 8', 'ravav',
# '--all --archive --mail {}', [1], [2,3,4,5], qr/Infected: (.+)/m ],
# # NOTE: the command line switches changed with scan engine 8.5 !
# # (btw, assigning stdin to /dev/null causes RAV to fail)
### http://www.nai.com/
['NAI McAfee AntiVirus (uvscan)', 'uvscan',
'--secure -rv --mime --summary --noboot - {}', [0], [13],
qr/(?x) Found (?:
\ the\ (.+)\ (?:virus|trojan) |
\ (?:virus|trojan)\ or\ variant\ ([^ ]+) |
:\ (.+)\ NOT\ a\ virus)/m,
# sub {$ENV{LD_PRELOAD}='/lib/libc.so.6'},
# sub {delete $ENV{LD_PRELOAD}},
],
# NOTE1: with RH9: force the dynamic linker to look at /lib/libc.so.6 before
# anything else by setting environment variable LD_PRELOAD=/lib/libc.so.6
# and then clear it when finished to avoid confusing anything else.
# NOTE2: to treat encrypted files as viruses replace the [13] with:
# qr/^\s{5,}(Found|is password-protected|.*(virus|trojan))/
### http://www.virusbuster.hu/en/
['VirusBuster', ['vbuster', 'vbengcl'],
"{} -ss -i '*' -log=$MYHOME/vbuster.log", [0], [1],
qr/: '(.*)' - Virus/m ],
# VirusBuster Ltd. does not support the daemon version for the workstation
# engine (vbuster-eng-1.12-linux-i386-libc6.tgz) any longer. The names of
# binaries, some parameters AND return codes have changed (from 3 to 1).
# See also the new Vexira entry 'vascan' which is possibly related.
# ### http://www.virusbuster.hu/en/
# ['VirusBuster (Client + Daemon)', 'vbengd',
# '-f -log scandir {}', [0], [3],
# qr/Virus found = (.*);/m ],
# # HINT: for an infected file it always returns 3,
# # although the man-page tells a different story
### http://www.cyber.com/
['CyberSoft VFind', 'vfind',
'--vexit {}/*', [0], [23], qr/##==>>>> VIRUS ID: CVDL (.+)/m,
# sub {$ENV{VSTK_HOME}='/usr/lib/vstk'},
],
### http://www.avast.com/
['avast! Antivirus', ['/usr/bin/avastcmd','avastcmd'],
'-a -i -n -t=A {}', [0], [1], qr/\binfected by:\s+([^ \t\n\[\]]+)/m ],
### http://www.ikarus-software.com/
['Ikarus AntiVirus for Linux', 'ikarus',
'{}', [0], [40], qr/Signature (.+) found/m ],
### http://www.bitdefender.com/
['BitDefender', 'bdscan', # new version
'--action=ignore --no-list {}', qr/^Infected files\s*:\s*0+(?!\d)/m,
qr/^(?:Infected files|Identified viruses|Suspect files)\s*:\s*0*[1-9]/m,
qr/(?:suspected|infected)\s*:\s*(.*)(?:\033|$)/m ],
### http://www.bitdefender.com/
['BitDefender', 'bdc', # old version
'--arc --mail {}', qr/^Infected files *:0+(?!\d)/m,
qr/^(?:Infected files|Identified viruses|Suspect files) *:0*[1-9]/m,
qr/(?:suspected|infected): (.*)(?:\033|$)/m ],
# consider also: --all --nowarn --alev=15 --flev=15. The --all argument may
# not apply to your version of bdc, check documentation and see 'bdc --help'
### ArcaVir for Linux and Unix http://www.arcabit.pl/
['ArcaVir for Linux', ['arcacmd','arcacmd.static'],
'-v 1 -summary 0 -s {}', [0], [1,2],
qr/(?:VIR|WIR):[ \t]*(.+)/m ],
# ### a generic SMTP-client interface to a SMTP-based virus scanner
# ['av_smtp', \&ask_av_smtp,
# ['{}', 'smtp:[127.0.0.1]:5525', '[email protected]'],
# qr/^2/, qr/^5/, qr/^\s*(.*?)\s*$/m ],
# ['File::Scan', sub {Amavis::AV::ask_av(sub{
# use File::Scan; my($fn)[email protected]_;
# my($f)=File::Scan->new(max_txt_size=>0, max_bin_size=>0);
# my($vname) = $f->scan($fn);
# $f->error ? (2,"Error: ".$f->error)
# : ($vname ne '') ? (1,"$vname FOUND") : (0,"Clean")}, @_) },
# ["{}/*"], [0], [1], qr/^(.*) FOUND$/m ],
# ### fully-fledged checker for JPEG marker segments of invalid length
# ['check-jpeg',
# sub { use JpegTester (); Amavis::AV::ask_av(\&JpegTester::test_jpeg, @_) },
# ["{}/*"], undef, [1], qr/^(bad jpeg: .*)$/m ],
# # NOTE: place file JpegTester.pm somewhere where Perl can find it,
# # for example in /usr/local/lib/perl5/site_perl
);
@av_scanners_backup = (
### http://www.clamav.net/ - backs up clamd or Mail::ClamAV
['ClamAV-clamscan', 'clamscan',
"--stdout --no-summary -r --tempdir=$TEMPBASE {}",
[0], qr/:.*\sFOUND$/m, qr/^.*?: (?!Infected Archive)(.*) FOUND$/m ],
### http://www.f-prot.com/ - backs up F-Prot Daemon, V6
['F-PROT Antivirus for UNIX', ['fpscan'],
'--report --mount --adware {}', # consider: --applications -s 4 -u 3 -z 10
[0,8,64], [1,2,3, 4+1,4+2,4+3, 8+1,8+2,8+3, 12+1,12+2,12+3],
qr/^\[Found\s+[^\]]*\]\s+<([^ \t(>]*)/m ],
### http://www.f-prot.com/ - backs up F-Prot Daemon (old)
['FRISK F-Prot Antivirus', ['f-prot','f-prot.sh'],
'-dumb -archive -packed {}', [0,8], [3,6], # or: [0], [3,6,8],
qr/(?:Infection:|security risk named) (.+)|\s+contains\s+(.+)$/m ],
### http://www.trendmicro.com/ - backs up Trophie
['Trend Micro FileScanner', ['/etc/iscan/vscan','vscan'],
'-za -a {}', [0], qr/Found virus/m, qr/Found virus (.+) in/m ],
### http://www.sald.com/, http://drweb.imshop.de/ - backs up DrWebD
['drweb - DrWeb Antivirus', # security LHA hole in Dr.Web 4.33 and earlier
['/usr/local/drweb/drweb', '/opt/drweb/drweb', 'drweb'],
'-path={} -al -go -ot -cn -upn -ok-',
[0,32], [1,9,33], qr' infected (?:with|by)(?: virus)? (.*)$'m ],
### http://www.kaspersky.com/
['Kaspersky Antivirus v5.5',
['/opt/kaspersky/kav4fs/bin/kav4fs-kavscanner',
'/opt/kav/5.5/kav4unix/bin/kavscanner',
'/opt/kav/5.5/kav4mailservers/bin/kavscanner', 'kavscanner'],
'-i0 -xn -xp -mn -R -ePASBME {}/*', [0,10,15], [5,20,21,25],
qr/(?:INFECTED|WARNING|SUSPICION|SUSPICIOUS) (.*)/m,
# sub {chdir('/opt/kav/bin') or die "Can't chdir to kav: $!"},
# sub {chdir($TEMPBASE) or die "Can't chdir back to $TEMPBASE $!"},
],
# Commented out because the name 'sweep' clashes with Debian and FreeBSD
# package/port of an audio editor. Make sure the correct 'sweep' is found
# in the path when enabling.
#
# ### http://www.sophos.com/ - backs up Sophie or SAVI-Perl
# ['Sophos Anti Virus (sweep)', 'sweep',
# '-nb -f -all -rec -ss -sc -archive -cab -mime -oe -tnef '.
# '--no-reset-atime {}',
# [0,2], qr/Virus .*? found/m,
# qr/^>>> Virus(?: fragment)? '?(.*?)'? found/m,
# ],
# # other options to consider: -idedir=/usr/local/sav
# Always succeeds and considers mail clean.
# Potentially useful when all other scanners fail and it is desirable
# to let mail continue to flow with no virus checking (when uncommented).
# ['always-clean', sub {0}],
);
1; # insure a defined return value |
amavisd-new is the program that glues together Postfix and SpamAssassin/ClamAV. Postfix passes the mails to amavisd-new which then invokes SpamAssassin and ClamAV to scan the emails. Please have a look at the Spamassassin and ClamAV settings in /etc/amavisd/amavisd.conf . Of course, you can customize that file a lot more. Feel free to do so, and have a look at the explanations in the original /etc/amavisd/amavisd.conf file!
Now let's create the system startup links for ClamAV and amavisd-new, update ClamAV's virus signature database, and start both services:
chkconfig --levels 235 amavisd on
chkconfig --levels 235 clamd.amavisd on
/usr/bin/freshclam
/etc/init.d/amavisd start
/etc/init.d/clamd.amavisd start
Nous devons maintenant configurer Postfix pour diriger les e-mails entrants via amavisd-new :
postconf -e 'content_filter = amavis:[127.0.0.1]:10024'
postconf -e 'receive_override_options = no_address_mappings'
Afterwards append the following lines to /etc/postfix/master.cf :
vi /etc/postfix/master.cf
[...] |
and restart Postfix:
/etc/init.d/postfix restart
13 Install Razor, Pyzor And DCC And Configure SpamAssassin
Razor, Pyzor et DCC sont des filtres anti-spam qui utilisent un réseau de filtrage collaboratif. Pour installer Razor et Pyzor, exécutez
yum install perl-Razor-Agent pyzor
Then initialize both services:
chmod -R a+rX /usr/share/doc/pyzor-0.5.0 /usr/bin/pyzor /usr/bin/pyzord
chmod -R a+rX /usr/lib/python2.6/site-packages/pyzor
su -m amavis -c 'pyzor --homedir /var/spool/amavisd discover'
su -m amavis -c 'razor-admin -home=/var/spool/amavisd -create'
su -m amavis -c 'razor-admin -home=/var/spool/amavisd -register'
Then we install DCC as follows:
cd /tmp
wget http://www.dcc-servers.net/dcc/source/dcc-dccproc.tar.Z
tar xzvf dcc-dccproc.tar.Z
cd dcc-dccproc-1.3.144
./configure --with-uid=amavis
make
make install
chown -R amavis:amavis /var/dcc
ln -s /var/dcc/libexec/dccifd /usr/local/bin/dccifd
Maintenant, nous devons dire à SpamAssassin d'utiliser ces trois programmes. Edit /etc/mail/spamassassin/local.cf so that it looks like this:
vi /etc/mail/spamassassin/local.cf
# These values can be overridden by editing ~/.spamassassin/user_prefs.cf |
Ensuite, il faut activer le plugin DCC dans SpamAssassin. Open /etc/mail/spamassassin/v310.pre and uncomment the loadplugin Mail::SpamAssassin::Plugin::DCC line:
vi /etc/mail/spamassassin/v310.pre
[...] |
Vous pouvez vérifier votre configuration SpamAssassin en exécutant :
spamassassin --lint
Il ne devrait afficher aucune erreur.
Exécuter
/etc/init.d/amavisd restart
afterwards.
Maintenant, nous mettons à jour nos ensembles de règles SpamAssassin comme suit :
sa-update --no-gpg
Nous créons une tâche cron afin que les ensembles de règles soient mis à jour régulièrement. Exécuter
crontab -e
pour ouvrir l'éditeur de tâches cron. Créez la tâche cron suivante :
23 4 */2 * * /usr/bin/sa-update --no-gpg &> /dev/null |
Cela mettra à jour les règles tous les deux jours à 4h23.
14 Quota Exceedance Notifications
Si vous souhaitez recevoir des notifications sur tous les comptes de messagerie qui dépassent le quota, créez le fichier /usr/local/sbin/quota_notify :
cd /usr/local/sbin/
vi quota_notify
#!/usr/bin/perl -w

# Author <[email protected]>
#
# This script assumes that virtual_mailbox_base in defined
# in postfix's main.cf file. This directory is assumed to contain
# directories which themselves contain your virtual user's maildirs.
# For example:
#
# -----------/
#            |
#            |
#    home/vmail/domains/
#        |          |
#        |          |
#  example.com/  foo.com/
#                   |
#                   |
#           -----------------
#           |       |       |
#           |       |       |
#         user1/   user2/  user3/
#                           |
#                           |
#                        maildirsize
#

use strict;

my $POSTFIX_CF = "/etc/postfix/main.cf";
my $MAILPROG = "/usr/sbin/sendmail -t";
my $WARNPERCENT = 80;
my @POSTMASTERS = ('[email protected]');
my $CONAME = 'My Company';
my $COADDR = '[email protected]';
my $SUADDR = '[email protected]';
my $MAIL_REPORT = 1;
my $MAIL_WARNING = 1;

#get virtual mailbox base from postfix config
open(PCF, "< $POSTFIX_CF") or die $!;
my $mboxBase;
while (<PCF>) {
   next unless /virtual_mailbox_base\s*=\s*(.*)\s*/;
   $mboxBase = $1;
}
close(PCF);

#assume one level of subdirectories for domain names
my @domains;
opendir(DIR, $mboxBase) or die $!;
while (defined(my $name = readdir(DIR))) {
   next if $name =~ /^\.\.?$/;        #skip '.' and '..'
   next unless (-d "$mboxBase/$name");
   push(@domains, $name);
}
closedir(DIR);
#iterate through domains for username/maildirsize files
my @users;
chdir($mboxBase);
foreach my $domain (@domains) {
        opendir(DIR, $domain) or die $!;
        while (defined(my $name = readdir(DIR))) {
           next if $name =~ /^\.\.?$/;        #skip '.' and '..'
           next unless (-d "$domain/$name");
      push(@users, {"$name\@$domain" => "$mboxBase/$domain/$name"});
        }
}
closedir(DIR);

#get user quotas and percent used
my (%lusers, $report);
foreach my $href (@users) {
   foreach my $user (keys %$href) {
      my $quotafile = "$href->{$user}/maildirsize";
      next unless (-f $quotafile);
      open(QF, "< $quotafile") or die $!;
      my ($firstln, $quota, $used);
      while (<QF>) {
         my $line = $_;
              if (! $firstln) {
                 $firstln = 1;
                 die "Error: corrupt quotafile $quotafile"
                    unless ($line =~ /^(\d+)S/);
                 $quota = $1;
            last if (! $quota);
            next;
         }
         die "Error: corrupt quotafile $quotafile"
            unless ($line =~ /\s*(-?\d+)/);
         $used += $1;
      }
      close(QF);
      next if (! $used);
      my $percent = int($used / $quota * 100);
      $lusers{$user} = $percent unless not $percent;
   }
}

#send a report to the postmasters
if ($MAIL_REPORT) {
   open(MAIL, "| $MAILPROG");
   select(MAIL);
   map {print "To: $_\n"} @POSTMASTERS;
   print "From: $COADDR\n";
   print "Subject: Daily Quota Report.\n";
   print "DAILY QUOTA REPORT:\n\n";
   print "----------------------------------------------\n";
   print "| % USAGE |            ACCOUNT NAME          |\n";
   print "----------------------------------------------\n";
   foreach my $luser ( sort { $lusers{$b} <=> $lusers{$a} } keys %lusers ) {
      printf("|   %3d   | %32s |\n", $lusers{$luser}, $luser);
      print "---------------------------------------------\n";
   }
        print "\n--\n";
        print "$CONAME\n";
        close(MAIL);
}

#email a warning to people over quota
if ($MAIL_WARNING) {
        foreach my $luser (keys (%lusers)) {
           next unless $lusers{$luser} >= $WARNPERCENT;       # skip those under quota
           open(MAIL, "| $MAILPROG");
           select(MAIL);
           print "To: $luser\n";
      map {print "BCC: $_\n"} @POSTMASTERS;
           print "From: $SUADDR\n";
           print "Subject: WARNING: Your mailbox is $lusers{$luser}% full.\n";
           print "Reply-to: $SUADDR\n";
           print "Your mailbox: $luser is $lusers{$luser}% full.\n\n";
           print "Once your e-mail box has exceeded your monthly storage quota\n";
      print "your monthly billing will be automatically adjusted.\n";
      print "Please consider deleting e-mail and emptying your trash folder to clear some space.\n\n";
           print "Contact <$SUADDR> for further assistance.\n\n";
           print "Thank You.\n\n";
           print "--\n";
           print "$CONAME\n";
           close(MAIL);
        }
} |
Assurez-vous d'ajuster les variables en haut (en particulier l'adresse e-mail [email protected]).
Il faut rendre le fichier exécutable :
chmod 755 quota_notify
Exécuter
crontab -e
pour créer une tâche cron pour ce script :
0 0 * * * /usr/local/sbin/quota_notify &> /dev/null |
15 Test Postfix
To see if Postfix is ready for SMTP-AUTH and TLS , run
telnet localhost 25
Après avoir établi la connexion à votre type de serveur de messagerie Postfix
ehlo localhost
Si vous voyez les lignes
250-STARTTLS
et
250-AUTH PLAIN LOGIN
everything is fine.
[[email protected] sbin]# telnet localhost 25
Trying ::1...
Connected to localhost.
Escape character is '^]'.
220 server1.example.com ESMTP Postfix
<-- ehlo localhost
250-server1.example.com
250-PIPELINING
250-SIZE 10240000
250-VRFY
250-ETRN
250-STARTTLS
250-AUTH PLAIN LOGIN
250-AUTH=PLAIN LOGIN
250-ENHANCEDSTATUSCODES
250-8BITMIME
250 DSN
<-- quit
221 2.0.0 Bye
Connection closed by foreign host.
[[email protected] sbin]#
Saisissez
exit
to return to the system's shell.
16 Populate The Database And Test
Pour remplir la base de données, vous pouvez utiliser le shell MySQL :
mysql -u root -p
USE mail;
Il faut au moins créer des entrées dans les tables domaines et utilisateurs :
INSERT INTO `domains` (`domain`) VALUES ('example.com');
INSERT INTO `users` (`email`, `password`, `quota`) VALUES ('[email protected]', ENCRYPT('secret'), 10485760);
(Please take care you use the ENCRYPT syntax in the second INSERT statement in order to encrypt the password!)
Si vous souhaitez créer des entrées dans les deux autres tables, cela ressemblerait à ceci :
INSERT INTO `forwardings` (`source`, `destination`) VALUES ('[email protected]', '[email protected]');
INSERT INTO `transport` (`domain`, `transport`) VALUES ('example.com', 'smtp:mail.example.com');
Pour quitter le shell MySQL, tapez
quit;
Pour la plupart des gens, c'est plus facile s'ils ont une interface graphique pour MySQL; therefore you can also use phpMyAdmin (in this example under http://192.168.0.100/phpMyAdmin/ or http://server1.example.com/phpMyAdmin/) to administrate the mail base de données. Encore une fois, lorsque vous créez un utilisateur, assurez-vous d'utiliser la fonction ENCRYPT pour chiffrer le mot de passe :
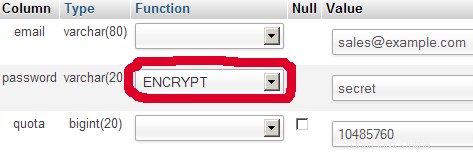
Je ne pense pas avoir à expliquer davantage le tableau des domaines et des utilisateurs.
La table des transferts peut avoir des entrées comme celles-ci :
| source | destination | |
| [email protected] | [email protected] | Redirection des e-mails pour [email protected] vers [email protected] |
| @example.com | [email protected] | Crée un compte fourre-tout pour [email protected] Tous les e-mails destinés à example.com arriveront à [email protected], à l'exception de ceux qui existent dans la table des utilisateurs (c'est-à-dire si [email protected] existe dans la table des utilisateurs, les e-mails à [email protected] arriveront toujours à [email protected]). |
| @example.com | @unautredomaine.tld | Cela redirige tous les e-mails vers example.com vers le même utilisateur sur anotherdomain.tld. Par exemple, les e-mails à [email protected] seront transférés à [email protected] |
| [email protected] | [email protected], [email protected] | Transférer les e-mails de [email protected] vers deux adresses e-mail ou plus. Toutes les adresses e-mail répertoriées sous destination reçoivent une copie de l'e-mail. |
La table de transport peut avoir des entrées comme celles-ci :
| domaine | transport | |
| exemple.com | : | Distribue les e-mails pour example.com localement. C'est comme si cet enregistrement n'existait pas du tout dans cette table. |
| exemple.com | smtp:mail.anotherdomain.tld | Envoie tous les e-mails pour example.com via smtp au serveur mail.anotherdomain.com. |
| exemple.com | smtp:mail.anotherdomain.tld:2025 | Envoie tous les e-mails pour example.com via smtp au serveur mail.anotherdomain.com, mais sur le port 2025, et non 25 qui est le port par défaut pour smtp. |
| exemple.com |
smtp :[1.2.3.4] | Les crochets empêchent Postfix d'effectuer des recherches dans l'enregistrement DNS MX pour l'adresse entre crochets. Logique pour les adresses IP. |
| .example.com | smtp:mail.anotherdomain.tld | Le courrier pour n'importe quel sous-domaine de example.com est livré à mail.anotherdomain.tld. |
| * | smtp:mail.anotherdomain.tld | Tous les e-mails sont envoyés à mail.anotherdomain.tld. |
| [email protected] | smtp:mail.anotherdomain.tld | Les e-mails pour [email protected] sont envoyés à mail.anotherdomain.tld. |
Voir
man transport
pour plus de détails.
N'oubliez pas que l'ordre des entrées dans le tableau des transports est important ! Les entrées seront suivies de haut en bas.
Important : Postfix utilise un mécanisme de mise en cache pour les transports, il peut donc s'écouler un certain temps avant que vos modifications dans la table de transport ne prennent effet. Si vous voulez qu'ils prennent effet immédiatement, exécutez
postfix reload
après avoir effectué vos modifications dans la table de transport.
17 Send A Welcome Email For Creating Maildir
Lorsque vous créez un nouveau compte de messagerie et que vous essayez d'y récupérer des e-mails (avec POP3/IMAP), vous obtiendrez probablement des messages d'erreur indiquant que le Maildir n'existe pas. Le Maildir est créé automatiquement lorsque le premier e-mail arrive pour le nouveau compte. C'est donc une bonne idée d'envoyer un e-mail de bienvenue à un nouveau compte.
Tout d'abord, nous installons le package mailx :
yum install mailx
Pour envoyer un e-mail de bienvenue à [email protected], nous procédons comme suit :
mailx [email protected]
Le sujet vous sera demandé. Tapez l'objet (par exemple, Bienvenue), puis appuyez sur ENTREE, et dans la ligne suivante tapez votre message. When the message is finished, press ENTER again so that you are in a new line, then press CTRL+D:
[[email protected] ~]# mailx [email protected]
Subject:Welcome <-- ENTER
Welcome! Amusez-vous avec votre nouveau compte de messagerie. <-- ENTER
<-- CTRL+D
EOT
[[email protected] ~]#
18 Installing SquirrelMail
SquirrelMail est une interface de messagerie Web qui permettra à vos utilisateurs d'envoyer et de recevoir des e-mails dans un navigateur. Ce chapitre montre comment l'installer et l'adapter à notre configuration afin que les utilisateurs puissent même changer le mot de passe de leur compte de messagerie à partir de l'interface SquirrelMail.
Pour installer SquirrelMail, nous exécutons :
yum install squirrelmail php-pear-DB
Afterwards we restart Apache:
/etc/init.d/httpd restart
SquirrelMail est livré avec des plugins préinstallés, malheureusement aucun d'entre eux n'est capable de nous permettre de changer notre mot de passe de messagerie dans notre base de données MySQL. Mais il y a le plugin Change SQL Password que nous pouvons installer manuellement :
cd /usr/share/squirrelmail/plugins
wget http://www.squirrelmail.org/plugins/change_sqlpass-3.3-1.2.tar.gz
tar xvfz change_sqlpass-3.3-1.2.tar.gz
cd change_sqlpass
cp config.php.sample config.php
Maintenant, nous devons éditer config.php et l'ajuster à notre configuration. Veuillez ajuster les variables $csp_dsn, $lookup_password_query, $password_update_queries, $password_encryption, $csp_salt_static et $csp_delimiter comme suit et commentez $csp_salt_query :
vi config.php
[...] |
Le fichier complet se présente comme suit :
<?php |
The Change SQL Password plugin also depends on the Compatibility plugin which we install as follows:
cd /usr/share/squirrelmail/plugins
wget http://www.squirrelmail.org/countdl.php?fileurl=http%3A%2F%2Fwww.squirrelmail.org%2Fplugins%2Fcompatibility-2.0.16-1.0.tar.gz
tar xvfz compatibility-2.0.16-1.0.tar.gz
Now we must go into the SquirrelMail configuration and tell SquirrelMail that we use Courier as our POP3 and IMAP server and enable the Change SQL Password and the Compatibility plugins:
/usr/share/squirrelmail/config/conf.pl
You'll see the following menu. Navigate through it as indicated:
SquirrelMail Configuration : Read: config.php (1.4.0)
---------------------------------------------------------
Main Menu --
1.  Organization Preferences
2.  Server Settings
3.  Folder Defaults
4.  General Options
5.  Themes
6.  Address Books
7.  Message of the Day (MOTD)
8.  Plugins
9.  Database
10. Languages

D.  Set pre-defined settings for specific IMAP servers

C   Turn color off
S   Save data
Q   Quit

Command >> <-- D


SquirrelMail Configuration : Read: config.php
---------------------------------------------------------
While we have been building SquirrelMail, we have discovered some
preferences that work better with some servers that don't work so
well with others.  If you select your IMAP server, this option will
set some pre-defined settings for that server.

Please note that you will still need to go through and make sure
everything is correct.  This does not change everything.  There are
only a few settings that this will change.

Please select your IMAP server:
    bincimap    = Binc IMAP server
    courier     = Courier IMAP server
    cyrus       = Cyrus IMAP server
    dovecot     = Dovecot Secure IMAP server
    exchange    = Microsoft Exchange IMAP server
    hmailserver = hMailServer
    macosx      = Mac OS X Mailserver
    mercury32   = Mercury/32
    uw          = University of Washington's IMAP server
    gmail       = IMAP access to Google mail (Gmail) accounts

    quit        = Do not change anything
Command >> <-- courier


              imap_server_type = courier
         default_folder_prefix = INBOX.
                  trash_folder = Trash
                   sent_folder = Sent
                  draft_folder = Drafts
            show_prefix_option = false
          default_sub_of_inbox = false
show_contain_subfolders_option = false
            optional_delimiter = .
                 delete_folder = true

Press enter to continue... <-- ENTER


SquirrelMail Configuration : Read: config.php (1.4.0)
---------------------------------------------------------
Main Menu --
1.  Organization Preferences
2.  Server Settings
3.  Folder Defaults
4.  General Options
5.  Themes
6.  Address Books
7.  Message of the Day (MOTD)
8.  Plugins
9.  Database
10. Languages

D.  Set pre-defined settings for specific IMAP servers

C   Turn color off
S   Save data
Q   Quit

Command >> <-- 8


SquirrelMail Configuration : Read: config.php (1.4.0)
---------------------------------------------------------
Plugins
  Installed Plugins
    1. delete_move_next
    2. squirrelspell
    3. newmail

  Available Plugins:
    4. administrator
    5. bug_report
    6. calendar
    7. change_sqlpass
    8. compatibility
    9. filters
    10. fortune
    11. info
    12. listcommands
    13. mail_fetch
    14. message_details
    15. sent_subfolders
    16. spamcop
    17. test
    18. translate

R   Return to Main Menu
C   Turn color off
S   Save data
Q   Quit

Command >> <-- 8 (or whatever number the compatibility plugin has - it's needed by the change_sqlpass plugin)


SquirrelMail Configuration : Read: config.php (1.4.0)
---------------------------------------------------------
Plugins
  Installed Plugins
    1. delete_move_next
    2. squirrelspell
    3. newmail
    4. compatibility

  Available Plugins:
    5. administrator
    6. bug_report
    7. calendar
    8. change_sqlpass
    9. filters
    10. fortune
    11. info
    12. listcommands
    13. mail_fetch
    14. message_details
    15. sent_subfolders
    16. spamcop
    17. test
    18. translate

R   Return to Main Menu
C   Turn color off
S   Save data
Q   Quit

Command >> <-- 8 (the number of the change_sqlpass plugin)


SquirrelMail Configuration : Read: config.php (1.4.0)
---------------------------------------------------------
Plugins
  Installed Plugins
    1. delete_move_next
    2. squirrelspell
    3. newmail
    4. compatibility
    5. change_sqlpass

  Available Plugins:
    6. administrator
    7. bug_report
    8. calendar
    9. filters
    10. fortune
    11. info
    12. listcommands
    13. mail_fetch
    14. message_details
    15. sent_subfolders
    16. spamcop
    17. test
    18. translate

R   Return to Main Menu
C   Turn color off
S   Save data
Q   Quit

Command >> <-- S


SquirrelMail Configuration : Read: config.php (1.4.0)
---------------------------------------------------------
Plugins
  Installed Plugins
    1. delete_move_next
    2. squirrelspell
    3. newmail
    4. compatibility
    5. change_sqlpass

  Available Plugins:
    6. administrator
    7. bug_report
    8. calendar
    9. filters
    10. fortune
    11. info
    12. listcommands
    13. mail_fetch
    14. message_details
    15. sent_subfolders
    16. spamcop
    17. test
    18. translate

R   Return to Main Menu
C   Turn color off
S   Save data
Q   Quit

Command >> S

Data saved in config.php
Press enter to continue... <-- ENTER


SquirrelMail Configuration : Read: config.php (1.4.0)
---------------------------------------------------------
Plugins
  Installed Plugins
    1. delete_move_next
    2. squirrelspell
    3. newmail
    4. compatibility
    5. change_sqlpass

  Available Plugins:
    6. administrator
    7. bug_report
    8. calendar
    9. filters
    10. fortune
    11. info
    12. listcommands
    13. mail_fetch
    14. message_details
    15. sent_subfolders
    16. spamcop
    17. test
    18. translate

R   Return to Main Menu
C   Turn color off
S   Save data
Q   Quit

Command >> <-- Q
One last thing we need to do is modify the file /etc/squirrelmail/config_local.php and comment out the $default_folder_prefix variable - if you don't do this, you will see the following error message in SquirrelMail after you've logged in:Query:CREATE "Sent" Reason Given:Invalid mailbox name.
vi /etc/squirrelmail/config_local.php
<?php |
Now you can type in http://server1.example.com/webmail or http://192.168.0.100/webmail in your browser to access SquirrelMail.
Log in with your email address (e.g. [email protected]) and your password:
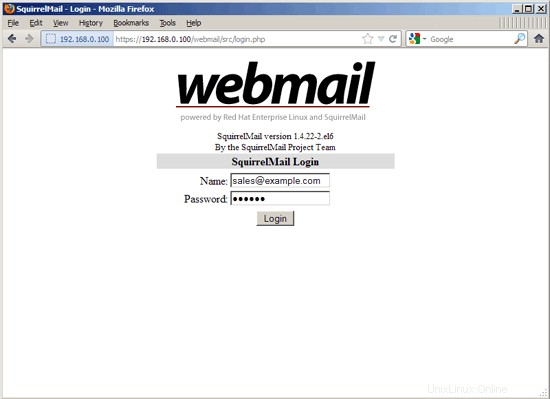
You should find the welcome email in your inbox:
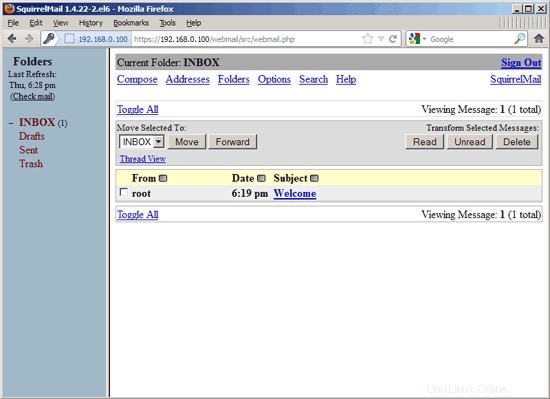
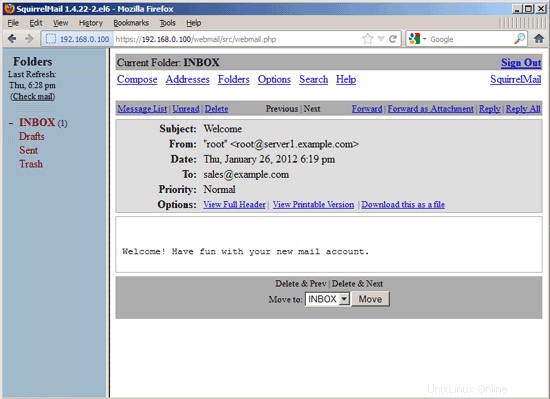
To change your password, go to Options and then select Change Password:
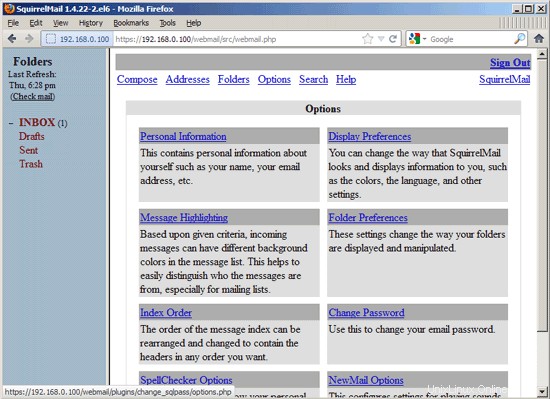
Type in your current password and then your new password twice:
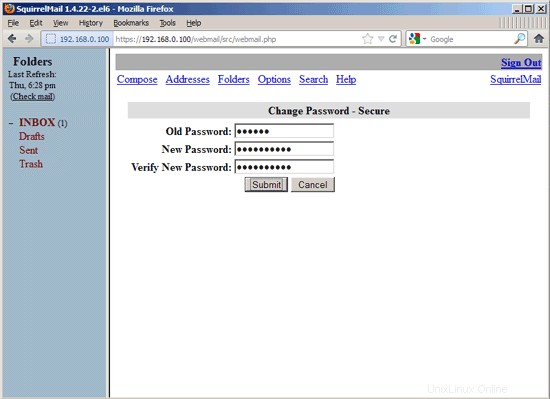
After you've changed the password, you will have to immediately log in again with the new password:
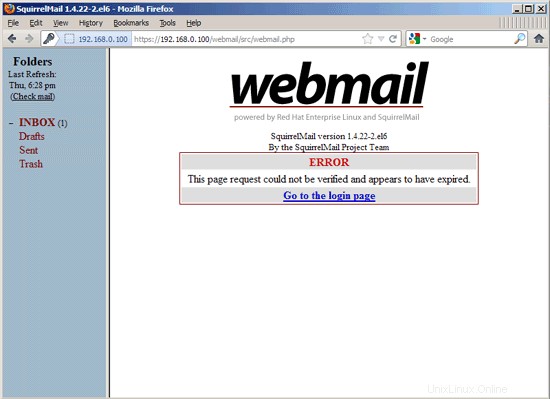
19 VMA (Virtual Mail Admin Interface)
Virtual Mail Admin (VMA) is a small PHP-based web app written to manage the email system set up in this guide. I didn't test it, but I thought I'd share.
This is what the developer (Charl Loubser) wrote to me in an email:
"Hi There,
I don't know if you'll like this, or if this has any use to you, but I thought I'd Share:
I wrote a silly little webapp for the setup you did in the Howto:https://www.howtoforge.com/virtual-users-domains-postfix-courier-mysql-squirrelmail-ubuntu-10.04
If you approve and think it worthy of sharing on your tutorial, you are more than welcome, and can feel free to do so.
As mentioned in the readme, this is not a perfect app, but it does the job for now, and I'd thing it's relatively safe in a closed environment (LAN setup between servers).
The rar file with the app is attached, but can also be downloaded at :http://code.google.com/p/vma/"
20 References
Tutorial:ISP-style Email Service with Debian-Sarge and Postfix 2.1:http://workaround.org/articles/ispmail-sarge/
Postfix + Quota:http://vhcs.net/new/modules/newbb/viewtopic.php?topic_id=3496&forum=17
Mail Passwords Encrypted using saslauthd:http://www.syscp.de/docs/public/contrib/cryptedmailpws
21 Links
- Postfix MTA:http://www.postfix.org/
- Postfix Quota Patch:http://web.onda.com.br/nadal/
- phpMyAdmin :http://www.phpmyadmin.net/
- SquirrelMail:http://www.squirrelmail.org/
- CentOS :http://www.centos.org/