Présentation
Panneau Plesk est un logiciel commercial d'hébergement Web et d'automatisation de centre de données de serveur. Dans cet article, vous apprendrez comment installer Plesk Obsidian sur CentOS / RHEL 8.
Il s'agit d'un panneau de contrôle centralisé.
Vous pouvez créer et gérer plusieurs sites à partir d'un seul tableau de bord. Vous pouvez également exécuter des mises à jour, surveiller les performances et intégrer de nouveaux prospects à partir du même endroit.
Plesk, avec la dernière version d'Obsidian 18.x, est disponible dans les configurations de licence suivantes :
- Plesk Web Admin Edition : Jusqu'à 10 domaines. Pour la gestion de base de sites Web simples, sans les outils et fonctionnalités étendus.
- Plesk Web Pro Edition : Pour gérer jusqu'à 30 domaines. Il inclut également Plesk WordPress Toolkit complet.
- Plesk Web Host Edition : Domaines illimités. L'administrateur peut également créer des comptes revendeurs supplémentaires.
Le prix de la licence distingue également si une licence peut être utilisée pour un serveur dédié ou un serveur virtualisé. Les licences pour les serveurs dédiés sont généralement légèrement plus chères.
Plesk vend directement les trois licences pour un prix mensuel ou annuel. Les trois éditions peuvent également être obtenues auprès des revendeurs officiels de licences. Les tarifs détaillés de Plesk sont disponibles sur leur site officiel.
Mettre à jour les packages de serveur Linux
Mettez à jour votre système d'exploitation Linux en exécutant la commande suivante.
# dnf update -yInstaller Plesk Panel sur CentOS 8
Ici, nous installons Plesk Panel (Obsidian) en utilisant Installer Console.
Téléchargez le programme d'installation de Plesk Obsidian avec la commande wget
[root@unixcop ~]#  wget https://autoinstall.plesk.com/plesk-installer
--2021-08-24 07:51:56--  https://autoinstall.plesk.com/plesk-installer
Resolving autoinstall.plesk.com (autoinstall.plesk.com)... 185.93.2.19, 185.93.2.27, 185.93.2.6, ...
Connecting to autoinstall.plesk.com (autoinstall.plesk.com)|185.93.2.19|:443... connected.
HTTP request sent, awaiting response... 200 OK
Length: 15740 (15K) [application/octet-stream]
Saving to: 'plesk-installer'

plesk-installer                       100%[=======================================================================>]  15.37K  --.-KB/s    in 0s

2021-08-24 07:51:57 (282 MB/s) - 'plesk-installer' saved [15740/15740]

[root@unixcop ~]#
Rendre le fichier téléchargé exécutable.
# chmod +x plesk-installerInstallez et configurez Parallels Plesk Panel et les composants logiciels dépendants avec le script de téléchargement suivant.
[root@unixcop ~]# ./plesk-installer

The Plesk Installation and Upgrade Wizard will guide you through
the installation or upgrade process.
===============================================================================

------ IMPORTANT ------

* New installation of product(s) should be performed on clean servers only.

* Before upgrading Plesk, be sure to back up your data.

* By using this Wizard you agree to the terms and conditions described at
  http://www.plesk.com/legal/terms/ and those of the Plesk End User
  License Agreement.

Available actions:
(F) Go forward
(Q) Cancel installation

Select an action [F/q]: F
Checking for installed packages...
Downloading file products.inf3: 100% was finished.
Downloading file pool/PSA_18.0.37_6686/release.inf3: 100% was finished.
Downloading file pool/PSA_18.0.36_6324/release.inf3: 100% was finished.
Downloading file pool/PSA_18.0.35_6216/release.inf3: 100% was finished.
Downloading file pool/PSA_18.0.34_5691/release.inf3: 100% was finished.
Downloading file pool/PSA_18.0.33_5467/release.inf3: 100% was finished.
Downloading file pool/PSA_18.0.32_4963/release.inf3: 100% was finished.
Downloading file pool/PSA_18.0.31_4832/release.inf3: 100% was finished.
Downloading file plesk.inf3: 100% was finished.
Downloading file ppsmbe.inf3: 100% was finished.
Downloading file sitebuilder.inf3: 100% was finished.
Downloading file sso.inf3: 100% was finished.
Downloading file PHP80_17/release.inf3: 100% was finished.
Downloading file php80.inf3: 100% was finished.
Downloading file php72.inf3: 100% was finished.
Downloading file PHP74_17/release.inf3: 100% was finished.
Downloading file php74.inf3: 100% was finished.
Downloading file PHP73_17/release.inf3: 100% was finished.
Downloading file php73.inf3: 100% was finished.
Downloading file php71.inf3: 100% was finished.
Downloading file setemplates.inf3: 100% was finished.
Downloading file pp-sitebuilder.inf3: 100% was finished.
Downloading file billing.inf3: 100% was finished.
Downloading file mysql.inf3: 100% was finished.
Downloading file apache.inf3: 100% was finished.
Downloading file nginx.inf3: 100% was finished.
Downloading file php70.inf3: 100% was finished.
Downloading file php56.inf3: 100% was finished.
Downloading file php55.inf3: 100% was finished.
Downloading file php54.inf3: 100% was finished.
Downloading file php53.inf3: 100% was finished.
Downloading file php52.inf3: 100% was finished.
Downloading file pmm.inf3: 100% was finished.
Downloading file pool/PSA_18.0.37_6686/plesk-18.0.37-cos8-x86_64.inf3: 100% was finished.
Downloading Extensions Catalog feed...
Downloading file https://ext.plesk.com/api/v4/packages?platform=unix&version=18.0.37&ai-compatible: 0%
Downloading file pool/PHP_7.1.33_96/php71-cos8-x86_64.inf3: 100% was finished.
Downloading file pool/PHP_7.2.34_150/php72-cos8-x86_64.inf3: 100% was finished.
Downloading file PHP73_17/php73-cos8-x86_64.inf3: 100% was finished.
Downloading file PHP74_17/php74-cos8-x86_64.inf3: 100% was finished.
Downloading file PHP80_17/php80-cos8-x86_64.inf3: 100% was finished.
Downloading file SITEBUILDER_18.0.29/sitebuilder-18.0.29-rhall-all.inf3: 100% was finished.
gpg-pubkey-8483c65d-5ccc5b19 gpg(CentOS (CentOS Official Signing Key) <[email protected]>)
gpg-pubkey-914bdf7e-55c05220 gpg(Plesk Team <[email protected]>)
Le script d'installation affiche le lien vers la licence Plesk Obsidian. Appuyez sur F touche pour avancer.
Select the installation type for Plesk Obsidian
===============================================================================

Installation types for the product:

 1. (*) Recommended
       Install typically used components. Recommended for general use.

 2. ( ) Full
       Install all available components.

 3. ( ) Custom
       Custom components selection. Recommended only for experienced users.


Available actions:
(F) Go forward
(B) Go back
(Q) Cancel installation

Select an action or a number [F/b/q/1-3]: F
gpg-pubkey-8483c65d-5ccc5b19 gpg(CentOS (CentOS Official Signing Key) <[email protected]>)
gpg-pubkey-914bdf7e-55c05220 gpg(Plesk Team <[email protected]>)
Retrieving information about the installed license key...
Launching component and product checkers...
Downloading file pool/PSA_18.0.37_6686/examiners/repository_check.sh: 100% was finished.
Downloading file pool/PSA_18.0.37_6686/examiners/disk_space_check.sh: 100% was finished.
Downloading file pool/PSA_18.0.37_6686/examiners/sh_cmd.sh: 100% was finished.
Start downloading 1 files of unknown size and 0 delta RPMs
Downloading CentOS Linux 8 - PowerTools 2105086/2451404 [total 2105086/unknown B 0/1 files]
Download CentOS Linux 8 - PowerTools   2451404B 0:00:18 [total 0/unknown B 1/1 files]
Start downloading 1 files of unknown size and 0 delta RPMs
Downloading PLESK_18_0_37 dist 0/0 [total 0/unknown B 0/1 files]
Download PLESK_18_0_37 dist   3091B 0:00:30 [total 0/unknown B 1/1 files]
Start downloading 1 files of unknown size and 0 delta RPMs
Sélectionnez le type d'installation. La valeur par défaut Recommander l'option est bonne pour vous, appuyez sur "F" pour continuer.
Preparing Your System for Product Installation
===============================================================================

There are 368 packages required for the product to function properly which
were not found in your system.

There are 0 packages that need to be upgraded
in order to install the product.


Available actions:
(F) Go forward
(B) Go back
(Q) Cancel installation
(S) Show the list of packages

Select an action [F/b/q/s]: F
Installing packages
Last metadata expiration check: 0:00:07 ago on Tue Aug 24 08:28:47 2021.
Start downloading 71 files of 61853988 size and 0 delta RPMs
Download libjpeg-turbo-1.5.3-10.el8.x86_64.rpm   159432B [total 415324/61853988B 1/71 files]
Download psmisc-23.1-5.el8.x86_64.rpm   154364B [total 437255/61853988B 2/71 files]
Download perl-libnet-3.11-3.el8.noarch.rpm   123784B [total 693470/61853988B 3/71 files]
Download libpq-13.3-1.el8_4.x86_64.rpm   201952B [total 1200486/61853988B 4/71 files]
Download plesk-libboost-1.65-1.65.1-1centos.8.191004.1513.x86_64.rpm   7934B [total 1398572/61853988B 5/71 files]
Download plesk-libboost-date-time1.65-1.65.1-1centos.8.191004.1513.x86_64.rpm   28928B [total 1614916/61853988B 6/71 files]
Download plesk-libboost-filesystem1.65-1.65.1-1centos.8.191004.1513.x86_64.rpm   59098B [total 1884686/61853988B 7/71 files]
Download sqlite-3.26.0-13.el8.x86_64.rpm   683476B 0:00:05 [total 1948721/61853988B 8/71 files]
Appuyez ensuite sur F pour avancer comme indiqué ci-dessus.
Components and product check results:
Installation is finished

  	                           Congratulations!

  	The installation has been finished. Plesk is now running on your server.

  	To complete the configuration process, browse either of URLs:
  	  * https://recursing-mendel.156-217-118-33.plesk.page/login?secret=EuF_wUNNPilzfym-fP-Gs-Hl9eceHNG3sPbTkLUMFWrGlAnG
  	  * https://192.168.13.131/login?secret=EuF_wUNNPilzfym-fP-Gs-Hl9eceHNG3sPbTkLUMFWrGlAnG

  	Use the username 'admin' to log in. To log in as 'admin', use the 'plesk login' command.
  	You can also log in as 'root' using your 'root' password.

  	Use the 'plesk' command to manage the server. Run 'plesk help' for more info.

  	Use the following commands to start and stop the Plesk web interface:
  	'service psa start' and 'service psa stop' respectively.

  	If you would like to migrate your subscriptions from other hosting panel
  	or older Plesk version to this server, please check out our assistance
  	options: https://www.plesk.com/professional-services/


The changes were applied successfully.


[root@unixcop ~]#
Plesk Panel a donc été installé avec succès
Remarque
L'URL ci-dessus à la fin de l'installation sera utilisée pour accéder à Plesk Obsidian pour la première fois.
Remarque
le PSA service peut exprimer un problème au démarrage, vous devez donc vérifier l'unité de service systemd pour PSA .
Démarrez-le également avec la commande suivante puis vérifiez s'il est en cours d'exécution ou non avec le statut systemctl commande.
[root@unixcop ~]# systemctl start psa.service
[root@unixcop ~]# systemctl status psa.service
● psa.service - Plesk Panel
   Loaded: loaded (/usr/lib/systemd/system/psa.service; enabled; vendor preset: disabled)
   Active: active (exited) since Tue 2021-08-24 09:00:58 EDT; 44min ago
 Main PID: 33013 (code=exited, status=0/SUCCESS)
    Tasks: 0 (limit: 6242)
   Memory: 0B
   CGroup: /system.slice/psa.service

Aug 24 09:00:58 recursing-mendel.156-217-118-33.plesk.page systemd[1]: Starting Plesk Panel...
Aug 24 09:00:58 recursing-mendel.156-217-118-33.plesk.page systemd[1]: Started Plesk Panel.
[root@unixcop ~]#
Pour moi il n'y a aucun problème.
Si le statut du service PSA est mort ou inactif puis éditez l'unité PSA systemd avec l'éditeur.
# vim /etc/systemd/system/multi-user.target.wants/psa.serviceet changer le type de one-shot à simple comme indiqué ci-dessous.
[Unit]
Description=Plesk Panel
Wants=sw-cp-server.service sw-engine.service
Wants=mariadb.service mysql.service
After=network.target mariadb.service mysql.service

[Service]
Type=simple
RemainAfterExit=yes
ExecStart=/bin/true

[Install]
WantedBy=multi-user.target
Ensuite, rechargez le démon pour démarrer le service PSA maintenant avec les commandes ci-dessous :
# systemctl daemon-reload
# systemctl start psa.service
Vérifiez également à nouveau l'état du service PSA. Vous constaterez que le service PSA a été démarré avec succès.
Configurer le pare-feu Linux
Plesk Panel s'exécute sur le port HTTP. pour cette raison, vous devez l'autoriser dans le pare-feu Linux avec les commandes ci-dessous :
[root@unixcop ~]# firewall-cmd --permanent --add-service=http
success
[root@unixcop ~]# firewall-cmd --reload
success
[root@unixcop ~]#
Accéder au panneau Plesk
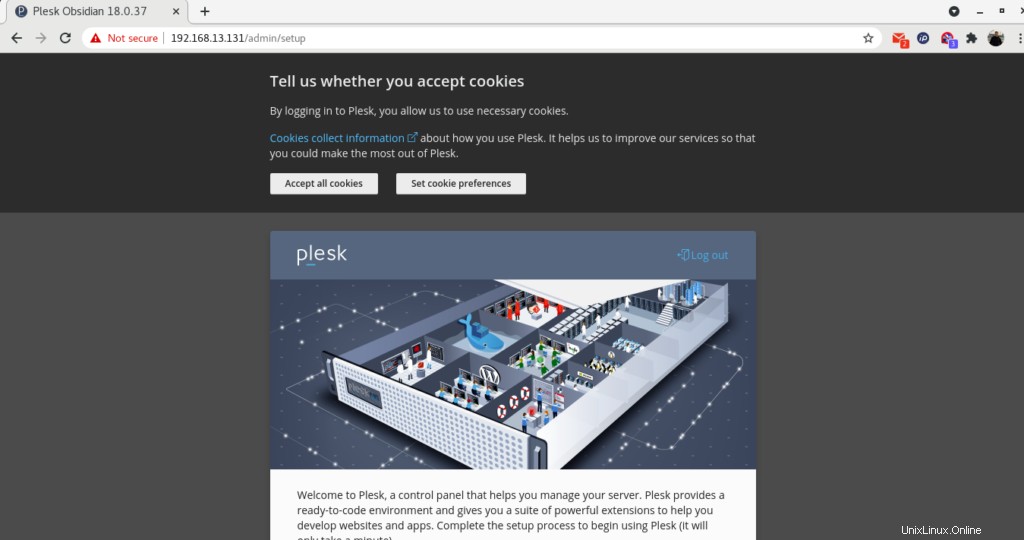
Utilisez l'URL fournie par le programme d'installation de Plesk que nous avons mentionné ci-dessus e Remarque pour accéder à l'interface Web d'Obsidian.
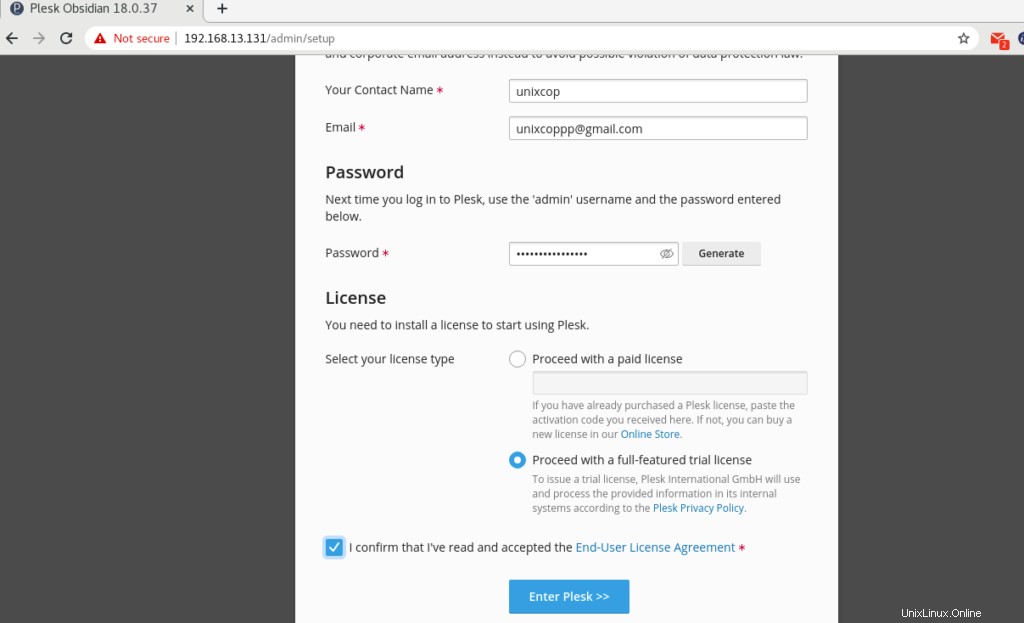
Ensuite, fournissez les informations de contact, définissez le mot de passe pour l'utilisateur administrateur et sélectionnez le type de licence. (option :Poursuivre avec une licence d'essai complète) comme indiqué ci-dessous.
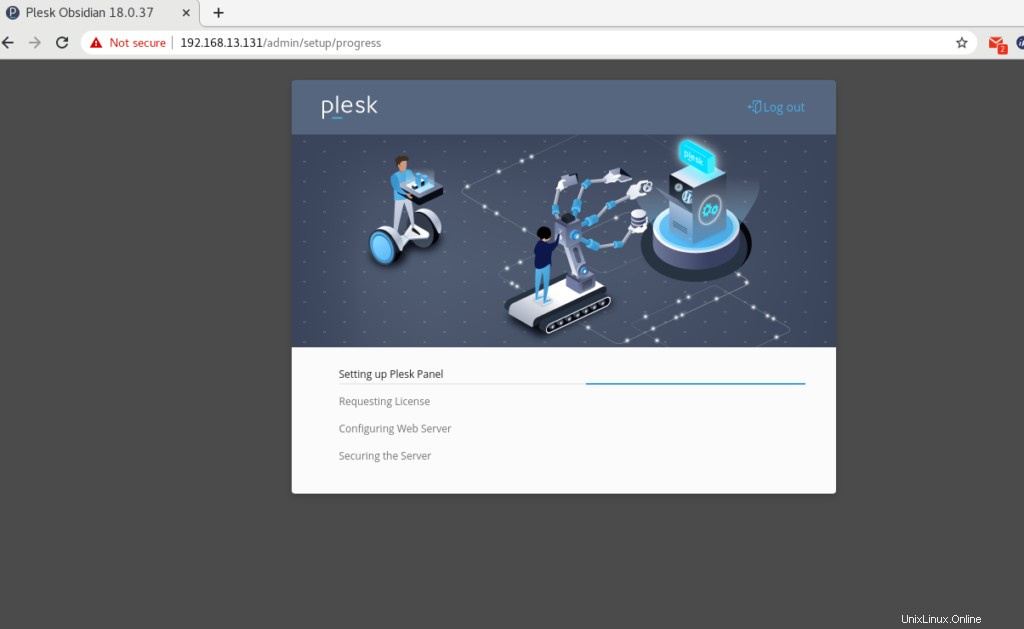
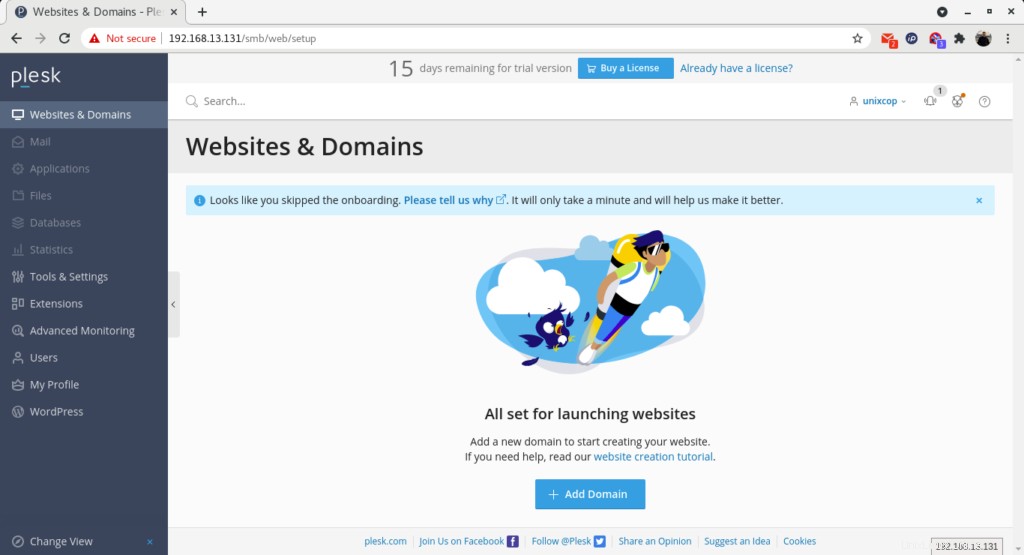
Plesk configure Plesk Panel pour vous.
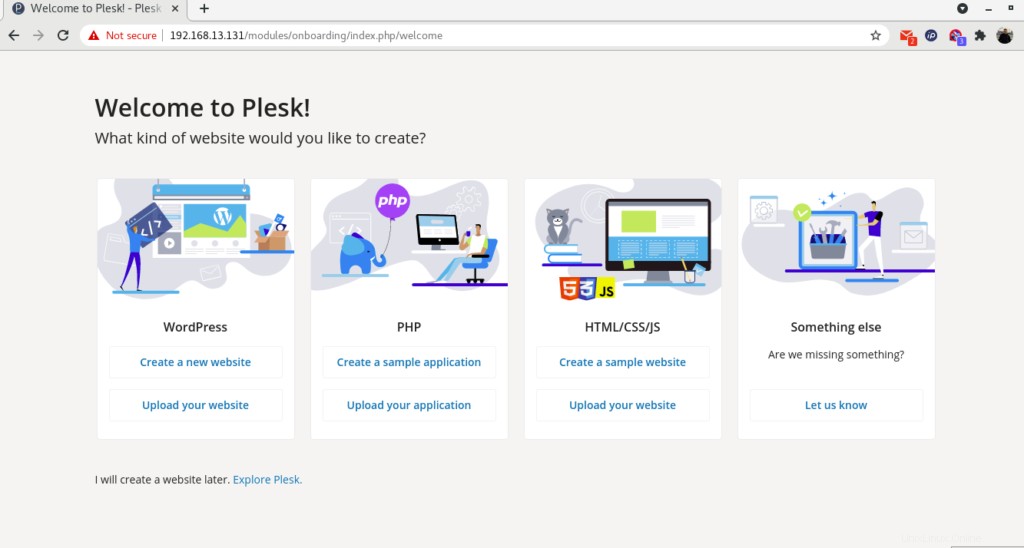
Une fois la configuration réussie, Plesk vous redirigera vers la page d'introduction comme indiqué ci-dessus.
Cliquez sur « Explorer Plesk ” pour passer au tableau de bord de Plesk.
Version Plesk
Vous pouvez vérifier la version de Plesk avec la commande
[root@unixcop ~]# plesk -v
Product version: Plesk Obsidian 18.0.37.2
     OS version: CentOS 8.4.2105 x86_64
     Build date: 2021/08/09 18:00
       Revision: 1dff6684b76d24eb5432e13e6870e5795482e0a1
[root@unixcop ~]#
Conclusion
Vous avez donc installé avec succès Parallel Plesk Panel (Obsidian) sur CentOS / RHEL 8.
Pour plus d'informations sur Plesk, vous pouvez visiter son site officiel ici.