
Django est un framework Web de haut niveau gratuit et open source utilisé pour développer des applications Web Python. Django est livré avec un ensemble d'outils qui vous aident à créer des applications Web sécurisées et évolutives. Son objectif principal est de faciliter la création d'applications complexes et de maintenir la structure interne.
Dans ce didacticiel, nous allons apprendre à installer Django et à configurer Nginx en tant que proxy inverse pour Django sur Rocky Linux 8 et CentOS 8.
Condition préalable
- Serveur avec système d'exploitation CentOS 8.
- Connectez-vous en tant qu'utilisateur root ou utilisateur avec les privilèges sudo
Installer les packages requis
Django est un framework basé sur Python, vous devez donc installer Python et PIP sur votre système. Pour pouvoir l'installer, exécutez la commande suivante :
dnf install python36 python3-pip -y Une fois les deux packages installés, passez à l'étape suivante.
Installer Django sur Rocky Linux 8
Vous pouvez installer Django avec la commande PIP comme indiqué ci-dessous :
pip3 install Django Après avoir installé Django, vérifiez la version de Django avec la commande suivante :
django-admin --version Vous verrez la version de Django dans la sortie suivante :
3.0.3
au moment de la rédaction de cet article, la version de Django est la version 3.0.3
Créer un projet Django
À ce stade, Django a été installé avec succès. Il est maintenant temps de créer une application Django.
Vous pouvez créer des applications Django en utilisant la commande django-admin dans le répertoire /opt comme indiqué ci-dessous :
cd /opt
 django-admin startproject djangoproject
Une fois le projet django créé, changez le répertoire en djangoproject et migrez les modifications avec la commande suivante :
cd djangoproject
 python3 manage.py migrate
Vous obtiendrez le résultat suivant :
Opérations à effectuer :Appliquer toutes les migrations :admin, auth, contenttypes, sessionsExécution des migrations :Appliquer contenttypes.0001_initial... OK Appliquer auth.0001_initial... OK Appliquer admin.0001_initial... OK Appliquer admin.0002_logentry_remove_auto_add.. . OK Application admin.0003_logentry_add_action_flag_choices... OK Application contenttypes.0002_remove_content_type_name... OK Application auth.0002_alter_permission_name_max_length... OK Application auth.0003_alter_user_email_max_length... OK Application auth.0004_alter_user_username_opts... OK Application auth.0005_alter_user_username_opts... OK Application auth.0005_alter_user_username_opts... OK Application auth.0005_alter_user_email_max_length... Application auth.0006_require_contenttypes_0002... OK Application auth.0007_alter_validators_add_error_messages... OK Application auth.0008_alter_user_username_max_length... OK Application auth.0009_alter_user_last_name_max_length... OK Application auth.0010_alter_group_name_max_length... OK Application auth.001_up_proxy sessions... OK Application auth.001_up_proxy sessions... .0001_initial... D'accord
Ensuite, vous devez créer un compte utilisateur administrateur pour gérer votre projet Django avec la commande suivante :
python3 manage.py createsuperuser Il vous sera demandé de fournir votre nom d'utilisateur, email et mot de passe. Vous pouvez le fournir selon votre choix comme indiqué ci-dessous :
Nom d'utilisateur (laissez vide pour utiliser 'root') :dadminAdresse e-mail :[email protected] Mot de passe :Mot de passe (encore) :Superutilisateur créé avec succès.
Une fois cela fait, vous pouvez passer à l'étape suivante.
Démarrer l'application Django
Par défaut, les applications Django ne sont accessibles qu'à partir de l'hôte local uniquement. Pour que Django se connecte à Internet, vous devez autoriser Django pour les hôtes externes. Vous pouvez le faire en ajoutant l'IP de votre serveur dans IP settings.py:
nano /opt/djangoproject/djangoproject/settings.py Modifiez la ligne suivante :
ALLOWED_HOSTS =['ip_server_Anda']
Enregistrez et fermez le fichier. Ensuite, lancez l'application Django avec la commande suivante :
cd /opt/djangoproject
 python3 manage.py runserver 0.0.0.0:8000
Vous verrez la sortie suivante :
Surveillance des modifications de fichiers avec StatReloaderExécution des vérifications du système...La vérification du système n'a identifié aucun problème (0 silencieux). http://0.0.0.0:8000/Quitter le serveur avec CONTROL-C. L'application Django est maintenant lancée et tourne sur le port 8000.
À ce stade, l'application Django est maintenant opérationnelle sur le port 8000. Vous pouvez maintenant passer à l'étape suivante.
Configurer SELinux et le pare-feu sur Rocky Linux 8
Ensuite, vous devez autoriser les ports 8000 et 80 via firewalld. Vous pouvez les autoriser avec la commande suivante :
firewall-cmd --permanent --add-port=8000/tcp
 firewall-cmd --permanent --add-port=80/tcp
 firewall-cmd --reload
Ensuite, configurez SELinux avec la commande suivante :
setsebool httpd_can_network_connect on -P Une fois cela fait, vous pouvez passer à l'étape suivante.
Accéder aux applications Django
Vous pouvez accéder à l'application Django en visitant l'URL http://your-server-ip:8000. Vous verrez la page suivante :

Vous pouvez également accéder à l'interface d'administration de Django en utilisant l'URL http://server-ip:8000/admin. Vous verrez la page suivante :
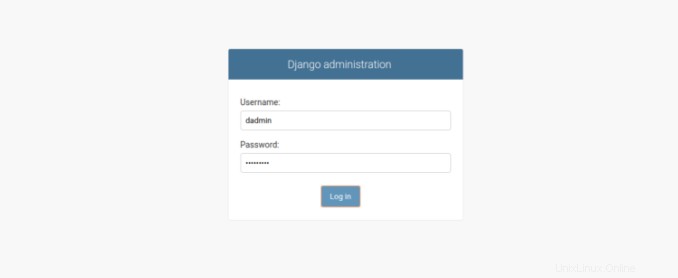
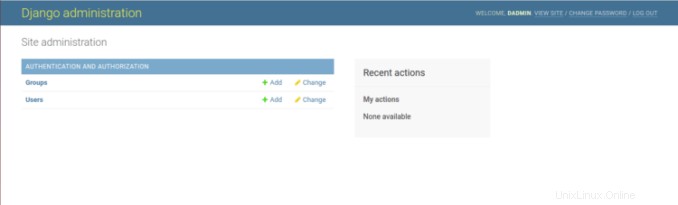
Indiquez le nom d'utilisateur et le mot de passe de l'administrateur et cliquez sur le bouton Se connecter dans . Vous verrez la page suivante :
Installer Nginx et Gunicorn sur Rocky Linux 8
Dans cette section, nous installerons Gunicorn pour créer et gérer les services Django, et Nginx pour servir les applications Django.
Tout d'abord, installez Nginx avec la commande suivante :
dnf install nginx -y Ensuite, installez Gunicorn en utilisant la commande PIP comme indiqué ci-dessous :
pip3 install gunicorn Une fois les deux packages installés, démarrez le service Nginx et autorisez-le à démarrer après le redémarrage du système avec la commande suivante :
systemctl start nginx
 systemctl enable nginx
Ensuite, changez la propriété du répertoire /opt/djangoproject à Nginx comme indiqué ci-dessous :
chown -R nginx:nginx /opt/djangoproject Créer un service File Systemd pour Django
Ensuite, créez un fichier de service systemd pour gérer les services Django avec la commande suivante :
nano /etc/systemd/system/django.service Ajoutez la ligne suivante :
[Unit]Description=django daemonAfter=network.target[Service]User=nginxGroup=nginxWorkingDirectory=/opt/djangoprojectExecStart=/usr/local/bin/gunicorn --workers 3 --bind unix:/opt/djangoproject/ djangoproject.sock djangoproject.wsgi:application[Install]WantedBy=multi-user.target
Enregistrez et fermez le fichier puis rechargez le démon systemd avec la commande suivante :
systemctl daemon-reload Ensuite, démarrez le service Django et activez-le après le redémarrage du système avec la commande suivante :
systemctl start django
 systemctl enable django
Vous pouvez maintenant vérifier l'état du service Django avec la commande suivante :
systemctl status django Vous verrez la sortie suivante :
? django.service - django daemon Chargé :chargé (/etc/systemd/system/django.service ; désactivé ; préréglage fournisseur :désactivé) Actif :actif (en cours d'exécution) depuis le lundi 2020-03-02 22:27:51 UTC ; il y a 3min 32s PID principal :960 (django) Tâches :4 (limite :25028) Mémoire :95,2 Mo CGroup :/system.slice/django.service ??960 /usr/bin/python3.6 /usr/local/bin/ gunicorn --workers 3 --bind unix:/opt/djangoproject/djangoproject.sock djangoproject.wsgi:a> ??964 /usr/bin/python3.6 /usr/local/bin/gunicorn --workers 3 --bind unix:/opt/djangoproject/djangoproject.sock djangoproject.wsgi:a> ??965 /usr/bin/python3.6 /usr/local/bin/gunicorn --workers 3 --bind unix:/opt/djangoproject/djangoproject .sock djangoproject.wsgi:a> ??966 /usr/bin/python3.6 /usr/local/bin/gunicorn --workers 3 --bind unix:/opt/djangoproject/djangoproject.sock djangoproject.wsgi:a> 02 mars 22:27:51 centos8 systemd[1] :Démon django démarré. Démarrage de django 20.0.4Mar 02 22:27:52 centos8 django[960] :[2020-03-02 22:27:52 -0500] [960] [INFO] En écoute :unix :/opt/djangoproject/djangoproject.sock (960)2 mars 22:27 :52 centos8 django[960] :[2020-03-02 22:27:52 -0500] [960] [INFO] Utilisation du travailleur :syncMar 02 22:27:52 centos8 django[960] :[2020-03-02 22 :27:52 -0500] [964] [INFO] Booter worker avec pid :964Mar 02 22:27:52 centos8 django[960] :[2020-03-02 22:27:52 -0500] [965] [INFO ] Booter worker avec pid :965Mar 02 22:27:52 centos8 django[960] :[2020-03-02 22:27:52 -0500] [966] [INFO] Booter worker avec pid :966h pid :966Configurer Nginx pour Django
Ensuite, configurez Nginx en tant que proxy inverse pour Django. Pour ce faire, créez un nouveau fichier de configuration Nginx avec la commande suivante :
nano /etc/nginx/conf.d/django.confAjoutez la ligne suivante :
serveur { écoute 80 ; server_name your-server-ip location =https://cdn.linuxid.net/favicon.ico?x87109 { access_log off; log_not_found désactivé ; } emplacement /statique/ { root /opt/djangoproject ; } emplacement / { proxy_set_header Hôte $http_host ; proxy_set_header X-Real-IP $remote_addr ; proxy_set_header X-Forwarded-For $proxy_add_x_forwarded_for ; proxy_set_header X-Forwarded-Proto $scheme ; proxy_pass http://unix:/opt/djangoproject/djangoproject.sock ; }}Enregistrez et fermez le fichier lorsque vous avez terminé. Ensuite, testez nginx pour toute erreur de syntaxe avec la commande suivante :
nginx -tS'il n'y a pas d'erreurs, la sortie suivante apparaît :
nginx :la syntaxe du fichier de configuration /etc/nginx/nginx.conf est oknginx :le test du fichier de configuration /etc/nginx/nginx.conf est réussiEnsuite, redémarrez le service Nginx pour mettre en œuvre les modifications :
systemctl start nginxVous pouvez également vérifier Nginx avec la commande suivante :
systemctl status nginxVous obtiendrez le résultat suivant :
? nginx.service - Le serveur HTTP et proxy inverse de nginx Chargé :chargé (/usr/lib/systemd/system/nginx.service ; désactivé ; préréglage du fournisseur :désactivé) Actif :actif (en cours d'exécution) depuis le lundi 2020-03-02 22 :28h13 HNE ; 4min 14s ago Processus :984 ExecStart=/usr/sbin/nginx (code=sorti, statut=0/SUCCESS) Processus :982 ExecStartPre=/usr/sbin/nginx -t (code=sorti, status=0/SUCCESS) Processus :980 ExecStartPre=/usr/bin/rm -f /run/nginx.pid (code=exited, status=0/SUCCESS) PID principal :985 (nginx) Tâches :3 (limite :25028) Mémoire :5,5 M CGroup :/system.slice/nginx.service ??985 nginx :processus principal /usr/sbin/nginx ??986 nginx :processus de travail ??987 nginx :processus de travail Mar 02 22:28:12 centos8 systemd[1] :Démarrage de nginx HTTP et serveur proxy inverse...Mar 02 22:28:12 centos8 nginx[982] :nginx :la syntaxe du fichier de configuration /etc/nginx/nginx.conf est correcteMar 02 22:28:12 centos8 nginx[982] :nginx :le test du fichier de configuration /etc/nginx/nginx.conf est réussiMar 02 22:28:13 centos8 systemd[1] :Démarrage Le serveur HTTP et proxy inverse de nginx.Vous pouvez désormais accéder aux applications Django en utilisant l'URL http://server_IP_address.
Conclusion
Dans ce guide, nous avons appris à installer Django sur Rocky Linux 8 et CentOS 8. Nous avons également appris à utiliser Gunicorn pour créer et gérer des services Django et configurer Nginx en tant que proxy inverse pour servir les applications Django.