Présentation
Subversion est un système de contrôle de version open source. Fondé en 2000 par CollabNet, Inc., le projet et le logiciel Subversion ont connu un succès incroyable au cours de la dernière décennie. Subversion a été et continue d'être largement adopté à la fois dans le domaine de l'open source et dans le monde de l'entreprise.
USVN convivial est une interface web écrite en PHP utilisée pour configurer les dépôts Subversion. Son but est de faciliter la création de nouveaux projets sans avoir à utiliser l'interface de ligne de commande, donc, peut-être sans accès privilégié au serveur. USVN générera alors la liste des utilisateurs autorisés à accéder à votre code source. Cela permet la délégation des droits pour administrer les dépôts Subversion.
Installer Apache Subversion (SVN)
USVN nécessitait un serveur Web pour le déploiement. Nous allons donc installer Apache HTTP Server.
# yum install -y httpdDémarrer et activer httpd services.
# systemctl start httpd
# systemctl enable httpd
Désactiver la page d'accueil du serveur HTTP Apache.
# mv /etc/httpd/conf.d/welcome.conf /etc/httpd/conf.d/welcome.conf.orgDésactiver les index de répertoires dans les configurations Apache HTTP Server, puis redémarrez le service httpd avec les commandes suivantes :
# cp /etc/httpd/conf/httpd.conf /etc/httpd/conf/httpd.conf.org
# sed -i "s/Options Indexes FollowSymLinks/Options FollowSymLinks/" /etc/httpd/conf/httpd.conf
# systemctl restart httpd
Ensuite, vous devez autoriser le service http via le service firewalld avec les commandes :
# firewall-cmd --permanent --add-service=http
# firewall-cmd --reload
USVN nécessite également qu'une base de données MySQL soit une base de données principale. Nous allons donc installer mariadb base de données et php .
# yum install php mariadb-server php-mysql -yDémarrer et activer mariadb services.
# systemctl start mariadb
# systemctl enable mariadb
Configurez le serveur mariadb avec la commande :
[root@unixcop ~]# mysql_secure_installation
NOTE: RUNNING ALL PARTS OF THIS SCRIPT IS RECOMMENDED FOR ALL MariaDB
SERVERS IN PRODUCTION USE! PLEASE READ EACH STEP CAREFULLY!
In order to log into MariaDB to secure it, we'll need the current
password for the root user. If you've just installed MariaDB, and
you haven't set the root password yet, the password will be blank,
so you should just press enter here.
Enter current password for root (enter for none):
OK, successfully used password, moving on...
Setting the root password ensures that nobody can log into the MariaDB
root user without the proper authorisation.
Set root password? [Y/n] Y
New password:
Re-enter new password:
Password updated successfully!
Reloading privilege tables..
... Success!
By default, a MariaDB installation has an anonymous user, allowing anyone
to log into MariaDB without having to have a user account created for
them. This is intended only for testing, and to make the installation
go a bit smoother. You should remove them before moving into a
production environment.
Remove anonymous users? [Y/n] Y
... Success!
Normally, root should only be allowed to connect from 'localhost'. This
ensures that someone cannot guess at the root password from the network.
Disallow root login remotely? [Y/n] Y
... Success!
By default, MariaDB comes with a database named 'test' that anyone can
access. This is also intended only for testing, and should be removed
before moving into a production environment.
Remove test database and access to it? [Y/n] Y
- Dropping test database...
... Success!
- Removing privileges on test database...
... Success!
Reloading the privilege tables will ensure that all changes made so far
will take effect immediately.
Reload privilege tables now? [Y/n] Y
... Success!
Cleaning up...
All done! If you've completed all of the above steps, your MariaDB
installation should now be secure.
Thanks for using MariaDB!
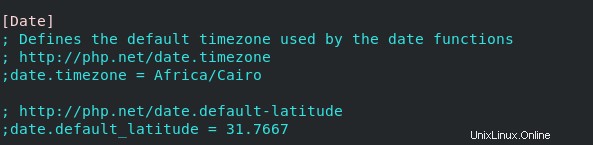
[root@unixcop ~]#Modifiez également le fuseau horaire dans les paramètres php :
# vim /etc/php.iniEt ajoutez le fuseau horaire à cette ligne
date.timezone = Comme ça
date.timezone = Africa/Cairo
Installer Apache Subversion et le module de serveur HTTP Apache
Vous pouvez les télécharger avec cette commande ci-dessous :
# yum install -y subversion mod_dav_svnInstaller un SVN convivial (USVN)
Téléchargez et extrayez USVN sur Apache HTTP Server. Suivez simplement les commandes dans les étapes ci-dessous :
# cd /var/www/html[root@unixcop html]# wget https://github.com/usvn/usvn/archive/1.0.7.tar.gz
--2021-08-24 07:28:42-- https://github.com/usvn/usvn/archive/1.0.7.tar.gz
Resolving github.com (github.com)... 192.30.255.113
Connecting to github.com (github.com)|192.30.255.113|:443... connected.
HTTP request sent, awaiting response... 302 Found
Location: https://codeload.github.com/usvn/usvn/tar.gz/1.0.7 [following]
--2021-08-24 07:28:42-- https://codeload.github.com/usvn/usvn/tar.gz/1.0.7
Resolving codeload.github.com (codeload.github.com)... 192.30.255.120
Connecting to codeload.github.com (codeload.github.com)|192.30.255.120|:443... connected.
HTTP request sent, awaiting response... 200 OK
Length: unspecified [application/x-gzip]
Saving to: ‘1.0.7.tar.gz’
[ <=> ] 4,577,871 5.77MB/s in 0.8s
2021-08-24 07:28:43 (5.77 MB/s) - ‘1.0.7.tar.gz’ saved [4577871]
[root@unixcop html]#Extrayez le fichier tar téléchargé :
[root@unixcop html]# tar xvf 1.0.7.tar.gz Renommez le fichier extrait en usvn :
[root@unixcop html]# mv usvn-1.0.7 usvnEnsuite, allez dans le répertoire usvn et créez un répertoire de fichiers en définissant certaines autorisations de dossier requises avec les commandes ci-dessous :
[root@unixcop html]# cd usvn
[root@unixcop usvn]# mkdir files
[root@unixcop usvn]# chmod -R g+w {public,files,config}
[root@unixcop usvn]# chgrp -R apache /var/www/html/usvn
[root@unixcop usvn]# restorecon -R /var/www/html/usvn
Enfin, configurez l'application USVN sur Apache Server.
[root@unixcop usvn]# vim /etc/httpd/conf.d/usvn.conf Ajoutez ensuite ce qui suit :
<Directory /var/www/html/usvn/>
AllowOverride All
Require all granted
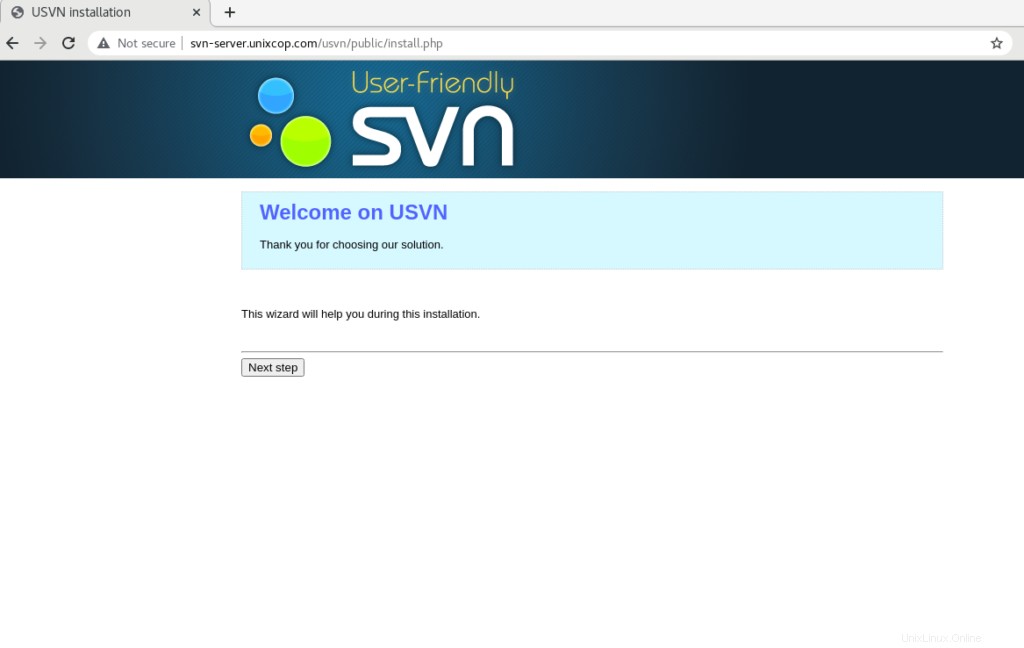
</Directory>Dans le navigateur, ouvrez http://ip_address/usvn/public/install.php pour lancer l'installation.
Ou ouvrez http://svn-server.unixcop.com/usvn/public/install.php , et lancez l'installation d'USVN.
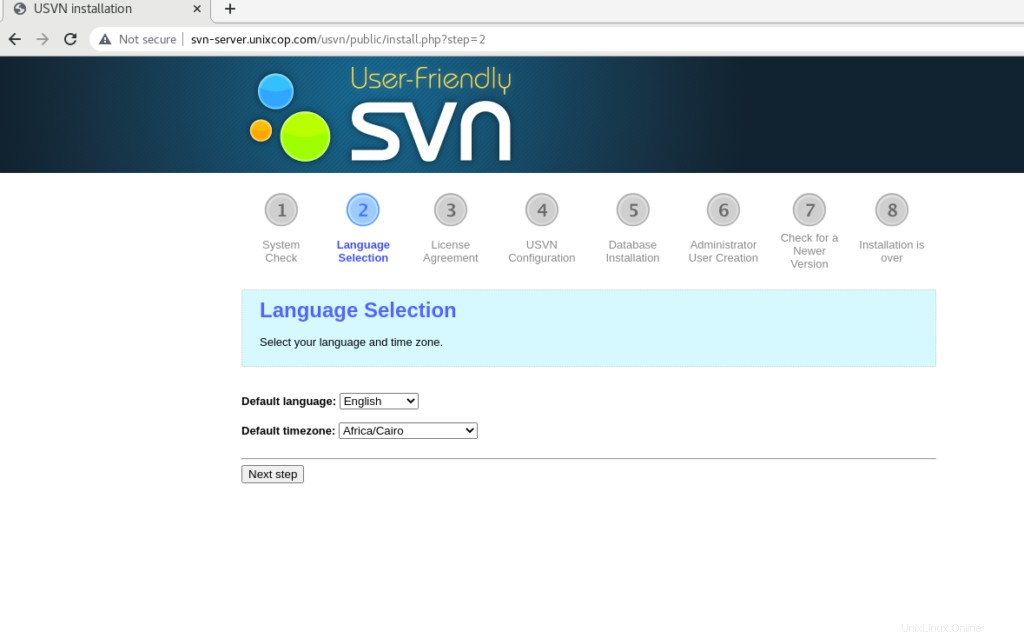
Sélectionnez votre langue et votre fuseau horaire.
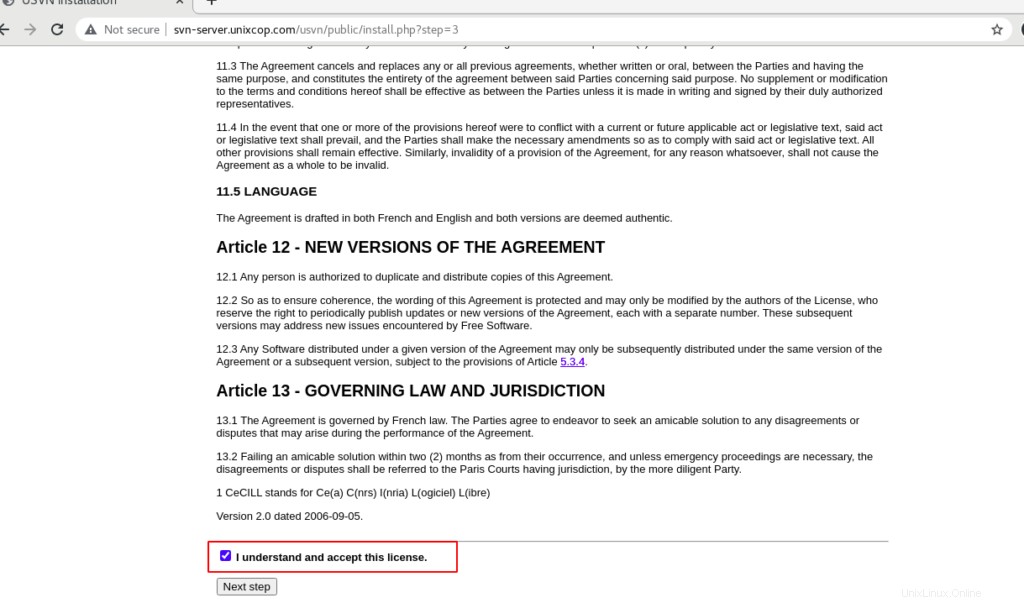
Cochez Je comprends et j'accepte cette licence puis cliquez sur Étape suivante .
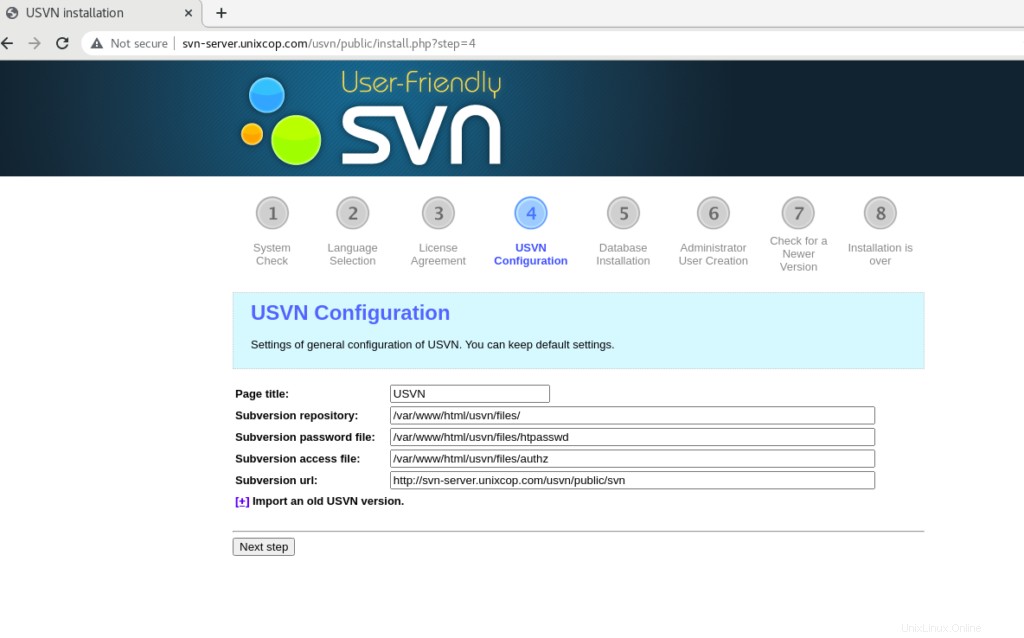
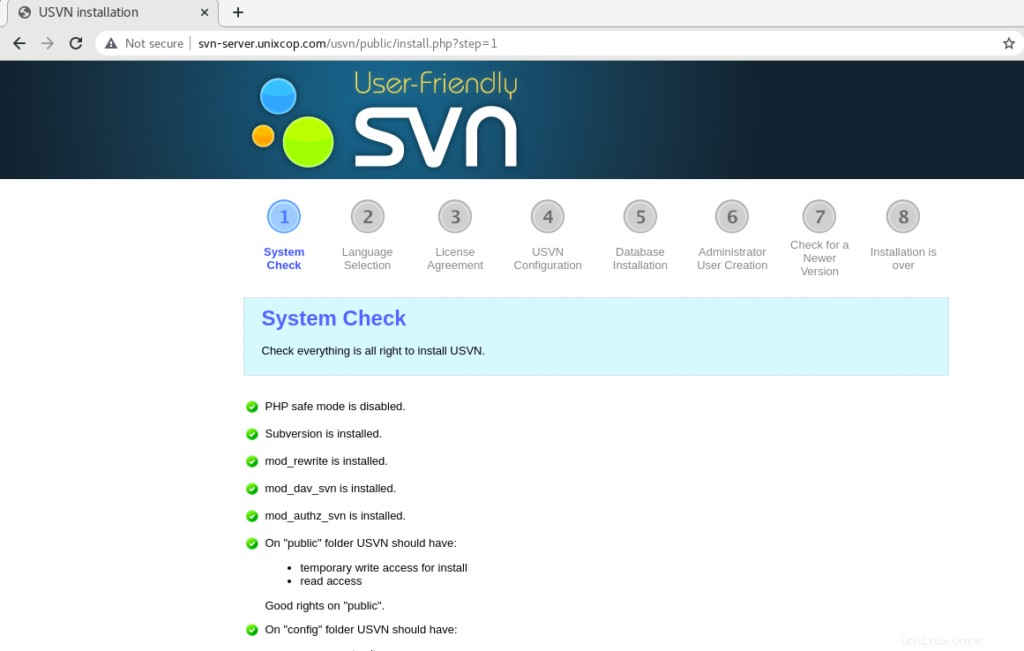
Cliquez sur Étape suivante .
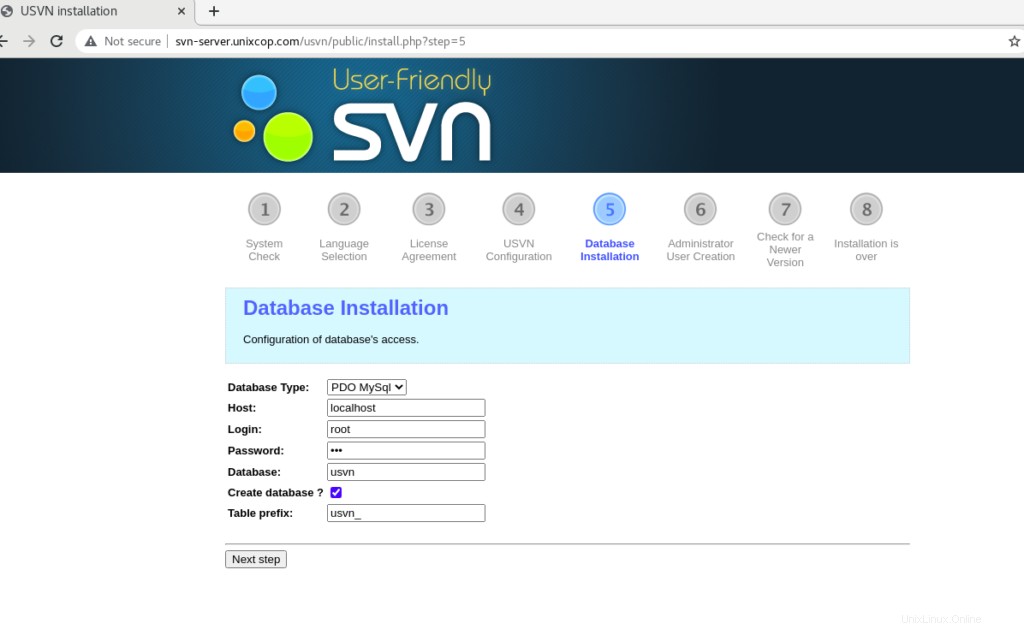
Indiquez le mot de passe de la base de données et cochez Créer une base de données ? puis cliquez sur suivant .
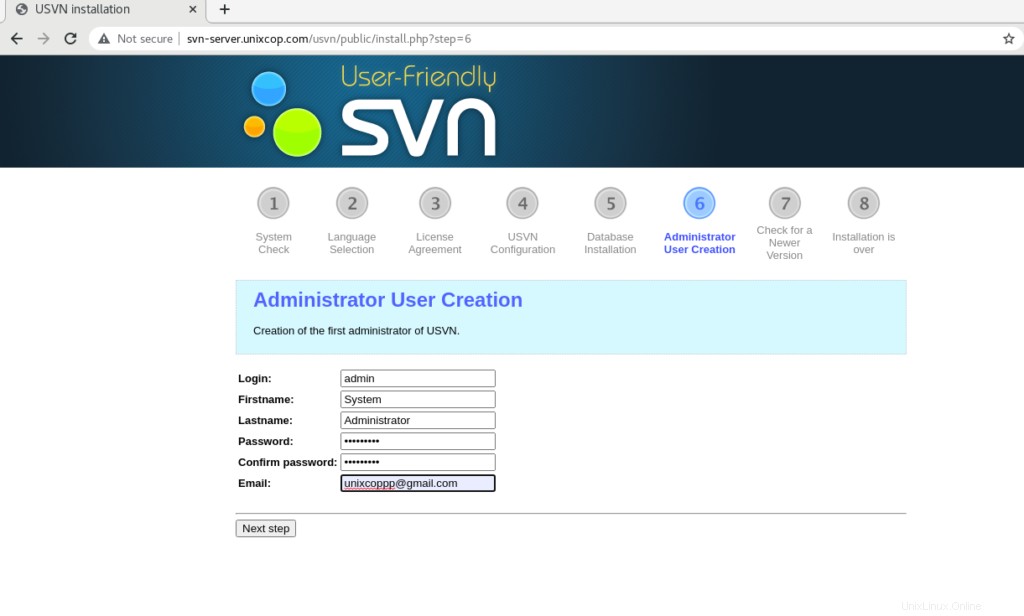
Créez un administrateur USVN puis cliquez sur Étape suivante.
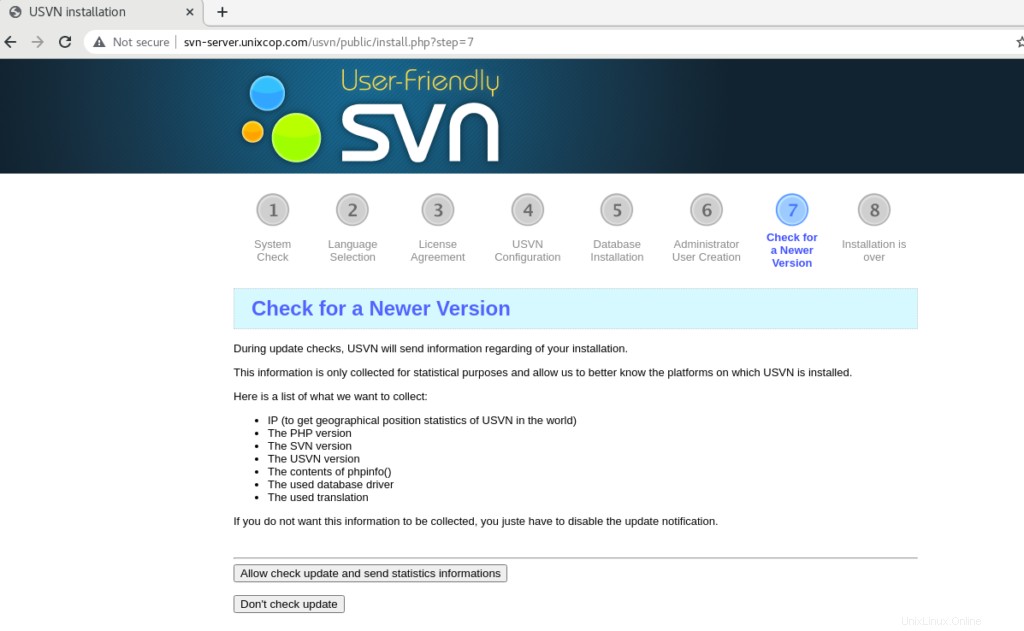
Désactivez les vérifications automatiques des versions mises à jour de l'USVN ou autorisez-les.
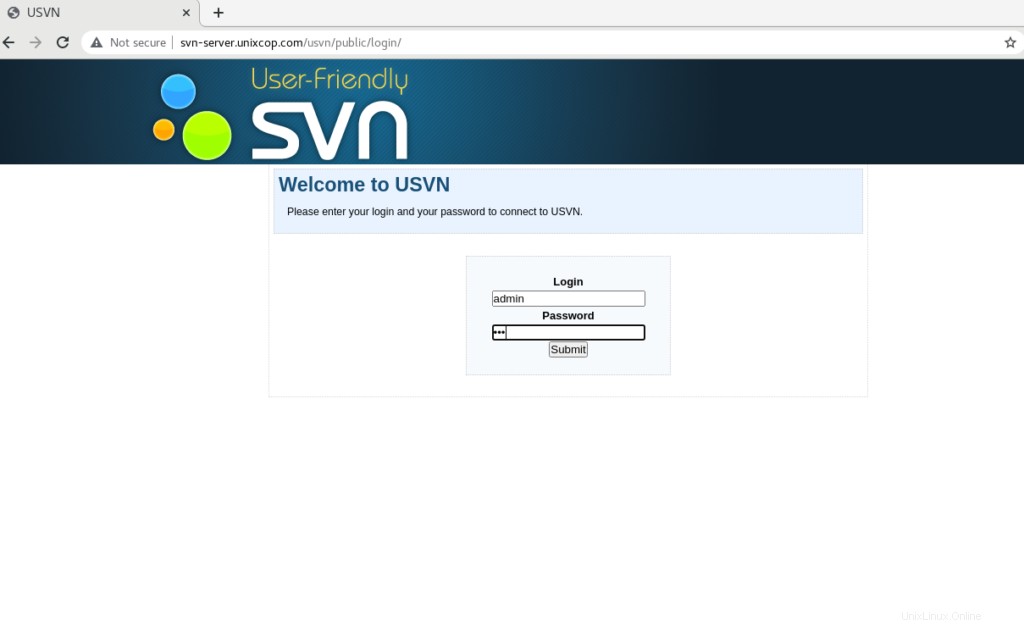
Vous serez redirigé vers la page de connexion avec l'utilisateur admin. Veuillez donc entrer le nom d'utilisateur (admin) et le mot de passe correct que vous venez de créer.
Conclusion
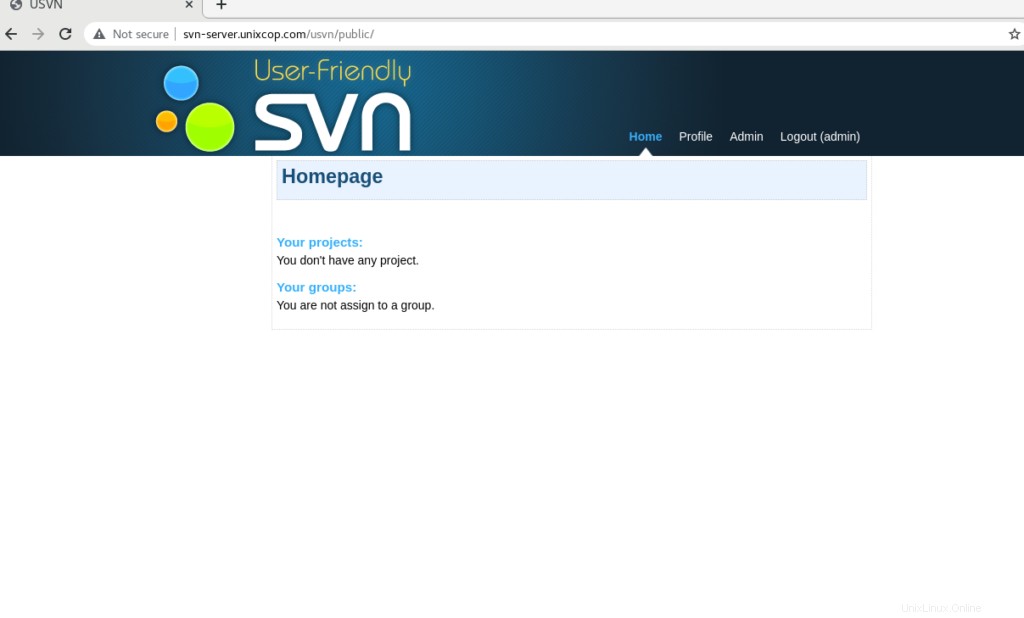
Nous avons donc installé avec succès l'application (USVN) et Apache Subversion (SVN).
Ce tutoriel pour apprendre à installer Subversion et USVN (Apache SVN) sur CentOS 8.